To remove acrylic nails safely at home, start by gathering supplies like acetone, cotton balls, aluminum foil, and tools for buffing. Protect your workspace and nails by covering surfaces and wearing gloves. Gently file the top coat, then soak cotton balls in acetone and wrap them with foil on each nail. After patience and checking progress, carefully remove the wraps and any remaining acrylic. Finish by moisturizing your nails. If you’re curious about detailed steps, you’ll find helpful tips to make the process smoother.
Key Takeaways
- Use acetone-soaked cotton and aluminum foil wraps to gently soften acrylic nails.
- File the top coat and buff nails before soaking to improve acetone penetration.
- Work in a well-ventilated area and wear gloves and safety goggles for protection.
- Check progress regularly and avoid forcing acrylic off to prevent nail damage.
- Moisturize and nourish nails after removal to promote healing and prevent dryness.
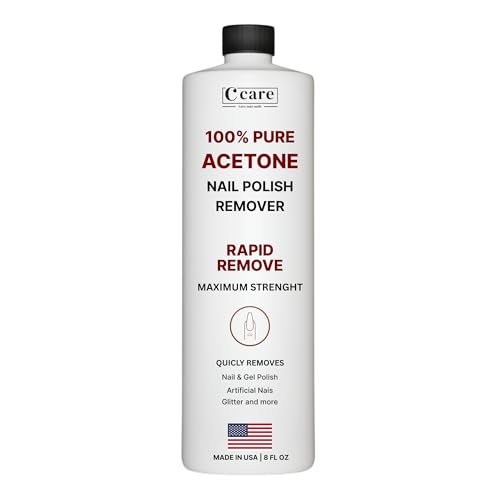
100% Pure Acetone Nail Polish Remover | Professional Quality | Easy To Use | Rapidly Removes Natural, Gel, Acrylic, shellac, and Glitter Nails | 8 Fl oz
100% Pure Acetone: Exceptionally efficient and powerful for swiftly removing all varieties of nail polish, such as gel,…
As an affiliate, we earn on qualifying purchases.
As an affiliate, we earn on qualifying purchases.
Gather Your Supplies

Before you begin removing your acrylic nails, gather all the necessary supplies to guarantee the process goes smoothly. Clearing your workspace and having everything ready helps avoid unnecessary delays. Remember, acrylic removal myths can lead you to use harmful methods, so stick to safe, proven tools. You’ll need acetone, cotton balls or pads, aluminum foil, a nail file, and a cuticle stick. Nail health tips suggest avoiding metal tools that can damage your natural nails. Make sure your acetone is pure and free of additives that might irritate your skin. Also, having a moisturizer or cuticle oil nearby will help after removal. Being well-prepared ensures you can remove your acrylics effectively without risking damage, keeping your nails healthy and strong. Additionally, understanding the importance of electric bike horsepower can help you choose the right bike for your needs if you’re considering an eco-friendly transportation alternative.
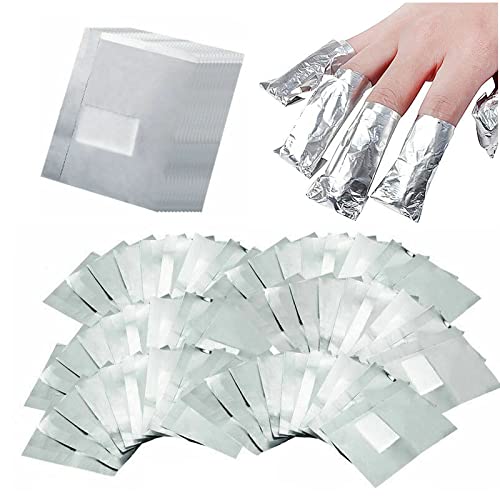
400Pcs Nail Polish Remover Gel Nail Foil Wraps Aluminium Soak Off Foils Cotton Pads Gel Nail Polish Wraps Removal Tool Finger Nail Polish Remover with Lint-Free Lager Cotton Pad
400 Pieces Set — The package includes 400 pcs foil nail wraps, enough for your daily nail polish…
As an affiliate, we earn on qualifying purchases.
As an affiliate, we earn on qualifying purchases.
Protect Your Work Area and Nails

Before you start removing your acrylic nails, it’s important to protect your work area. Cover nearby surfaces to prevent damage, wear gloves and safety glasses for your safety, and clear your space of unnecessary items. Taking these steps keeps the process safe and helps avoid messes.
Cover Surrounding Surfaces
To prevent damage and mess, it’s essential to protect your work area and surrounding surfaces before removing acrylic nails. Start by covering nearby furniture, countertops, and floors with old newspapers, plastic sheets, or towels. This creates a barrier that helps protect surfaces from acetone spills, nail debris, and potential scratches. Use painter’s tape or adhesive putty to secure plastic sheets in place, ensuring they don’t shift during the removal process. Protecting surrounding surfaces makes cleanup easier and keeps your space tidy. Additionally, lay down a towel or paper towels close to your work area to catch any drips or debris. Taking these simple precautions helps prevent damage and keeps your workspace clean and organized throughout the acrylic nail removal.
Wear Protective Gear
Wearing protective gear is essential to keep both your nails and your workspace safe during removal. It helps prevent injuries and minimizes exposure to harsh chemicals. Make sure to wear protective gloves to shield your skin from acetone and other irritants. Safety goggles are also vital to protect your eyes from splashes or fumes. Additionally, consider using a mask to avoid inhaling fumes, especially in a poorly ventilated area. Proper lighting and a clean workspace also help prevent accidents and ensure a smoother removal process improves safety.
Clear Work Space
Creating a clear and organized work space is vital for a safe and efficient acrylic nail removal process. Proper workspace organization keeps you focused and minimizes accidents. Before starting, clear your surface of clutter and gather all necessary tools. Protect your work area by covering surfaces with old towels or paper towels to prevent damage from acetone or nail debris. Maintaining cleaning safety is essential, so keep cleaning supplies away from open flames and ensure good ventilation. Use a table like this to stay organized:
| Item | Purpose | Safety Tip |
|---|---|---|
| Nail file | Remove topcoat | Dispose after use |
| Cotton balls | Apply acetone | Avoid spills |
| Aluminum foil | Wrap nails | Keep away from heat |
| Cuticle pusher | Gently lift nails | Sanitize after use |
| Protective gloves | Prevent skin contact | Use during entire process |
This setup helps protect your nails and work area. Additionally, it’s helpful to familiarize yourself with local regulations related to chemical handling when working with acetone to ensure safety.

Maryton Nail Buffer Blocks, Fine Grit 180/240 Professional Salon Quality 3 Way Blue Buffing Blocks for Natural Nails – Buff Nails Prior to Application of Gel Polish, Acrylic, 5 Count
OPTIMAL NAIL BUFFER – Prepping your nails for acrylic, polish, gel, or dip powder is easy and quick…
As an affiliate, we earn on qualifying purchases.
As an affiliate, we earn on qualifying purchases.
File the Top Coat and Shine Off the Surface

Start by using a fine-grit nail file to gently remove the shiny top coat. Lightly buff the surface to break down the remaining shine without damaging your natural nail. Once the shine is gone, you’ll be ready to move on to the next step in the removal process.
Use a Fine-Grit File
To begin removing the acrylic nails, gently file the top coat and shine off the surface with a fine-grit nail file. This step is essential in acrylic nail removal techniques, as it helps break down the protective layer without damaging your natural nails. Be careful to use light, even strokes to avoid unnecessary stress on your nails. Focus on smoothing out the surface, making it easier for the acetone to penetrate later. Keep in mind, proper filing supports nail health tips by preventing cracking or peeling. To stay safe, remember these tips:
- Always file in one direction to avoid splitting.
- Use a light touch to reduce nail damage.
- Clean your file regularly for effective results.
Additionally, understanding the importance of nail health and well-being can help you maintain healthy nails during and after the removal process. This careful approach ensures a safer, more effective acrylic removal process.
Gently Buff the Surface
Before applying acetone to dissolve the acrylic, you should gently buff the surface to remove the shiny top coat. Using proper buffing techniques helps prepare the surface for easier removal and prevents damage to your natural nails. Lightly file the surface with a fine-grit buffer, focusing on creating a matte finish rather than deep scratches. This surface preparation allows the acetone to penetrate better, speeding up the removal process. Be gentle to avoid thinning or harming your natural nails. Consistent, smooth buffing ensures the acrylic is properly exposed without overdoing it. Remember, the goal is to remove the shine without excessive filing, so maintain a gentle touch throughout the process for safe, effective acrylic removal at home. Proper surface preparation is essential for minimizing potential damage to your natural nails during removal.
Remove Remaining Shine
After buffing the surface to create a matte finish, the next step is to remove any remaining shine from the acrylic. This guarantees proper acrylic polish removal and prepares your nails for further treatments. To achieve maximum nail shine restoration, gently file the top coat and shine off the surface. Focus on areas that still reflect light, but avoid over-buffing, which can damage your natural nails. Use a fine-grit nail file or buffer to carefully dull the glossy surface. This step helps guarantee that all residual acrylic shine is gone, making it easier to apply new polish or treatments later. Remember, patience is key. Removing the remaining shine correctly will protect your nails and improve the overall finish. Incorporating proper filing techniques can also help ensure your nails stay healthy throughout the process.

Onsen Nail & Cuticle Cream Treatment w/Japanese Tsubaki, Jojoba & Lavender Oil, Shea Butter – Strengthens Nails, Softens Cuticles – Daily Repair Care (1 Count/15 ml)
FIRST-OF-ITS-KIND FORMULA: The original cuticle & nail serum, trusted by millions since 2005. Developed over 20 years, perfected…
As an affiliate, we earn on qualifying purchases.
As an affiliate, we earn on qualifying purchases.
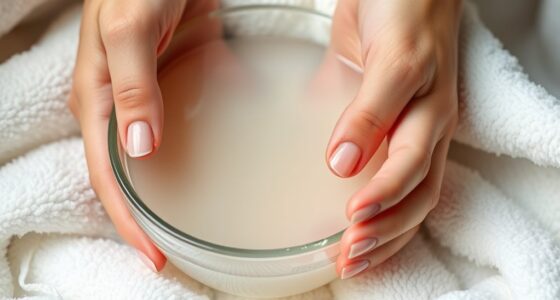
Soak Cotton Balls in Acetone

Begin by soaking cotton balls in acetone until they are fully saturated. This step is essential for the cotton ball technique, which helps loosen the acrylic nails effectively. When handling acetone, prioritize acetone safety by working in a well-ventilated area and avoiding skin contact. Dip each cotton ball thoroughly so it’s soaked but not dripping excessively to prevent mess. Once saturated, you’ll place these cotton balls directly on your nails, ensuring full coverage of the acrylic. This method allows the acetone to break down the acrylic material, making removal easier. Remember, proper application is key—using soaked cotton balls helps achieve a safe, effective removal process at home while minimizing potential irritation or damage. Additionally, using AI security insights, such as monitoring for adverse reactions, can help ensure a safer removal process.
Apply Cotton Balls and Wrap With Aluminum Foil

Have you prepared your soaked cotton balls? Now, it’s time to apply them for safe removal. Place a soaked cotton ball on each nail, ensuring full coverage of the acrylic. To keep the acetone in place and promote effective removal, wrap each nail with a small piece of aluminum foil. This creates a mini oven that softens the acrylic, supporting healthy nail growth by reducing damage.
Using proper removal techniques can help prevent damage to your natural nails and ensure a safer experience.
Here’s what you should do:
- Secure the foil tightly to prevent slipping
- Make sure the cotton ball stays in contact with the acrylic
- Check that your nails are comfortably wrapped without cutting off circulation
This method is an effective alternative removal technique that prioritizes nail health, making the process safer and less damaging.
Wait and Check Progress

Once you’ve wrapped your nails and started the soaking process, it’s important to give the acetone enough time to work. Patience and timing are key here—you need to wait long enough for the acrylic to loosen, but not so long that it damages your natural nails. Check your progress periodically by gently removing the foil and cotton balls to see if the acrylic has softened. If it hasn’t, rewrap and wait a little longer. Rushing this step can cause damage or make removal more difficult. Be attentive, and avoid disturbing the nails too often, as this can interfere with the process. Remember, patience pays off, and checking progress at regular intervals ensures you remove your acrylics safely and effectively. Additionally, understanding the proper nail care techniques can help prevent damage during removal.
Gently Remove the Foil and Cotton Balls

How do you know when it’s time to remove the foil and cotton balls? Once the recommended wait time has passed, and you notice the acrylic lifting or softening, it’s ready for foil removal. Carefully peel back the foil to reveal the cotton ball beneath. Using the cotton ball technique, gently press and lift the softened acrylic.
Here’s what to keep in mind:
- Check for signs of loosened acrylic before removing foil
- Avoid forcing the foil if it feels stuck
- Gently lift the cotton ball to prevent damage to your natural nail
This gentle approach makes sure you don’t damage your nails while effectively removing the acrylic. Patience and care are key during the foil removal process.
Remove Remaining Acrylic and Smooth Nails

After removing the foil and cotton balls, you might notice some remaining acrylic still attached to your nails. To finish, gently file down any stubborn spots with a fine-grit nail file, following the natural nail shape. Use light, even strokes to prevent damage. For a smoother finish, soak a cotton pad in acetone and press it onto your nails for a few minutes, then gently buff away residue. Remember, proper acrylic removal techniques protect your nail health. Additionally, understanding nail health precautions can help prevent damage during removal. Here’s a quick guide:
| Step | Action |
|---|---|
| Filing Remaining Acrylic | Lightly file to remove stubborn parts |
| Soaking with Acetone | Use acetone-soaked cotton pads |
| Buffing and Smoothing | Gently buff for smooth nails |
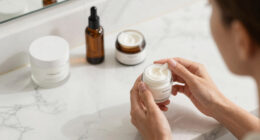
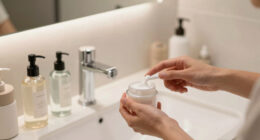
Moisturize and Care for Your Nails

With the acrylic removed and your nails smooth, it’s time to focus on nourishing and protecting them. Proper nail hydration helps restore moisture lost during removal, preventing brittleness and splits. Cuticle nourishment keeps your nails healthy and promotes strong growth. To maximize care, consider applying a nourishing cuticle oil daily to boost hydration and softness. Use a rich hand cream to lock in moisture and improve nail flexibility. Regularly massaging your nails and cuticles stimulates blood flow, supporting overall nail health. Keep your nails trimmed and avoid harsh chemicals for ongoing protection. By consistently caring for your nails, you’ll restore strength and maintain a healthy, polished look after acrylic removal.
Frequently Asked Questions
How Long Does It Typically Take to Remove Acrylic Nails at Home?
It usually takes about 30 to 60 minutes to remove acrylic nails at home, depending on their thickness and how well they’re adhered. You’ll want to prioritize nail health, so take your time with gentle removal. Use proper removal tools like acetone, nail files, and buffers, and avoid rushing to prevent damage. Patience and careful handling help protect your nails while ensuring a safe, effective removal process.
Can I Speed up the Acrylic Removal Process Safely?
Think of your nails as delicate gardens; rushing can cause damage. You can speed up acrylic removal safely with DIY techniques and natural remedies like soaking in acetone or using gentle buffing. But avoid aggressive scraping or excessive soaking, which can harm your nails. Patience is key—allow enough time for the process to work naturally, preserving your nail health while still making the removal quicker and safer.
Is There an Alternative to Acetone for Removing Acrylics?
Yes, you can try natural alternatives like a nail soak with warm water and gentle oils such as coconut or olive oil. Soaking your nails helps loosen the acrylics over time, reducing damage. You might also consider using a commercial acetone-free remover designed for sensitive nails. Remember, patience is key—soaking for extended periods can make acrylic removal safer without harsh chemicals.
How Can I Prevent Damage to My Natural Nails During Removal?
To prevent damage to your natural nails and protect nail health, avoid forcefully prying or peeling acrylics. Instead, soak your nails in acetone to soften the acrylics before gently filing or pushing them off. Use a buffer to smooth any rough edges afterward. Taking these careful steps minimizes damage prevention and maintains nail health, ensuring your natural nails stay strong and healthy during removal.
What Should I Do if My Nails Feel Painful or Irritated?
If your nails feel painful or irritated, stop the removal process immediately. You can try gentle pain relief methods like applying a cold compress to reduce swelling and discomfort. Use soothing, fragrance-free moisturizers to help with nail irritation. If pain persists or worsens, it’s best to seek professional advice from a nail technician or dermatologist. Ignoring the pain can lead to further damage, so prioritize your nail health and comfort.
Conclusion
Removing acrylic nails at home is like peeling away a stubborn layer to reveal your natural beauty beneath. With patience and care, you can do it safely and effectively. Just remember to protect your nails and moisturize afterward, so they stay healthy and strong. Taking the time to remove them properly is worth it—think of it as giving your nails a gentle reset, like starting fresh with a clean slate. Your nails will thank you for it.