To build the apex in builder gel, start by preparing your nails thoroughly, removing oils and cleaning the surface. Apply the gel in thin layers, shaping each to create a natural arch, focusing on controlling the C-curve and apex height. Cure each layer properly, then refine the shape by filing smoothly. Add thin reinforcement gel if needed for strength. If you keep practicing these steps, you’ll master creating a flawless, durable apex every time.
Key Takeaways
- Apply builder gel in thin layers, gradually building the apex while shaping a slight arch for strength.
- Control the C-curve by shaping the gel into a gentle, consistent arch that complements the nail’s natural contour.
- Cure each layer thoroughly to set the apex securely before adding more gel or shaping.
- Use proper pressure and visual cues to maintain proportionate apex height and C-curve depth.
- Smooth and refine the apex post-curing, adding reinforcement gel if needed, for a seamless and durable finish.
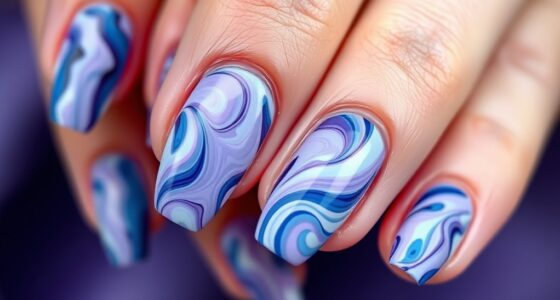
Top picks for "build apex structure"
Open Amazon search results for this keyword.
As an affiliate, we earn on qualifying purchases.
Preparing the Nail and Workspace for Apex Building

Before building the apex, you need to prepare both the nail and your workspace to guarantee a smooth application. Nail prep is essential; start by cleaning the natural nail thoroughly to remove oils and debris, then gently buff the surface to ensure proper adhesion. Apply a dehydrator or primer to eliminate moisture and oils, which helps the builder gel bond better. For workspace setup, organize your tools and materials within easy reach, ensuring proper lighting and ventilation. Use a clean, sanitized work surface to prevent contamination. Wearing gloves is recommended to maintain hygiene and avoid oils from your skin transferring to the nails. Proper nail prep combined with a well-organized workspace sets the foundation for a successful apex build, leading to a durable, natural-looking result. Additionally, using a high-quality airless paint sprayer can facilitate efficient cleanup and application, reducing the risk of contamination during the process. To further ensure a pristine environment, consider implementing disposable tools to minimize cross-contamination and maintain optimal hygiene standards. Ensuring proper ventilation helps dissipate fumes and maintain a safe workspace environment.
Applying the Builder Gel in Layers for a Natural Curve

To achieve a natural-looking curve with your builder gel, applying it in layers is essential. Start by ensuring your gel has the right consistency—thick enough to hold shape but still workable. Begin with a thin layer, focusing on the apex area, where proper apex placement is key. Apply the gel gradually, building up the thickness only where needed, and smooth each layer to avoid ridges. Let each layer cure properly before adding the next, which helps maintain control and precision. This layered approach allows you to shape the nail’s natural curve effectively, creating a seamless progression from the free edge to the apex. Paying attention to gel consistency and apex placement is crucial, as proper technique can further enhance the durability and appearance of your finished nails. Incorporating professional techniques can further enhance the durability and appearance of your finished nails.
Creating the Perfect C-curve to Form the Apex

How can you create the perfect C-curve to form a strong, natural-looking apex? Focus on controlling the apex height and C-curve depth. Start by gently shaping the builder gel into a slight arch, ensuring the C-curve is neither too shallow nor too deep. Adjust the apex height to match the natural fingertip contour for a balanced look. Applying consistent pressure, create a smooth, even curve that enhances strength and aesthetics. Visualize the gel forming a gentle wave that follows the nail’s natural arch. Keep the C-curve proportionate to the nail width, avoiding excessive depth that can weaken the structure. Properly shaping the apex is key to a flawless, professional finish. Additionally, understanding the importance of payment data protection helps ensure client information remains secure during your procedures. Maintaining the correct builder gel consistency also contributes to achieving a seamless apex and prevents issues like lifting or cracking. Developing manual dexterity through practice and precision, which are essential for mastering the perfect C-curve and overall nail enhancement.
Curing and Shaping the Apex for a Seamless Finish

Ever wondered how to guarantee your apex looks seamless and professional after shaping? It all starts with the right gel consistency—neither too thick nor too runny—so it adheres smoothly and shapes easily. Once you’ve sculpted the apex, it’s essential to cure it properly. Follow the recommended curing time for your UV or LED lamp to ensure the gel hardens evenly without soft spots. During curing, avoid disturbing the gel to prevent any distortion of your shape. After curing, check the apex to ensure it’s sturdy and smooth. If needed, you can gently reshape or add a thin layer of gel, then cure again. Proper curing techniques and careful handling help create a flawless, seamless apex finish that looks professional and lasts. Using the correct airless spray tips can also help achieve a smooth application and prevent imperfections. Proper gel consistency is crucial for shaping and adhesion, ensuring a perfect finish. Additionally, understanding retirement planning strategies can help you secure your financial future, just like perfecting your nail technique ensures lasting beauty.
Final Touches: Refining and Strengthening the Apex Structure

Once you’ve shaped and cured the apex, the final step is refining and strengthening it to guarantee durability and a polished look. Focus on adjusting the gel consistency to guarantee it’s smooth but firm enough to hold its shape. To enhance apex durability, gently file any uneven edges and smooth the surface for a seamless transition. Use your brush to carefully add a thin layer of builder gel, reinforcing the apex without overloading it. Visualize the process as sculpting a miniature mountain—sharp, smooth, and resilient. Remember, a well-refined apex not only looks professional but also resists chipping and lifting. Achieving a smooth, even surface is key to a flawless finish. Keep these key points in mind:
- Achieve a smooth, even surface
- Reinforce with a thin layer of gel
- Maintain the gel consistency for strength
- Pay attention to emotional support during stressful procedures to ensure confidence and patience.
Additionally, understanding celebrity transformations can inspire confidence in your artistic evolution, showcasing how small changes can lead to significant improvements.
Incorporating techniques from physical health awareness, such as proper hand positioning and controlled movements, can also improve your precision and results.
Frequently Asked Questions
How Do I Prevent Air Bubbles in the Apex During Application?
To prevent air bubbles during apex application, you should focus on proper air bubble prevention techniques. Start by mixing your builder gel thoroughly to avoid trapped air. When applying, use a gentle, even pressure to spread the gel smoothly. Keep your brush clean and avoid overloading it. Work slowly and methodically, ensuring you don’t introduce air as you build the apex. These apex application techniques help create a flawless, bubble-free finish.
What Are Common Mistakes That Weaken the Apex Structure?
You might weaken the apex structure if you don’t focus on proper gel application techniques. Common mistakes include applying too thick or uneven layers, which can compromise apex integrity. Rushing the process or not curing adequately also risks weakening the structure. To prevent this, guarantee even gel layers, follow recommended application methods, and cure thoroughly. These steps help maintain a strong, durable apex, essential for overall nail strength.
Can I Build the Apex Without Using Gels or Monomers?
You might wonder if you can create an apex without gels or monomers. While traditional methods use gel or builder gel for strength, there are gel-free apex alternatives like acrylic powder or fiber-strengthened products. These options can help you achieve a sturdy, well-shaped apex without gel. Just guarantee you follow proper application techniques to maintain durability and avoid weak spots, especially if you’re opting for a gel-free approach.
How Do I Fix a Sagging or Uneven Apex?
Imagine you’re in a 90s tech store fixing a glitch—you need quick, precise steps. To fix a sagging or uneven apex, start by gently filing to remove uneven areas. Then, apply apex reinforcement with more builder gel, focusing on the sagging spot. Use seamless blending to create a smooth progression. Cure thoroughly, and if needed, add a thin layer of gel for extra support. This guarantees a strong, even apex.
What Tools Are Best for Refining the Apex Shape Accurately?
To refine the apex shape accurately, you should use specialized apex shaping tools, which help you achieve a smooth, even contour. These tools allow for precise refinement techniques, giving you better control over the apex’s height and curvature. By carefully working with these tools, you can correct any unevenness and create a natural-looking, professional finish. Remember, patience and steady hands are key to perfecting the apex shape.
Conclusion
Building the apex in builder gel transforms your nails from simple extensions to natural works of art. As you shape and strengthen, you’ll feel a sense of accomplishment—like crafting a delicate sculpture. Yet, beneath that pride lies a patience that tests your precision. The final finish bridges beauty and resilience, reminding you that true artistry is born from both meticulous effort and passion. Embrace the process; your perfect apex is a proof to your dedication.