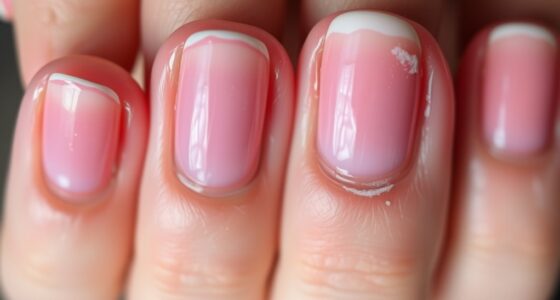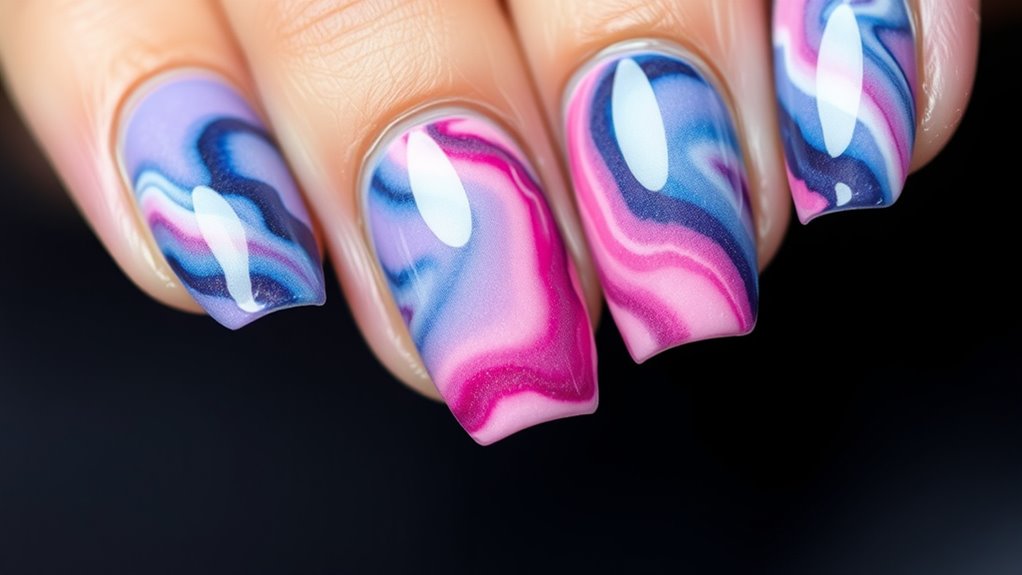
To achieve beautiful abstract watercolor nails without creating a mess, start by preparing your workspace with organized, high-quality supplies and apply a protective base coat. Use polish and water carefully on a palette to create soft, blended effects, and choose fine brushes for precise designs. Seal your artwork with a glossy top coat to prevent smudges and guarantee durability. For more tips on keeping your nails neat and professional-looking, continue exploring how to perfect your watercolor technique.
Key Takeaways
- Prepare a tidy workspace with organized tools, palettes, and proper ventilation to prevent clutter and spills.
- Use a clear base coat and thin layers of polish to reduce excess and mess during application.
- Create watercolor effects by blending polish with water on a palette, applying with controlled brushes or cotton swabs.
- Practice gentle, sweeping strokes and layered techniques to achieve soft, abstract designs without overloading the nails.
- Seal with a high-quality top coat and allow ample drying time to prevent smudging and maintain a clean, polished look.
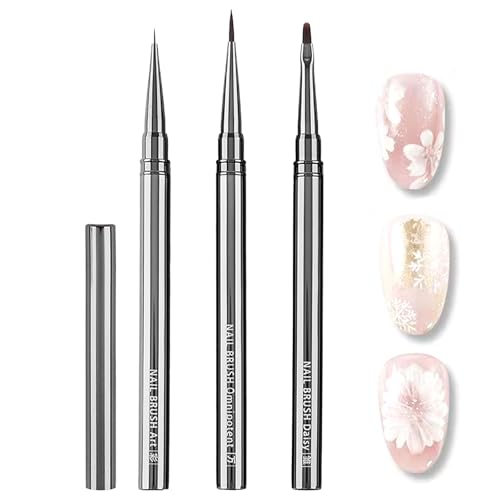
HYWWPFLAY 3Pcs Nail Art Brushes Set for Flower Petal Butterfly Drawing, 3D Gel Acrylic Nail Brush, Fine Liner Nails Design Tool, Professional Watercolor Painting Pen for Manicure DIY Salon
Professional 3-Piece Nail Art Brushes Set: Includes a 6mm liner brush for precise details, edges, and contours; a…
As an affiliate, we earn on qualifying purchases.
As an affiliate, we earn on qualifying purchases.
Gather Your Supplies and Prepare Your Workspace
Before you begin creating your watercolor nails, you need to gather all the necessary supplies and set up a clean, organized workspace. Start by browsing nail art inspiration to decide on colors and designs that excite you. Then, collect your essentials: watercolor brushes, nail polish or inks, a palette or plastic cup for mixing, cotton swabs, and nail polish remover. Keep everything within easy reach to maintain workspace organization, which helps prevent messes and speeds up your process. Clear your table of clutter to create a dedicated area for your nail art. A tidy workspace not only makes it easier to focus but also minimizes accidental spills. Incorporating professional equipment ensures your results are high quality and precise. Additionally, adding proper ventilation can help reduce fumes and keep your workspace safe. Being mindful of workspace setup can also contribute to a smoother, more enjoyable creative process. Once everything is set, you’ll be ready to immerse yourself in creating stunning watercolor nails without the stress of chaos.

JASSINS Resin Nail Art Palette,Nail Art Painting Mixed Color Palette Gold Edge Nail Gel Color Makeup Display Board (White)
NATURAL MATERIAL: These makeup mixing palette are made of quality resin material, Environmentally friendly and durable, Easy to…
As an affiliate, we earn on qualifying purchases.
As an affiliate, we earn on qualifying purchases.
Choose and Apply a Base Coat for Your Nails

Choosing the right base coat helps your watercolor design last longer and looks smoother. Make sure you pick a base that suits your nail type and desired finish. When applying, use thin, even layers to create a strong foundation for your artwork. Additionally, selecting a base coat with long-lasting adhesion can help prevent chipping and ensure your manicure stays fresh.
Selecting the Right Base
To achieve a smooth, long-lasting watercolor nail design, selecting the right base coat is essential. The ideal base ensures color consistency and enhances base durability, preventing chipping or uneven tones. Consider your nail type and choose a base that offers strong adhesion and a neutral or pale color to make your watercolor colors pop. A good base coat provides a smooth surface, helping your abstract design stay flawless. Here’s a quick guide:
| Nail Type | Recommended Base Coat | Key Benefit |
|---|---|---|
| Sensitive | Hypoallergenic | Reduces irritation |
| Weak Nails | Strengthening formula | Boosts durability |
| Stained Nails | Clear or pigmented | Conceals discoloration |
| Normal | Basic clear coat | Balanced with color consistency |
| Thick Nails | Bonding base | Improves adhesion |
Additionally, choosing a quality base coat can significantly influence the longevity and appearance of your watercolor nails. Using a proper nail prep can further optimize the adhesion and overall finish of your abstract watercolors. Incorporating proper nail care practices helps maintain the health of your nails, ensuring your artwork lasts longer. For optimal results, avoid toilet flushing mechanisms that may interfere with your nail drying process, especially if you have water-sensitive ingredients.
Proper Base Application Technique
Applying your base coat correctly sets the foundation for a flawless watercolor nail design. Use smooth brush techniques to evenly distribute the product, avoiding streaks or thick spots. Start with a thin layer, letting each coat dry fully before applying the next. Incorporate color theory by choosing a neutral or light base that enhances the watercolor effect without competing with it. A well-applied base helps the colors blend seamlessly and prevents staining or chipping. Keep your brush clean and steady, using gentle strokes to cover the entire nail surface. Proper application ensures your watercolor designs pop and last longer. Additionally, understanding espionage principles can inspire your creative process by emphasizing precision and strategic planning in your nail art techniques. Embracing a methodical approach can also improve your overall technique and results, much like the distinctive features of different dog breeds that require specific care. Recognizing the importance of automation in achieving consistent results can also be beneficial.

Top Coat Nail Polish Clear: Quick Dry Nail Polish No Chip High Shine Long Lasting Glossy Fast Air Dry Top Coat for Nail Art Manicure Salon Quality
Quick Dry Top Coat: Experience the convenience of our quick dry top coat. Fast drying nail polish efficient…
As an affiliate, we earn on qualifying purchases.
As an affiliate, we earn on qualifying purchases.
Use Water and Nail Polish for the Watercolor Effect
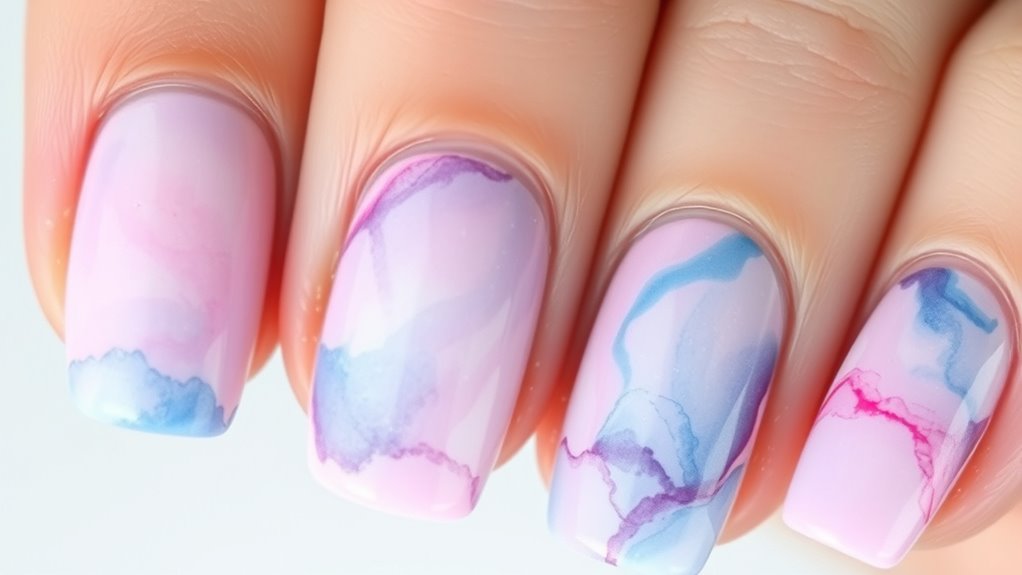
Creating a watercolor nail effect with water and nail polish is simple and striking. Start by applying a clear base coat to protect your nails. Next, drop small amounts of different nail polish colors onto a palette or foil. Using a nail art brush or toothpick, gently add water to each polish spot—this creates a watercolor blending effect. Carefully dip a clean brush or cotton swab into the water, then touch it to the polish spots to disperse the color and create soft, abstract designs. The key is controlling the water-to-polish ratio to avoid over-mixing. With patience, you’ll achieve a beautiful, fluid watercolor look that mimics real watercolor art, all without mess, using just water, nail polish, and your nail art tools.

Fcozpjk 200PCS Precision Tip Cotton Swabs with Wooden Sticks, Pointed Tip Cotton Swabs for Nail Polish Touch Up, Disposable Makeup Applicators, Cotton Sticks for Makeup, Microblading Supplies
【Package】You will get 2packs pointy tips cotton swabs,totally 200pcs.
As an affiliate, we earn on qualifying purchases.
As an affiliate, we earn on qualifying purchases.
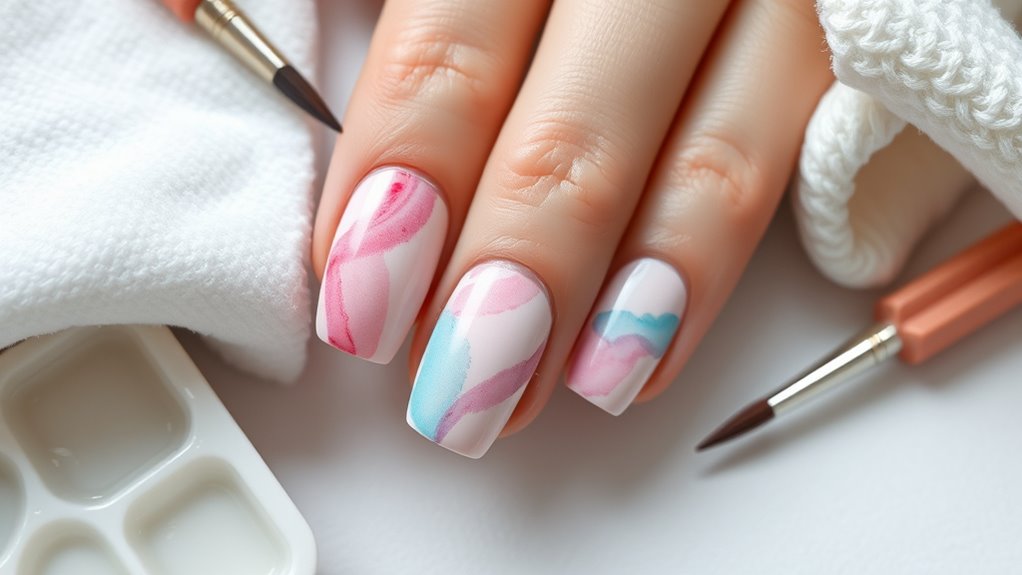
Opt for the Right Tools to Create Abstract Designs

Choosing the right tools is essential for achieving precise, beautiful abstract designs on your nails. Your brush selection impacts the detail and flow of your artwork, so opt for fine-tipped brushes for delicate lines and broader brushes for bold strokes. Proper palette organization helps you access colors easily, preventing mess and mixing mishaps. Picture these tools in action:
- A set of small, high-quality brushes with varying tip sizes, ready to capture intricate details or sweeping strokes.
- A well-organized palette with distinct sections for each color, making blending effortless.
- A clean workspace with your tools laid out neatly, so you can work efficiently without confusion.
- Using the right Kia Tuning tools can help you achieve a more professional and refined look for your abstract watercolor nails. Additionally, understanding ethical hacking concepts can inspire innovative design techniques by analyzing different styles and patterns to create unique art. Incorporating AI-driven security systems can also help protect your creative work from digital theft and unauthorized sharing. Being aware of beauty store hours can ensure you visit the right shops at optimal times to get your supplies without hassle.
Using the right brushes and keeping your palette organized ensures your abstract watercolor nails come out flawless and mess-free every time.
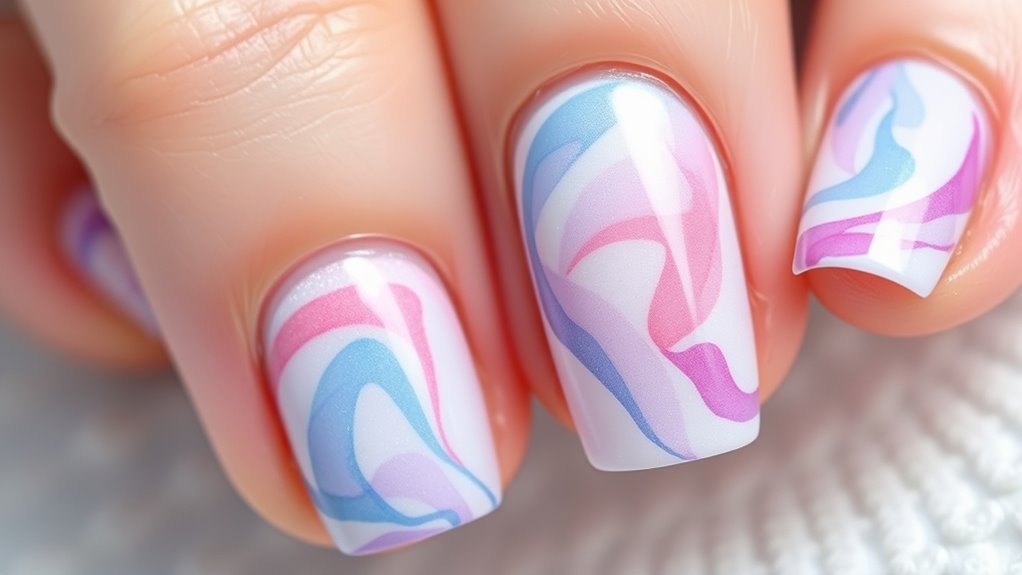
Practice Techniques for Blending and Layering Colors

Once you’ve selected the right tools and organized your palette, honing your blending and layering techniques will elevate your watercolor nail art. To master color blending, start by applying wet polish or a damp brush to create smooth gradations between shades. Practice soft, sweeping strokes to merge colors seamlessly, avoiding harsh lines. Layering techniques involve building depth by adding multiple transparent coats, allowing each layer to dry slightly before adding the next. This creates a sense of dimension without muddying the colors. Use light pressure and quick strokes to prevent pigment from becoming too thick. Consistent practice with these techniques will help you achieve delicate, abstract effects that look professional and effortless. Remember, patience and gentle blending are key to flawless watercolor nails. Additionally, understanding attention in creative practice can help improve your skill development and consistency in techniques, leading to better results over time. Cultivating focused mindful application during each step enhances the overall quality of your artwork.
Seal and Protect Your Artwork With a Top Coat

After finishing your watercolor nail design, it is essential to seal and protect your artwork with a top coat. The right top coat enhances your nails’ shine and prevents smudges or chips. When choosing a top coat, consider the nail polish consistency; a thinner polish spreads more evenly, avoiding streaks. There are different top coat types: glossy for a shiny finish, matte for a velvety look, and gel top coats for extra durability. Visualize these options as:
- A glossy top coat that creates a mirror-like shine, making colors pop.
- A matte top coat that transforms your artwork into a soft, velvety surface.
- A gel top coat that provides a hard, long-lasting layer, perfect for everyday wear.
Selecting the right top coat involves understanding the product consistency to achieve the best results and avoid unwanted streaks or bubbles.
Tips for Avoiding Common Messes and Mistakes

To prevent common messes and mistakes while working on watercolor nails, it’s essential to work in a clean, organized space and use tools carefully. Rushing the drying time can cause smudges or uneven blending, so give each layer enough time to set before adding more. Be mindful of your brush control to avoid accidental spills or over-application, which can lead to messy edges. Protect your nail health by avoiding harsh scrapers or excessive filing, which can damage the nail surface. Keep your workspace tidy, wiping excess polish promptly, and using small amounts of watercolors to prevent pooling. Proper drying and gentle handling not only keep your design clean but also maintain healthy nails, ensuring your watercolor art stays beautiful and intact longer.
Maintaining Your Watercolor Nails for Long-Lasting Beauty
Maintaining your watercolor nails requires consistent care to preserve their vibrant look and prevent premature chipping. To keep them looking fresh, focus on proper nail care routines and gentle polish removal. Here are three tips to help you achieve long-lasting beauty:
Keep watercolor nails vibrant and chip-free with gentle filing, a quality top coat, and careful polish removal.
- Gently file the edges to prevent cracks and maintain smoothness.
- Use a high-quality top coat to seal in the watercolor design and add extra durability.
- When removing polish, soak a cotton ball in acetone and gently press it against your nails, avoiding harsh scrubbing that can damage the artwork.
Frequently Asked Questions
Can I Use Regular Water Instead of Distilled Water?
You might wonder if regular water works instead of distilled water. While it’s possible, water quality matters—tap water can contain minerals or impurities that interfere with your nail art. Using water at the right temperature helps achieve smooth watercolor effects. To avoid mess and ensure vibrant results, it’s best to select distilled water, as its purity prevents unwanted reactions that could ruin your abstract watercolor nails.
How Do I Prevent Smudging During the Process?
To prevent smudging during your watercolor nail process, focus on proper brush techniques and drying tips. Use light, controlled strokes to avoid disturbing wet polish, and keep a steady hand. Allow each layer to dry completely before adding more. You can also use a gentle, quick-drying top coat to seal your design. Patience is key—don’t rush, and you’ll achieve a smooth, mess-free abstract watercolor look.
What Nail Polish Brands Work Best for Watercolor Effects?
Imagine your nails as tiny canvases waiting to be painted with fluid, vibrant colors. For watercolor effects, you’ll want brands like OPI, China Glaze, or Sally Hansen, which have smooth formulas perfect for blending. Use gentle brush techniques to layer and blend colors seamlessly. These brands’ pigmentation and consistency make it easier to achieve soft, watercolor-like effects without streaks or mess, transforming your nails into artful masterpieces.
How Long Does the Watercolor Manicure Typically Last?
Your watercolor manicure usually lasts about 5 to 7 days with proper nail care. The longevity depends on how well you maintain your nails and how carefully you handle daily activities. To prolong the look, avoid excessive water exposure and use a top coat to protect the color blending. Regular moisturizing of your cuticles also helps keep your nails healthy, ensuring your beautiful watercolor design stays vibrant for as long as possible.
Is This Technique Suitable for Gel or Acrylic Nails?
Imagine your nails as a blank canvas ready for artistry. This watercolor technique works beautifully, but you’ll want to contemplate gel compatibility and acrylic suitability. Gel nails offer a smooth, glossy surface that enhances watercolor effects and holds them longer, making them more suitable. Acrylic nails provide a sturdy base but may require extra preparation. Both can work, but gel often provides a cleaner, more vibrant finish for watercolor masterpieces.
Conclusion
Now that you’ve mastered the art of abstract watercolor nails without the mess, you hold the power to create stunning, effortless designs. It’s a delicate balance between chaos and control—like a painter’s brushstroke on your fingertips. Embrace the unpredictability, but stay organized. With patience and practice, your nails become a canvas of beauty and precision, proving that even the wildest watercolor can stay neat, polished, and undeniably stunning.