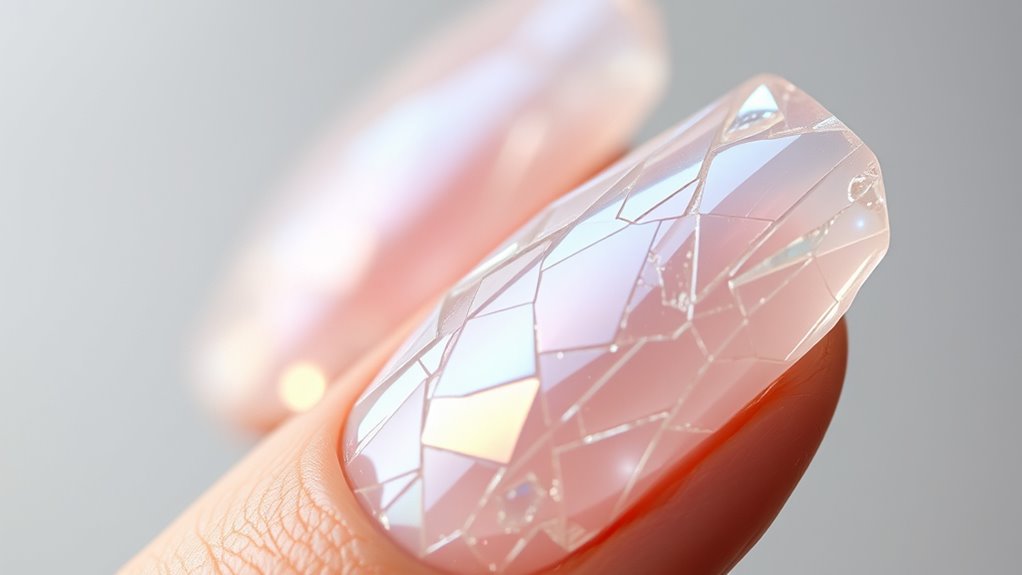

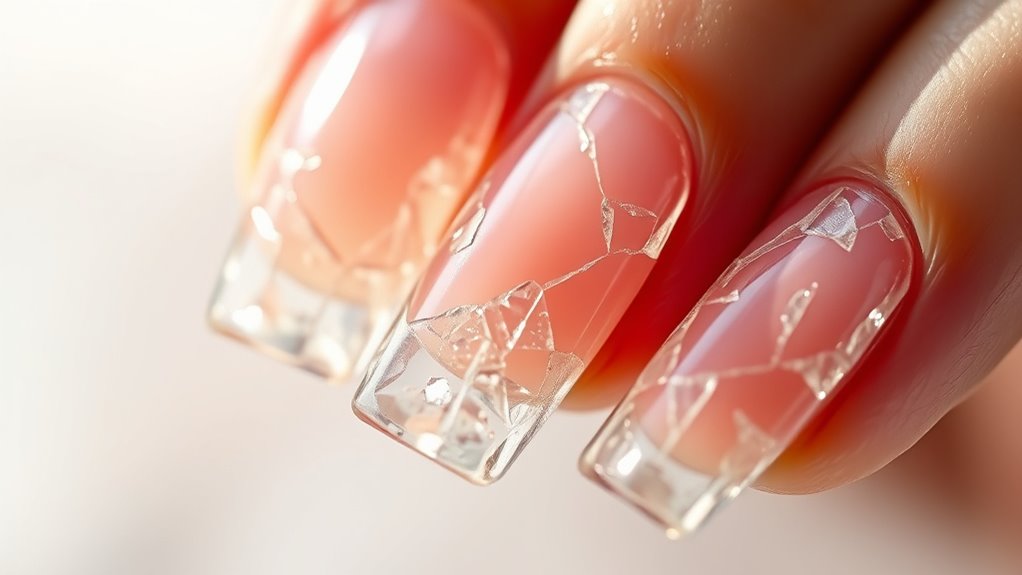
To create a shattered glass nail art look, start by selecting smooth, glossy base colors that complement the shattered effect you want. Prepare your nails by cleaning and pushing back cuticles. Apply a base coat, then layer your chosen color. Tear small pieces of foil or cellophane into irregular shapes and carefully press them onto your nails. Finish with a high-shine top coat to seal and protect your design—continuing will reveal more tips to perfect your glass nails.
Key Takeaways
- Select a transparent or pastel base color with a glossy finish for a realistic shattered glass look.
- Tear or cut nail foils or cellophane into irregular shards to mimic shattered glass pieces.
- Apply the shards onto a dry, base-colored nail using adhesive, layering different shades for depth.
- Seal the design with a high-shine top coat to enhance durability and achieve a sleek, glass-like appearance.
- Maintain nails with gentle cleaning and reapply top coat regularly; remove safely with acetone to preserve nail health.

Aurora Glass Paper Nail Art Sticker 10 Sheets Gradient Laser Broken Glass Paper Nail Decals Reflective Mirror Design Cellophane Nail Supplies for Girls Women DIY Nail Art Decoration
Package includes: You will receive 10 sheets of glass nail art foil stickers in different colors, each sheet…
As an affiliate, we earn on qualifying purchases.
As an affiliate, we earn on qualifying purchases.
Selecting the Right Base Colors and Finishes

Choosing the right base colors and finishes is essential for creating stunning glass nails. Your color combinations set the tone, so pick shades that complement each other and enhance the glass effect. Light, transparent, or pastel hues work well for a delicate, airy look, while bold, vibrant colors create a striking contrast. When it comes to finish choices, opt for a glossy or high-shine topcoat to mimic the sleek glass surface. Matte finishes can add a unique twist but might diminish the glass-like appearance. Remember, the smoothness of your base layer affects the overall clarity and shine of your nails. Using a Pimple Patch can help keep the surface smooth and free of blemishes, ensuring a flawless finish. By carefully selecting your color combinations and finish choices, you’ll craft a mesmerizing, professional-looking glass nail design that turns heads.

Artdone Metallic Nail Art Pens, Liner Brushes Set, 5PCS Black Color Nail Tools For Long Lines, Thin Details, Fine Drawing, Liner Brush UV Gel Polish Painting Nail Design Sizes 5/8/12/20/25mm
Package Contains: 5Pcs Metal pens for nail liner, sizes for nail liner brushes heads include 5/8/12/20/25mm.
As an affiliate, we earn on qualifying purchases.
As an affiliate, we earn on qualifying purchases.
Gathering Essential Tools and Materials
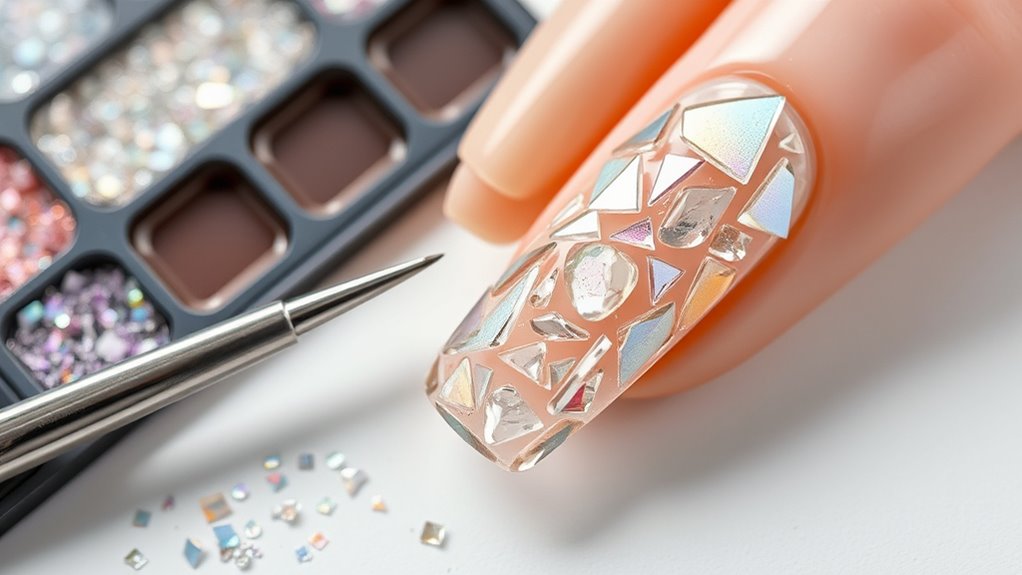
To create stunning glass nails, you need the right tools for precise application, like fine brushes and tweezers. You’ll also want materials that give the shattered effect, such as special glass fragments and adhesive. Gathering these essentials guarantees your design turns out flawless and striking. Additionally, understanding proper application techniques can help prevent damage to your nails and ensure a more professional-looking result, especially when working with delicate nail art materials.
Tools for Precision Application
Achieving flawless glass nails requires gathering the right tools and materials for precise application. Start with fine-tipped brushes to master delicate brush techniques, allowing you to create sharp, clean lines and intricate details. A high-quality detail brush helps with color blending, ensuring smooth gradients and seamless effects. Use a steady hand and small brushes for accurate placement of shattered glass pieces and precise layering. A precision palette or mixing dish is essential for mixing and thinning your polish or gel. Tweezers or nail art picks assist in positioning shards accurately. Investing in these tools will enhance your control, making it easier to achieve the shattered glass look with sharp edges and perfect color blending, elevating your nail art to professional standards. Additionally, understanding the materials used in creating glass effects can help you select the best products for durability and visual impact.
Materials for Shattered Effect
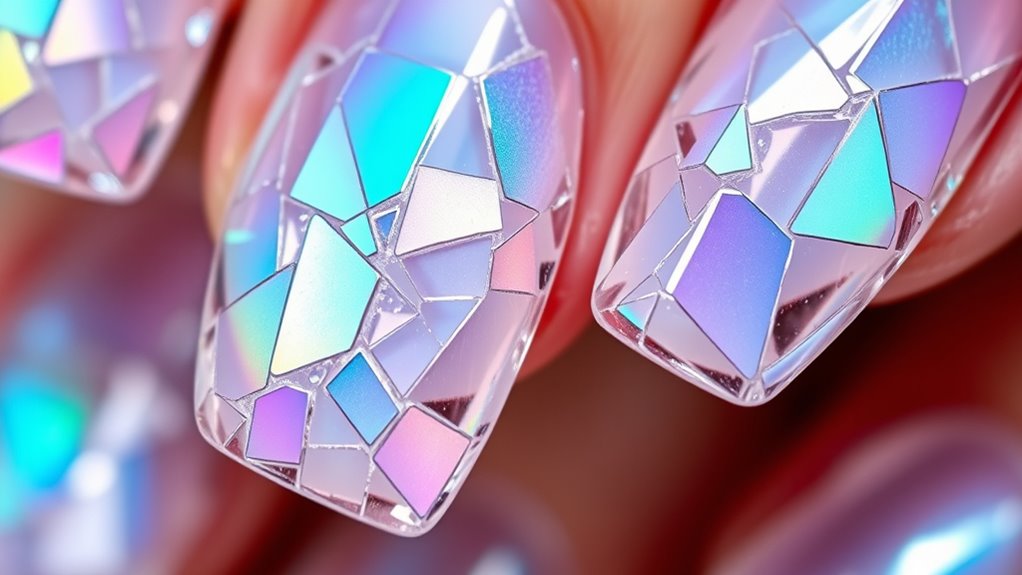
Creating a convincing shattered glass effect requires gathering the right materials that help you craft sharp, realistic fragments. Start with high-quality clear or iridescent nail foils or cellophane to mimic glass shards. Use fine-tipped tweezers for precise placement, and a strong topcoat to secure the pieces without dulling their shine. For added realism, incorporate metallic or holographic flakes, inspired by latest glass nail trends and nail art inspiration. Here’s a quick guide:
| Material | Purpose | Tips |
|---|---|---|
| Nail foils/cellophane | Glass shard illusion | Cut into irregular shapes |
| Tweezers | Precision placement | Handle gently |
| Topcoat | Sealing and shine | Apply in thin layers |
Additionally, choosing high-quality materials ensures the durability and realistic appearance of your shattered glass nails. These materials allow you to create stunning, authentic shattered glass nails.

Beaute Galleria 24 Pieces Mixed Colors Nail Art DIY Holographic Shattered Broken-Glass Reflective Mirror Shard Effect Rainbow Thin Iridescent Cellophane Films Foils
[BUNDLE SET – 24PACK] Includes 24 sheets of different colors of glass foils. Cut into your favorite shapes…
As an affiliate, we earn on qualifying purchases.
As an affiliate, we earn on qualifying purchases.
Preparing Your Nails for the Design
Before applying any glass nail design, it’s essential to prepare your nails properly. Start with thorough nail prep to remove oils and debris, ensuring a smooth surface for the design. Proper nail prep helps the polish adhere better and lasts longer. Next, focus on cuticle care—gently push back your cuticles and trim any excess if needed. Clean your nails with a gentle scrub or alcohol wipe to eliminate residue and oils. This step creates a clean canvas, preventing lifting or bubbling under the shattered glass effect. Well-maintained nails and healthy cuticles improve the overall appearance and durability of your nail art. Taking the time to prep correctly sets the foundation for a flawless shattered glass look that truly stands out. Additionally, using reliable nail tools can make the process safer and more effective.

Top Coat Nail Polish Clear: Quick Dry Nail Polish No Chip High Shine Long Lasting Glossy Fast Air Dry Top Coat for Nail Art Manicure Salon Quality
Quick Dry Top Coat: Experience the convenience of our quick dry top coat. Fast drying nail polish efficient…
As an affiliate, we earn on qualifying purchases.
As an affiliate, we earn on qualifying purchases.
Applying the Base Coat and Color Layers
To guarantee your glass nail design turns out flawless, start by applying a smooth, even base coat. This layer protects your nails and provides a perfect foundation for color blending. Choose a base color that complements the shattered glass effect, and apply it in thin, uniform coats to maintain nail health. Allow each layer to dry completely before adding the next to prevent bubbling or uneven texture. When applying the color layers, focus on smooth strokes to enhance blending and avoid streaks. Keep in mind that healthy nails are essential for a professional look, so don’t skip moisturizing and nourishing treatments beforehand. Proper application of the base coat and color layers ensures your glass nails look stunning, with vibrant, well-blended colors and a strong, healthy finish. Additionally, understanding the importance of nail health can help you achieve long-lasting and beautiful results.
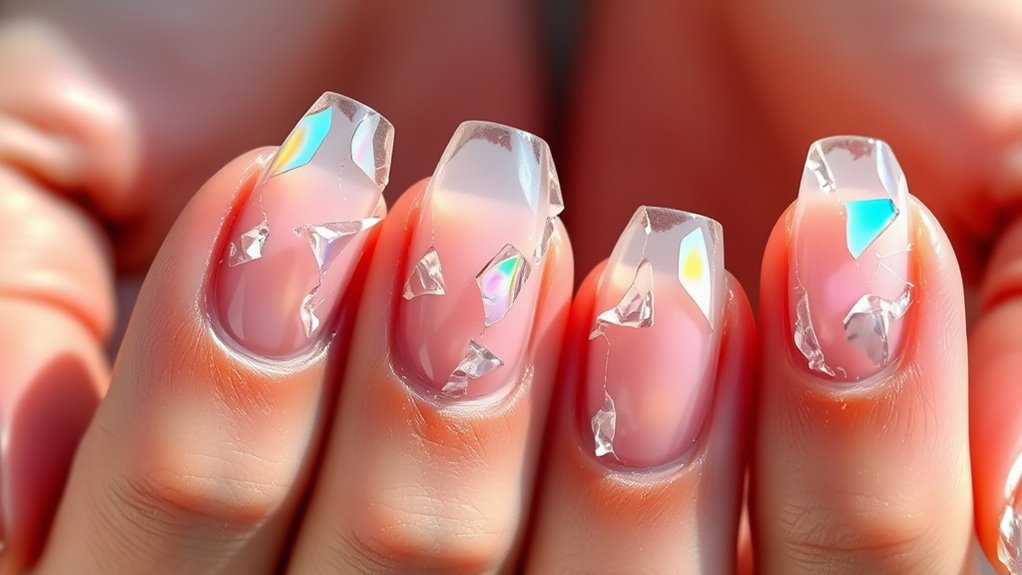
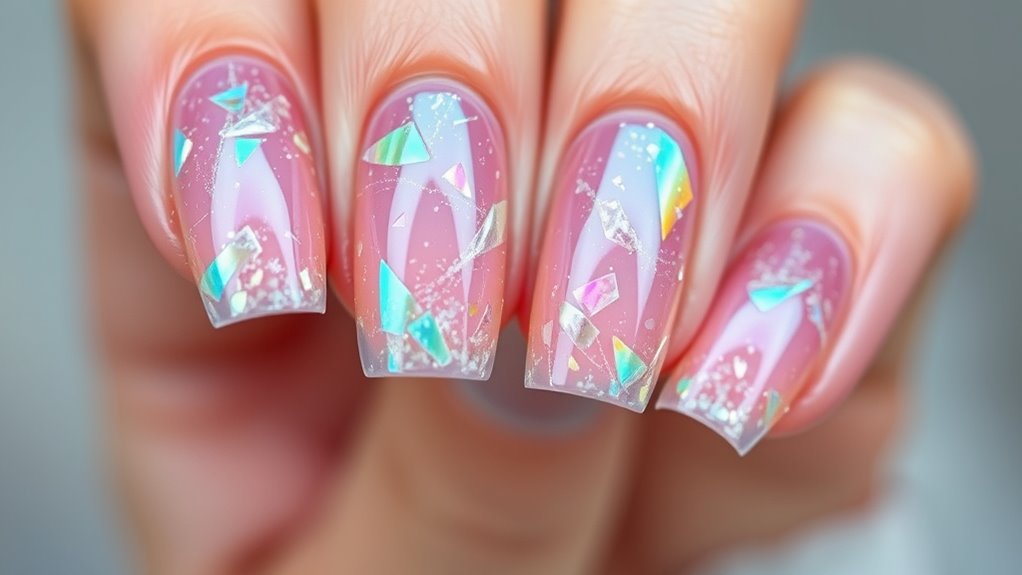
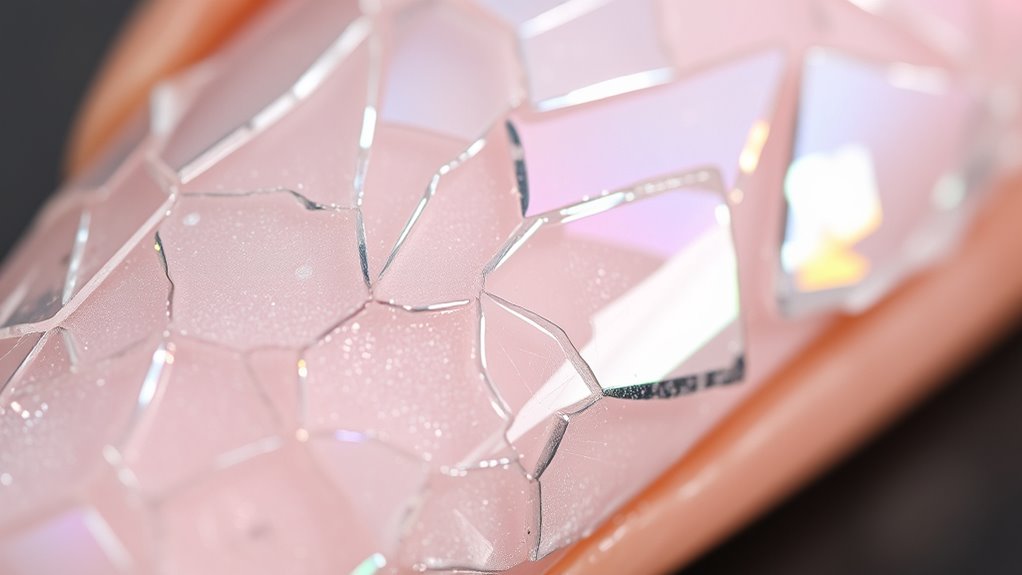
Creating the Shattered Glass Effect With Nail Foil or Cellophane

Once your base coat and color layers are dry and smooth, it’s time to add the shattered glass effect. Use nail foil or cellophane to create a mirror finish that mimics broken glass. Tear small pieces and randomly place them on your nail, pressing gently to guarantee adhesion. To achieve seamless color blending, layer different shades beneath the foil before application. This will give a multi-dimensional look as light reflects off the shattered pieces. Carefully trim or fold the foil to vary the size and shape of each shard, enhancing authenticity. Below is a quick guide:
| Step | Action | Tips |
|---|---|---|
| 1 | Tear foil or cellophane | Random sizes for natural effect |
| 2 | Apply to nail | Gently press for smooth adhesion |
| 3 | Seal with top coat | For durability and shine |
Additionally, understanding the best laundry detergents can help maintain the integrity of your nail art by preventing damage to delicate finishes.
Achieving the Broken Glass Look With Glitter or Chrome Powders
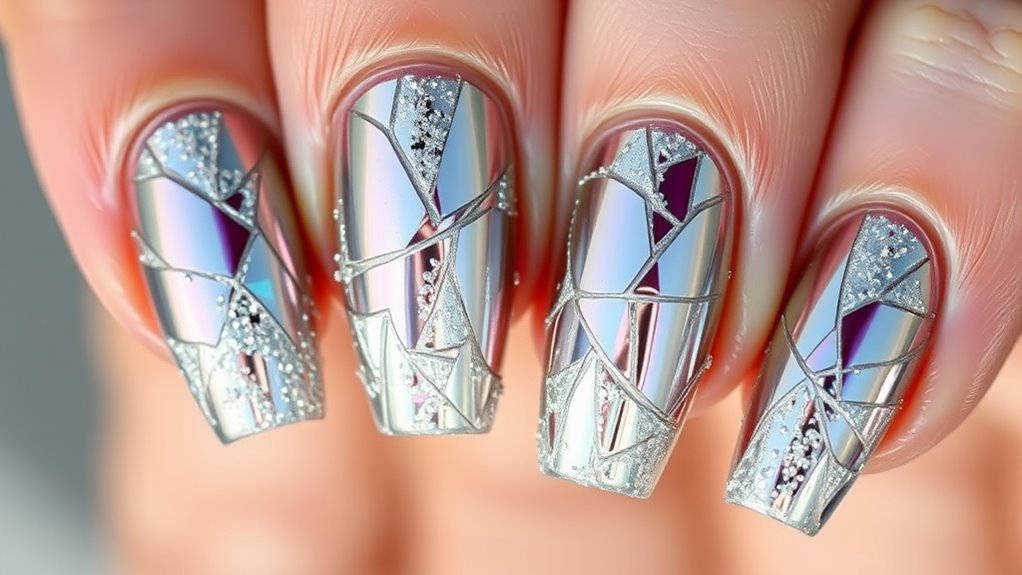
Achieving the broken glass look with glitter or chrome powders adds a dazzling, textured dimension to your nail design. To start, apply a base color that complements your overall look. Then, sprinkle or brush on glitter for sparkling accents that mimic shattered glass fragments. For a more reflective finish, use chrome powders, buffing them onto the surface to create a mirror-like effect. Focus on layering the powders unevenly to resemble jagged glass pieces. Use a small brush to carve out cracks and fractures, enhancing the shattered appearance. Regular checks on statements can help in financial management, ensuring your designs stay pristine and secure. Seal your design with a clear top coat to lock in the sparkle and reflection. This technique transforms simple glitter or chrome into a striking, broken glass-inspired masterpiece.
Sealing and Protecting Your Nail Art
Sealing and safeguarding your nail art is essential to guarantee it stays flawless and lasts longer. Proper sealing enhances nail polish durability and provides necessary UV protection, preventing fading and chipping. To maximize protection, consider these steps:
- Apply a high-quality, clear top coat to seal in the shattered glass effect and add shine.
- Use a UV-protective top coat to shield your nails from sun damage, ensuring color stays vibrant.
- Reapply a thin layer of top coat every few days to maintain durability and prevent cracks or scratches.
- Choosing a top coat with high-quality formulation can further improve longevity and overall finish.
These measures help preserve your intricate glass nail design, keeping it looking fresh and stunning. Protecting your nail art ensures your work stays intact and eye-catching for as long as possible.
Tips for Maintaining and Removing Glass Nails
To keep your glass nails looking their best, use gentle cleaning techniques to avoid damaging the surface. When it’s time to remove them, opt for safe methods that won’t harm your natural nails. Regular nail care, including hydration and careful handling, helps maintain their shine and durability. Applying skincare patches can also protect your nails from external factors during daily routines.
Gentle Cleaning Techniques
When it comes to maintaining glass nails, gentle cleaning is essential to preserve their clarity and strength. Proper nail hygiene ensures your nails stay sparkling and crack-free, while avoiding harsh chemicals protects the delicate glass surface. To keep your nails looking their best, follow these tips:
- Use a soft brush or damp cloth to gently remove dirt and debris.
- Avoid abrasive tools that can scratch or weaken the glass.
- Incorporate cuticle care by applying nourishing oils and avoiding aggressive cuticle removal.
Safe Removal Methods
Removing glass nails safely is essential to prevent damage and guarantee your natural nails stay healthy. To protect your nail health, avoid forceful pulling or peeling, which can cause cracks or tears. Instead, soak the nails in acetone or nail remover designed for gel or acrylic nails, allowing the glass to loosen gradually. Use a gentle nail file to carefully buff away the top layer if needed, but don’t overdo it. If you have allergy concerns, opt for acetone-free removers and ensure proper ventilation to minimize irritation. Always work in a well-lit space and take your time. Rushing removal can lead to nail damage or allergic reactions. Patience and gentle techniques are key to maintaining healthy nails and avoiding unwanted allergy issues.
Regular Nail Care
Maintaining your glass nails requires regular care and attention to guarantee they stay beautiful and healthy. Proper nail health involves consistent moisturizing routines to prevent dryness and brittleness. To keep your nails in top shape, consider these tips:
- Moisturize daily with cuticle oil or hand cream to nourish the nails and surrounding skin.
- Avoid harsh chemicals by wearing gloves when cleaning or using strong detergents.
- Gently buff your nails to remove any surface debris and maintain their clarity, but don’t overdo it to prevent damage.
Regular maintenance ensures your glass nails remain shiny and intact while reducing the risk of cracks or chips. Keeping nail health a priority will prolong their stunning appearance and make removal easier when the time comes.
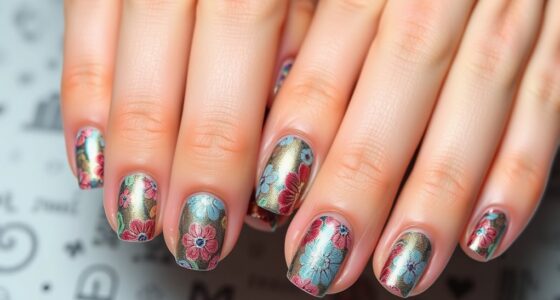
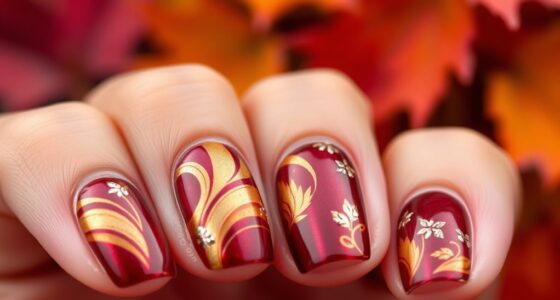
Experimenting With Different Colors and Styles
Trying out different colors and styles is one of the most exciting aspects of glass nails. You can experiment with color blending to create stunning gradients that mimic shattered glass effects or add a pop of contrasting hues for a bold look. Style variations allow you to customize your nails, from subtle, transparent shades to vibrant, eye-catching combinations. Play with layering different colors to enhance the shattered glass illusion or incorporate metallic accents for extra dimension. Don’t be afraid to mix and match styles—layering textures or adding glitter can elevate your design. The key is to stay creative and confident in your choices, knowing that each variation offers a unique way to express your personality through your nail art.
Frequently Asked Questions
How Long Does Glass Nail Art Typically Last?
Glass nail art typically lasts about one to two weeks, but durability concerns can vary based on your daily activities and how well you maintain your nails. To extend its lifespan, avoid harsh chemicals and excessive water exposure. Regularly apply a clear top coat, and be gentle when doing tasks. Proper maintenance tips ensure your shattered glass look stays vibrant and intact longer, giving you a stunning, durable finish.
Is Glass Nail Art Suitable for Sensitive Skin?
Glass nail art can be suitable for sensitive skin if you’re cautious. You should check the materials used, as some adhesives or glues might trigger skin sensitivity or allergic reactions. Always do a patch test before applying, and opt for gentle, hypoallergenic products. If you notice irritation or discomfort, remove the design immediately and consult a dermatologist. Being mindful helps guarantee you enjoy the stunning look safely.
Can I Do Shattered Glass Nails at Home Without Professional Tools?
Yes, you can do shattered glass nails at home using DIY techniques, but you need to follow safety precautions. Start by gathering the right tools like nail glue, thin plastic sheets or real shattered glass, and tweezers. Be careful to avoid skin contact and sharp edges. Work in a well-ventilated space, and take your time to make sure your nails look stunning without risking injury.
What Are the Best Ways to Fix Chipped Glass Nail Designs?
Imagine you’re back in an era of elegance, but your shattered glass nail design needs fixing. To fix chipped glass nails, start with nail repair by buffing the chipped area gently. Use a clear top coat to conceal cracks and restore shine. For better crack concealment, apply a thin layer of gel or acrylic over the chip, then cure or dry. This way, your shattered look remains stunning and flawless.
Are There Any Safety Concerns With Using Nail Foils or Cellophane?
Using nail foils or cellophane is generally safe if you consider chemical safety and disposal concerns. Make sure to work in a well-ventilated area to avoid inhaling fumes, and avoid skin contact with adhesive or chemicals. Dispose of used foils properly, as they can be non-biodegradable. Always follow manufacturer instructions to minimize any health risks, and wash your hands thoroughly after your nail session.
Conclusion
Think of your glass nails as a delicate stained glass window—beautiful, intricate, and meant to be admired. With patience and creativity, you can craft a stunning masterpiece that reflects your unique style. Just like a window needs care and protection, your nails require proper maintenance to stay dazzling. Embrace the process and let your artistry shine through, turning your fingertips into a breathtaking mosaic that captures every glance and admiration.