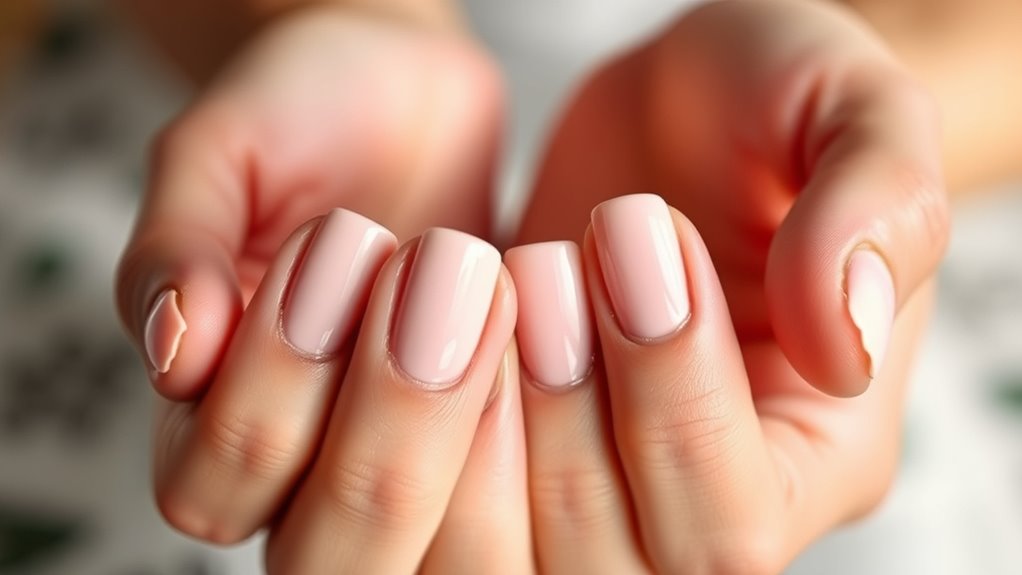
To make your press-on nails look salon-perfect, choose the right size and shape for a natural fit, then prep your natural nails by cleaning, buffing, and pushing back cuticles. Apply high-quality adhesive and press firmly for a few seconds. Customize with nail art or decorations, and seal with a top coat. Maintain your nails by avoiding water and rough activities, and remove them safely. For expert tips and tricks, explore each step to up your game.
Key Takeaways
- Choose the right size and shape for a natural, comfortable fit before application.
- Properly prep natural nails by cleaning, buffing, and pushing back cuticles for better adhesion.
- Use high-quality adhesive and press firmly, holding until fully secured for a flawless look.
- Customize with nail art or decals and seal with a top coat for a personalized, professional finish.
- Maintain nails by avoiding water, harsh chemicals, and rough activities to prolong the salon-quality appearance.
Top picks for "pres nail like"
Open Amazon search results for this keyword.
As an affiliate, we earn on qualifying purchases.
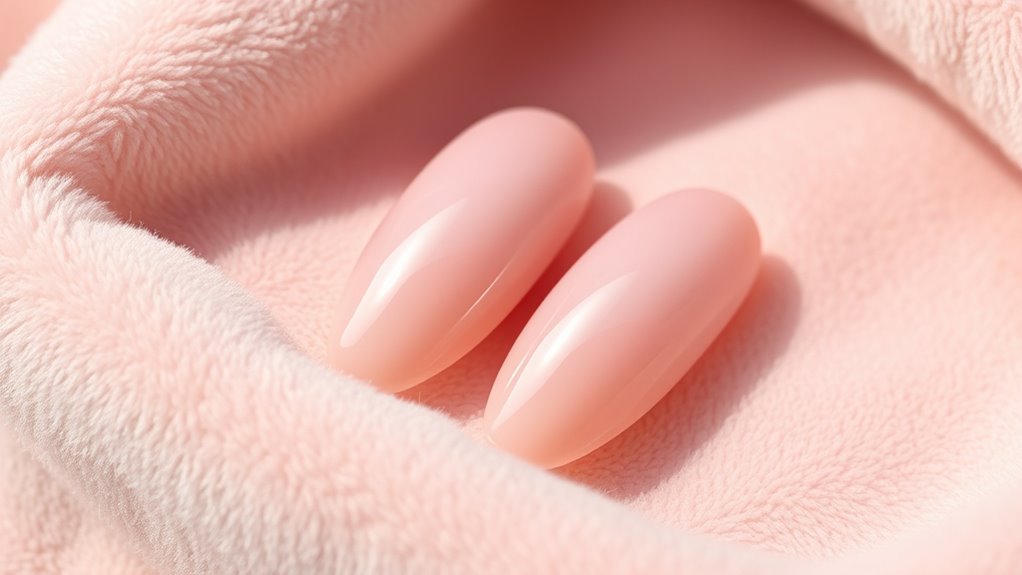
Choosing the Right Press-On Nails for Your Style and Fit

To choose the right press-on nails for your style and fit, start by considering your personal aesthetic and the occasion. Think about nail polish colors that match your wardrobe or mood—bright hues for fun events or neutral tones for professional settings. Nail art techniques can also enhance your look, whether you prefer subtle designs or bold patterns. When selecting nails, guarantee they complement your skin tone and finger shape for a seamless fit. Measure your nails accurately or choose flexible options that adapt to your natural nails. Remember, the right press-ons should feel comfortable and look natural while allowing you to express your style through color choices and creative nail art techniques. Additionally, exploring best nail art techniques can help you elevate your press-on game and achieve salon-quality results at home.
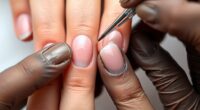
Preparing Your Natural Nails for a Seamless Application
Start by making certain your nails are clean and dry to prevent any lifting. Next, shape and buff them to create a smooth surface that helps the press-ons adhere better. Taking these steps guarantees your application looks flawless and lasts longer. Incorporating data analytics can further help you understand which techniques lead to longer-lasting results.
Clean and Dry Nails
Before applying your press-on nails, making sure your natural nails are clean and dry is vital. Start by washing your hands thoroughly to remove dirt and oils that can interfere with adhesion. Use a gentle nail polish remover or acetone to eliminate any residual oils or polish, ensuring your nails are completely oil-free. Proper cuticle care is essential—gently push back cuticles without cutting to create a smooth surface. Avoid nail hydration products before application, as excess moisture can prevent the adhesive from sticking properly. Dry nails thoroughly with a lint-free cloth or paper towel, leaving no moisture or residue behind. Clean, dry nails provide the perfect foundation for a seamless, long-lasting press-on nail application. Additionally, understanding the importance of proper nail preparation can significantly improve your results and ensure your press-ons stay in place longer.
Shape and Buff Nails
Shaping and buffing your nails guarantees a smooth surface that helps your press-on nails fit perfectly and last longer. Start by choosing a nail shape that complements your fingers, such as oval, square, or stiletto. Use a nail file to carefully shape each nail, smoothing out any rough edges. Next, apply buffing techniques to create an even, polished surface. Gently buff the surface of your nails with a buffing block or file to remove ridges and shine, but avoid over-buffing, which can weaken your nails. This step guarantees there’s no uneven texture that could cause press-ons to lift or peel prematurely. Proper shaping and buffing are key to achieving a seamless, professional look with your press-on nails. Incorporate natural materials like linen or wood during the process to help maintain nail health and promote a rustic, authentic look.
Step-by-Step Guide to Applying Press-On Nails Flawlessly
Applying press-on nails flawlessly begins with preparing your natural nails to guarantee they adhere properly. Start by cleaning your nails thoroughly to remove oils and debris, which helps prevent lifting. Lightly buff the surface for better grip without damaging nail health. Choose the right size for each nail, ensuring a snug fit to create a smooth, natural look. If you plan nail art, apply it before attaching the press-ons for precision. Use a high-quality adhesive tab or nail glue for secure attachment. Press the nail firmly onto your natural nail, holding for a few seconds to ensure proper adhesion. Avoid rushing to prevent air bubbles or misalignment. Ensuring your nails are free from oils and dirt is especially important when using press-on nail adhesives to maximize hold and longevity. With proper prep and application, your press-ons will look flawless, boosting your confidence and showcasing your nail art skills.
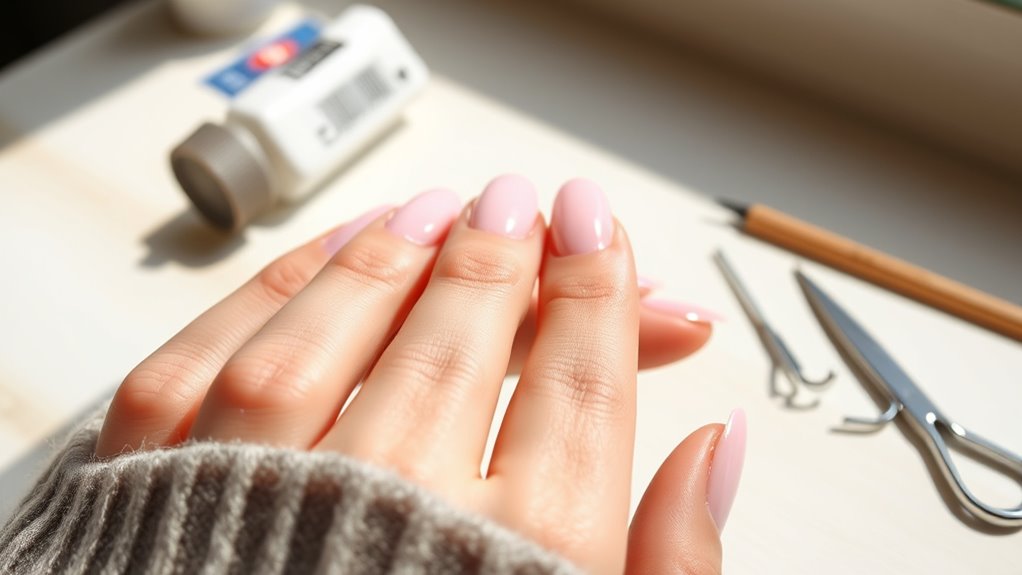
Shaping and Customizing Your Press-Ons for a Perfect Fit
To get your press-ons to fit perfectly, start by shaping them with a file to match your natural nail curves. Then, trim any excess for a comfortable, snug feel. Small adjustments like these make a big difference in achieving a professional look and feel. Additionally, choosing high-quality nail products can enhance durability and overall appearance.
Filing for Shape Precision
Before attaching your press-on nails, taking the time to file them for shape precision guarantees a seamless and natural look. Start by choosing a nail shape that complements your fingers, whether square, oval, or stiletto. Use the right filing techniques to smooth out rough edges and refine the overall shape. Hold the file at a slight angle and gently glide it along the edges, working from side to side. Be consistent, ensuring both nails of each hand match perfectly. If needed, file the top surface lightly to even out any uneven areas. Remember, precision in shaping your press-ons makes a significant difference in how natural and professional they look once applied. Proper filing creates a flawless base for the next steps. Additionally, understanding the importance of trademark protection can help you safeguard your unique nail art designs if you plan to share or sell your creations.
Trimming for Comfort
Trimming your press-on nails for comfort is essential to guarantee a perfect fit and natural feel. Proper nail trimming ensures your press-ons don’t poke or pinch, making them more comfortable throughout the day. Focus on shaping the edges to match your natural nail line, avoiding sharp or jagged tips. Keep comfort considerations in mind—trim just enough so they don’t extend beyond your fingertips or cause discomfort when typing or handling objects. Use a small nail file to smooth rough edges after trimming. Remember, less is more—over-trimming can weaken your press-ons or cause them to lift. Test fit frequently during trimming to achieve the ideal length and shape. Incorporating proper technique into your trimming routine can help prevent damage and improve overall fit. With careful nail trimming, your press-ons will feel more natural and stay comfortably secure.
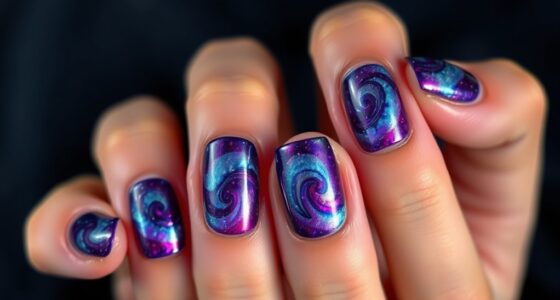
Adding Personal Touches: Designs, Decorations, and Finishing Touches
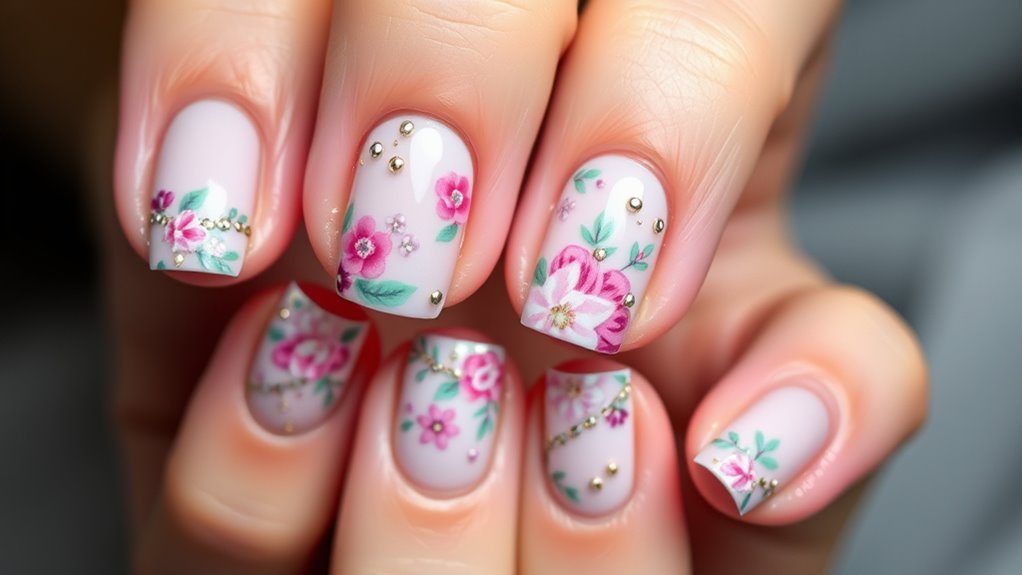
Adding personal touches to your press-on nails allows you to showcase your unique style and creativity. You can enhance your design with simple nail art, like tiny flowers or geometric patterns, using a fine brush or nail stickers. Glitter accents are a quick way to add sparkle and make your nails stand out; apply a layer of clear top coat, then sprinkle or dab on glitter where you want extra shimmer. Consider using rhinestones or metallic decals for more dimension. Finishing with a glossy top coat seals in your decorations and gives your nails a polished, professional look. These small details transform basic press-ons into a personalized accessory that reflects your personality and mood, making your manicure truly one-of-a-kind. Incorporating mindful decluttering strategies when organizing your nail supplies can help you keep your collection manageable and prevent clutter buildup.
Tips for Maintaining and Extending the Longevity of Your Manicure

To keep your press-on nails looking their best and last longer, you need to follow some simple maintenance tips. Proper care helps maintain nail health and ensures long-lasting results. Avoid using your nails as tools, which can cause chipping or lifting. Keep your nails dry and avoid excessive water exposure to prevent weakening the adhesive. Regularly moisturize your cuticles to promote overall nail health. Additionally, be gentle when doing household chores or applying lotions. Maintaining your energetic vitality can also support healthier nails and skin, creating a more vibrant overall appearance.
Here are some tips to help extend your manicure’s lifespan:
- Refrain from harsh chemicals and acetone-based products
- Wear gloves during cleaning or gardening
- Avoid using nails to open packages
- Touch up any lifting promptly with nail glue
Following these steps will keep your press-ons looking fresh and durable.
Troubleshooting Common Issues and Removing Press-On Nails Safely

Even with proper application, issues like lifting, chipping, or discomfort can occur with press-on nails. If this happens, avoid forcefully pulling them off, as that can damage your natural nails. Instead, gently soak your nails in warm, soapy water to loosen the adhesive. To prevent future problems, focus on cuticle care and nail hydration; dry or damaged cuticles can cause lifts or discomfort. If you notice lifting, lightly buff the area before reapplying or replacing the press-ons. When removing press-on nails, soak them in acetone or use an acetone-based remover, then gently lift or push them off with a cuticle stick. Always hydrate your nails afterward to restore moisture and keep your natural nails healthy.
Frequently Asked Questions
How Long Can I Expect My Press-On Manicure to Last?
You can expect your press-on manicure to last about a week to ten days, depending on nail longevity and your daily activities. To maximize wear time expectations, avoid water exposure and rough handling. Proper application and using quality nails also help extend their lifespan. If you follow these tips, your press-ons should stay looking fresh and salon-perfect for as long as possible.
Are Press-On Nails Safe for Sensitive Skin?
Yes, press-on nails can be safe for sensitive skin if you choose options made from hypoallergenic materials. These nails reduce the risk of skin irritation and allergic reactions. Always check the product label for hypoallergenic claims, and do a patch test before applying a full set. If you experience redness or discomfort, remove the nails promptly and consult a dermatologist to guarantee your skin stays healthy.
Can I Wear Press-Ons With Gel or Acrylic Overlays?
Yes, you can wear press-on nails with gel or acrylic overlays, but you should proceed cautiously. Make sure your overlays are properly cured and fully dry before applying press-ons to prevent lifting or damage. It’s best to consult a professional if you’re unsure, especially with acrylic overlays, as they can be thick and may affect the fit. Proper preparation and careful application help maintain your nails’ health and achieve a seamless look.
What Should I Do if a Press-On Nail Falls off Prematurely?
If a press-on nail falls off prematurely, don’t panic. You should perform a quick nail repair by cleaning the natural nail and reapplying adhesive tips or nail glue. Use a small amount of adhesive to secure the nail back in place, pressing firmly for a few seconds. This will help keep your press-on looking flawless and prolong its wear, giving you a salon-quality finish at home.
How Do I Remove Press-On Nails Without Damaging My Natural Nails?
Did you know that improper removal can damage natural nails? To remove press-on nails without harming nail health, soak your nails in warm, soapy water for 10-15 minutes to loosen the adhesive. Gently lift the edges with a cuticle stick, avoiding force. Use acetone-based remover only if necessary, and always moisturize afterward. This gentle removal technique guarantees your natural nails stay healthy and strong.
Conclusion
With a little patience and practice, you can master the art of applying press-on nails like a pro. Think of it as revealing a secret beauty trick that’s surprisingly simple and endlessly rewarding. Embrace your creativity, troubleshoot with confidence, and enjoy the flawless, salon-quality look you’ve crafted yourself. After all, your nails deserve to shine just as brightly as your confidence—so go ahead, dazzle with your DIY mastery!