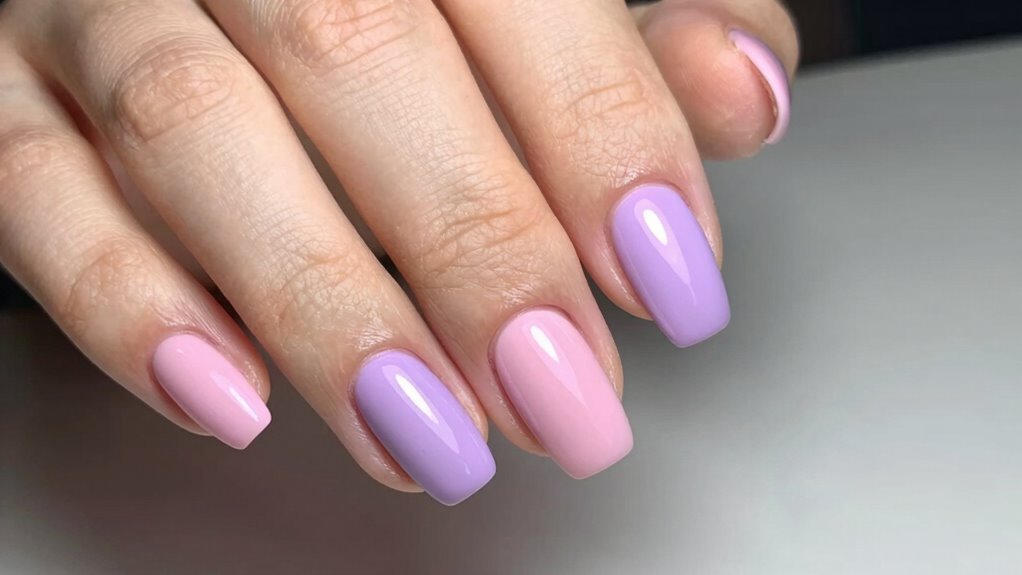

To make your nail sets look better online, experiment with angles that highlight the details and colors. Use close-up shots from slightly above and directly in front to showcase intricate designs, while side angles can emphasize the 3D aspects. Natural or diffused lighting helps prevent shadows and glare, making colors pop. Keep backgrounds simple and choose perspectives that keep the nails as the main focus. Keep exploring these techniques to capture stunning, eye-catching images.
Key Takeaways
- Use top-down (flat lay) angles to clearly showcase entire nail designs and colors.
- Incorporate close-up shots to highlight intricate details and textures.
- Experiment with slight side angles to add depth and emphasize 3D features.
- Maintain consistent camera height for uniformity across images.
- Combine angled shots with proper lighting to enhance vibrancy and reduce shadows.

When showcasing nail sets online, the right camera angles can make all the difference in highlighting their beauty and detail. Your goal is to capture the intricate designs, vibrant colors, and flawless finishes in a way that draws viewers in and makes the nails stand out. To do this effectively, paying attention to lighting techniques is essential. Proper lighting helps prevent unwanted shadows, reduces glare, and enhances the true colors of the nails. Natural light often works best because it provides soft, even illumination that showcases the fine details without harsh reflections. If natural light isn’t available, use diffused artificial lighting—think softboxes or ring lights—to mimic that effect. Avoid direct overhead lighting, which can create unflattering shadows, or overly bright spots that wash out the details. Instead, aim for a balanced, diffuse light setup that evenly illuminates the nails from multiple angles. Additionally, experimenting with different camera angles can highlight various aspects of the nail art and create more engaging images. Using proper framing techniques can further enhance the visual appeal of your photos and ensure the nails are the main focus. Adjusting your camera’s angle perspective can also help emphasize the 3D aspects of detailed nail designs. Background choices also play an *indispensable* role in making the nails pop. A simple, neutral background like white, black, or pastel shades minimizes distractions and puts the focus squarely on your nail art. Avoid cluttered or overly busy backgrounds that can divert attention away from the nails themselves. When selecting your background, consider contrast; for example, light-colored nails look striking against darker backgrounds, while darker nails can stand out against lighter surfaces. Additionally, textured backgrounds can add visual interest, but they should complement the nail design without overwhelming it. Keep the background consistent for a cohesive look across your photos. Incorporating lighting techniques can further elevate the quality of your images by ensuring your nails are well-lit and visually appealing.
As an affiliate, we earn on qualifying purchases.
Frequently Asked Questions
How Does Lighting Affect Nail Set Photos?
Lighting dramatically affects your nail set photos by highlighting color contrast and enhancing details. You should aim for even light diffusion to avoid harsh shadows that can distort the look. Proper lighting brings out the true colors and textures, making your nails pop. When you control these elements, your photos look more professional and appealing, drawing attention to your nail art and encouraging more clients to book with you.
What Camera Settings Are Best for Nail Photography?
You’re probably wondering which camera settings make your nails pop online. To nail it, use a high aperture for excellent depth of field, ensuring all your designs are sharp. Adjust your white balance for perfect color accuracy, so your nails look true-to-life. Keep ISO low to avoid grain, and shoot in RAW for maximum editing flexibility. These settings turn your nail shots from meh to mesmerizing—no filter needed!
How Can I Avoid Reflections in Nail Photos?
To avoid reflections in nail photos, you should control mirror reflections and reduce glare. Use diffused lighting or softboxes to soften harsh light, preventing unwanted reflections. Adjust your camera angle so it’s not directly facing shiny surfaces, and consider using a polarizing filter to cut glare. Additionally, covering reflective areas with matte or non-reflective materials can help minimize mirror reflections, resulting in cleaner, more professional-looking nail photos.
What’s the Ideal Background for Nail Set Images?
Choose a neutral or soft-colored background that complements your nail set, like pastel or white, to keep the focus on your nails. Incorporate simple props or accessories, such as minimal jewelry or delicate decor, to add interest without distraction. Use color schemes that enhance your nail colors, ensuring they pop. This approach creates a clean, appealing look that highlights your nail artistry and attracts potential clients.
How Do Different Angles Highlight Nail Details?
You can highlight nail details by experimenting with various angles. A close-up shot from directly above emphasizes nail texture, showcasing intricate designs and polish finish. A slight side angle can enhance color vibrancy, making shades pop and appear more lively. Turning your hand to a 45-degree angle balances both texture and color, giving viewers an all-encompassing view. These angles draw attention to the details, making your nail set look more appealing online.
As an affiliate, we earn on qualifying purchases.
Conclusion
Now that you know these camera angles, your nail sets will captivate everyone online. But here’s the real secret—there’s one angle that’s even more powerful, waiting to be discovered. Are you ready to open the full potential of your photos? Experiment, surprise yourself, and watch your nail art stand out like never before. The perfect shot isn’t just about angles; it’s about daring to go beyond. Will you find it?
As an affiliate, we earn on qualifying purchases.
As an affiliate, we earn on qualifying purchases.