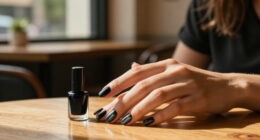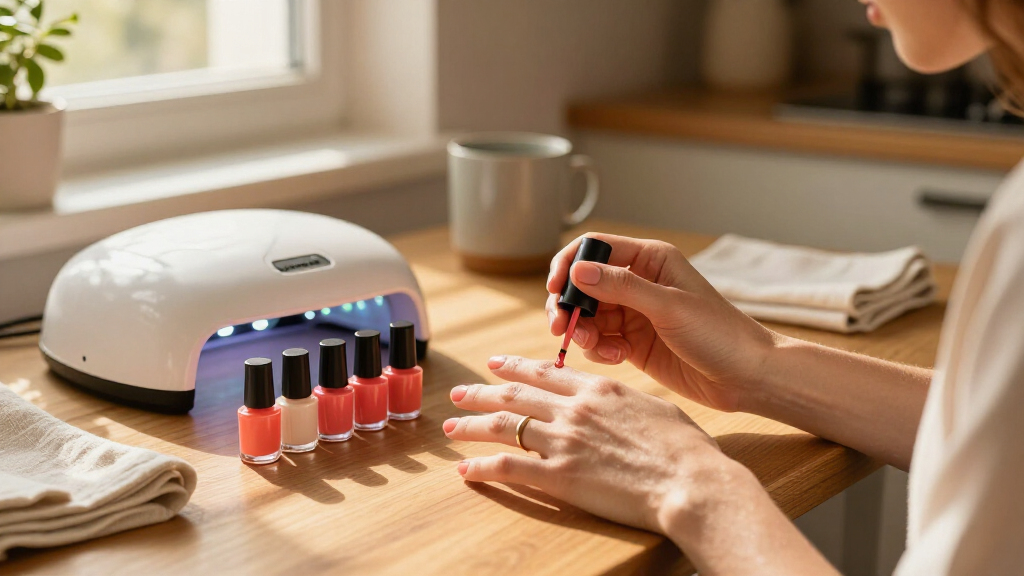
This guide shows you how to complete a full gel manicure at home using a gel nail polish kit. You will prep your nails, apply base coat, two coats of color, and top coat, curing each layer under the included UV or LED lamp. Done correctly, the result is a hard, high-gloss manicure that resists chipping for two to three weeks. This guide is written for beginners who have purchased a kit and are using it for the first time. No salon experience is required — the process is repetitive and forgiving once you understand the curing sequence. Expect to spend 45 to 60 minutes on your first full set; the time drops closer to 30 minutes with practice.

Get beauty and skincare favorites delivered free with Prime
- Fast, free delivery on millions of items
- Prime Video, Amazon Music and more included
- Member-only deals all year

Beetles Gel Nail Polish Kit with UV Light – 80 Pcs, 55 Colors
- ✔ Total Pieces: 80
- ✔ Gel Polish Colors: 55 (5ml each)
- ✔ Top Coats: No-wipe glossy, matte, glitter

JODSONE 60-Piece Gel Nail Polish Kit with UV Light – 55 Colors, Base and Top Coats, Manicure Set
- ✔ Total Pieces: 60
- ✔ Color Gel Polishes: 55 bottles (5ml each)
- ✔ Base Coats: 2

COSCELIA 53-Piece Gel Nail Polish Kit with UV/LED Light and Nail Drill, 35 Colors
- ✔ Total Pieces: 53
- ✔ Gel Polish Colors: 35
- ✔ Lamp Type: UV/LED with 30 beads, auto-sensing, low heat mode
Difficulty: Beginner | Time: 45-60 minutes for a full manicure (plus 20-30 minutes for soak-off removal later)
What You’ll Need
Tools & Materials:
- A complete gel nail polish kit (base coat, color, top coat, UV or LED lamp)
- Isopropyl alcohol (90% or higher) or the cleanser/dehydrator included in your kit
- Nail file (100/180 grit) and buffer
- Cuticle pusher (metal or wooden orange stick)
- Cuticle oil
- Lint-free wipes or a cotton pad that will not shed fibers
- Nail clippers
Knowledge:
- Basic familiarity with filing and shaping your own nails
- Understanding that gel polish only hardens under UV/LED light — it will stay wet indefinitely otherwise
Check your lamp type before starting. Most modern kits include an LED lamp, which cures each layer in 30-60 seconds. UV lamps typically require 2 minutes per layer. The curing times printed on your polish bottles override any generic timing in this guide, so read them first. Work in a room with decent lighting and a stable table, and keep the lamp plugged in within reach. Protect your table surface with paper or an old towel, because uncured gel is difficult to remove from fabric and wood.
Beetles Gel Nail Polish Kit with UV Light – 80 Pcs, 55 Colors
The Beetles kit earns our top spot because it is the most complete creative package of the three. Where JODSONE and COSCELIA each include one matte top coat, Beetles goes further with a no-wipe glossy top coat plus separate matte and glitter top coats, meaning you can produce three distinct finishes from the same color bottles. For anyone who cares about variety in their manicures, that flexibility matters more than raw piece count.The 55-color range matches JODSONE and dwarfs COSCELIA’s 35, with seasonal shades that make the kit feel current rather than generic. The bundled 20-tool set and certified 5V/2A lamp round out a genuinely all-in-one package — though the lamp itself is more basic than JODSONE’s sensor-equipped model, so curing is a slightly more manual process. Compared with COSCELIA, you give up the electric nail drill, which means filing, shaping, and gel removal stay manual chores.The honest tradeoff: this kit rewards careful nail prep. Skip the buffing and cleansing steps and peeling becomes likely, a limitation shared by every gel kit here but most noticeable with a set this large because users are tempted to rush through colors. Cure times of at least 60 seconds per layer also add up across a full manicure.
Pros:
- Largest kit of the trio: 80 pieces including 55 seasonal colors
- Three distinct finish options — glossy no-wipe, matte, and glitter top coats — a category exclusive here
- Genuinely all-in-one: lamp, base coat, tools, and polishes in one box
- Strong gift option for at-home manicure enthusiasts
Cons:
- Lamp is more basic than JODSONE’s auto-sensing model
- Longevity depends on diligent prep; peeling occurs with rushed application
- 60-second minimum cure per layer makes full manicures time-consuming
Best for: DIY beginners and hobbyists who want maximum color and finish variety in one purchase
Not ideal for: Anyone who wants advanced lamp features like auto-sensing, or pro-grade tools like a nail drill
Bottom line: If variety is your priority and you want every coat and finish included from day one, this is the most complete gel kit of the three.
“If variety is your priority and you want every coat and finish included from day one, this is the most complete gel kit of the three.”
JODSONE 60-Piece Gel Nail Polish Kit with UV Light – 55 Colors, Base and Top Coats, Manicure Set
JODSONE matches Beetles on color count — 55 shades at the same 5ml size — but differentiates itself where it counts during actual use: the curing experience. The smart lamp’s auto on/off hand sensing means the light kicks in when your hand enters and shuts off when it leaves, eliminating the timer-tapping that the Beetles lamp requires. With 30 LED beads providing all-direction curing, edges and thumbs cure more evenly, which directly reduces the patchy spots that cause early chipping.The kit also quietly solves a problem the others don’t: it includes two base coats and two glossy top coats, plus one matte. Since base and top coats run out far faster than any single color, that backup supply keeps the kit usable long after a Beetles or COSCELIA owner has reordered essentials. Add three curing modes (5s, 30s, 60s) versus Beetles’ fixed 60-second minimum, and quick flash-cures become possible during art work.The natural resin formula applies with a silky texture and a soft brush that forgives unsteady hands, and wear reaches roughly 21 days with proper curing. The drawbacks are shared across the category — every application requires lamp curing, the 5ml bottles deplete quickly with weekly use, and the polishes must be stored away from heat and light or they thicken prematurely.
Pros:
- Smart lamp with auto on/off hand sensing and 30 LED beads for even, all-direction curing
- Duplicate base and glossy top coats outlast competing kits’ single bottles
- Three timer modes (5s/30s/60s) allow faster flash-curing than fixed-time lamps
- Silky natural resin formula and soft brush make application forgiving for beginners
Cons:
- No glitter top coat, limiting finish variety compared with Beetles
- Small 5ml bottles run out quickly with frequent manicures
- Must be stored away from heat and light to stay usable
Best for: Value-focused buyers who want a smarter lamp and backup essentials rather than maximum accessories
Not ideal for: Users who want specialty finishes like glitter top coat, or pro tools like a drill
Bottom line: The smartest pick for practical daily use — you trade a few accessories for a better lamp and longer-lasting essentials.
“The smartest pick for practical daily use — you trade a few accessories for a better lamp and longer-lasting essentials.”
COSCELIA 53-Piece Gel Nail Polish Kit with UV/LED Light and Nail Drill, 35 Colors
COSCELIA takes a different bet than the other two: fewer colors, more capability. At 35 shades it offers roughly two-thirds of the color range of Beetles or JODSONE, but it is the only kit in this lineup that includes an electric nail drill — a tool that transforms grinding, cuticle work, shaping, and especially gel removal compared with manual files. If you have ever spent twenty minutes filing off a cured gel manicure, you will understand why this matters.The lamp holds its own against JODSONE’s: 30 LED beads, three timer settings, automatic sensing, and a low heat mode that reduces the burning sensation thick gels can cause during curing — a comfort feature neither competitor emphasizes. Five base and top coat bottles keep the system running, and the natural resin formula keeps odor low, which matters for home use in unventilated rooms.The compromises are real, though. The smaller palette means fewer niche and seasonal shades, and the 2-3 week wear claim depends heavily on careful application and aftercare — this is not a kit that forgives skipped prep steps. Like the others, every manicure requires UV/LED curing, so buyers hoping to minimize lamp exposure should note that upfront. For a beginner who intends to grow into the hobby, however, the drill alone justifies choosing this over a larger but more basic set.
Pros:
- Only kit here with an electric nail drill for grinding, shaping, and gel removal
- Lamp includes low heat mode alongside auto-sensing and three timer settings
- Low-odor natural resin formula suited to home use
- Five base and top coat bottles provide ample system supplies
Cons:
- Smallest color range of the three at 35 shades
- Longevity hinges on careful application and aftercare
- UV/LED curing required for every manicure
Best for: Improving DIYers and aspiring nail techs who want drill-level tools and lamp comfort features
Not ideal for: Color collectors who want the widest shade range, or anyone avoiding UV curing entirely
Bottom line: Choose this when tools matter more than shade count — the drill and low-heat lamp make it the best growth path in the lineup.
“Choose this when tools matter more than shade count — the drill and low-heat lamp make it the best growth path in the lineup.”
As an Amazon Associate we earn from qualifying purchases.
Before You Start
Wash your hands thoroughly and remove any old polish before beginning. Gel polish will not bond to oily, wet, or previously lacquered nails, and lifting at the edges is almost always caused by skipped prep. Do not apply hand lotion or cuticle cream before your manicure — moisturize only after the final cure. If you have any cuts, hangnails, or torn skin around the nail bed, wait for them to heal or work carefully around them, because gel liquids and alcohol-based cleansers will sting broken skin. Avoid caffeine right before starting if your hands tend to shake; a steady hand matters more than speed.
Step-by-Step Instructions
Step 1: Shape and clip your nails
Clip your nails to your desired length, then file them into shape using the 180-grit side of your file. File in one direction rather than sawing back and forth, which weakens the free edge. Square and rounded shapes hold gel well and hide minor application flaws better than pointed shapes.
Tip: Cut nails slightly shorter than your target length. Filing lets you fine-tune, but you cannot add length back.
Check: All ten nails are even in length and shape, with no visible nicks or rough edges.
Step 2: Push back and clean the cuticles
Soak your fingertips in warm water for 2-3 minutes to soften the skin, then gently push the cuticles back toward the base of each nail with a cuticle pusher. Remove any visible dead skin clinging to the nail plate, but do not cut live skin. Dry your hands completely.
Tip: Gel that touches the cuticle or surrounding skin is the most common cause of lifting and peeling within days. Leave a hairline gap between the polish and your skin as you apply later steps.
Check: You can see a clear margin of nail plate at the base of each nail with cuticles pushed neatly back.
Step 3: Buff and dehydrate the nail surface
Lightly buff the entire surface of each nail with the buffer until it looks slightly matte — about 5-10 seconds per nail. Then wipe each nail with a lint-free wipe soaked in isopropyl alcohol or your kit’s cleanser/dehydrator. Let the alcohol evaporate fully (a few seconds) before moving on.
Tip: Do not touch your nails with bare fingers after this point. Skin oils transfer instantly and block adhesion. Hold your hand by the fingertips or knuckles from now on.
Check: Nails look uniformly matte, clean, and dry with no shine patches or dust.
Step 4: Apply a thin base coat and cure
Apply one very thin layer of base coat to each nail, cap the free edge by brushing across the tip, and place your hand in the lamp. Cure for the time printed on the base coat bottle — typically 30-60 seconds for LED or 2 minutes for UV. Repeat for the other hand.
Tip: Thin is critical. A thick base coat wrinkles and causes the color above it to chip. If you can see brush strokes or pooling, you have applied too much.
Check: The base coat is dry and hard to the touch, with a slightly tacky surface — this tackiness is normal and should not be wiped off.
Step 5: Apply the first color coat and cure
Brush on a thin, even layer of gel color, capping the free edge again, staying just short of the cuticle line. Cure under the lamp for the time printed on the color bottle. Work on one hand fully before switching.
Tip: If you make a mistake, wipe the uncured polish off with the alcohol cleanser and reapply — you lose nothing by starting a nail over before curing.
Check: Color covers the nail evenly. Some sheer shades look streaky after the first coat — this is expected and will be fixed by the second coat.
Step 6: Apply the second color coat and cure
Apply a second thin layer of color, again sealing the free edge and keeping a small margin from the skin. Cure for the full recommended time. With most colors, two coats give complete coverage; very light or nude shades may need a third thin coat with a full cure between layers.
Check: The color is fully saturated with no visible nail line or streaking, and the surface is hard.
Step 7: Apply the top coat and cure
Apply a thin layer of top coat over the entire nail, wrapping the free edge carefully — this sealed edge is what protects the manicure from chipping. Cure for the full recommended time, usually slightly longer than the color layers.
Tip: If your kit includes a ‘no-wipe’ top coat, skip the next step. Traditional top coats require the alcohol wipe.
Check: The nail is hard with a glossy finish, though a sticky residue layer remains.
Step 8: Wipe off the tacky layer and finish
Wipe each nail with a fresh lint-free wipe soaked in alcohol, using light pressure and a single pass per nail. Then massage cuticle oil into the skin around each nail and apply hand lotion.
Tip: Use firm scrubbing only if residue persists — excessive rubbing can dull a fresh top coat. Always use lint-free wipes; regular cotton pads shed fibers that stick to the tacky layer.
Check: Nails are completely dry, glassy smooth, and glossy with no sticky feel when you press a fingertip against them.
Common Mistakes to Avoid
- Applying thick layers to save time — Gel cures from the outside in; thick layers stay soft underneath and wrinkle or peel. Always apply two or three thin coats instead of one thick one.
- Getting polish on the cuticle or skin — Leave a hairline gap between polish and skin. Paint with your brush nearly parallel to the nail and rest your painting hand on the table to steady it.
- Skipping nail prep or using hand lotion beforehand — Buffing, dehydrating, and keeping skin oils off the nail are what make gel bond. Follow steps 1-3 in full every single time.
- Forgetting to cap the free edge — Brush across the nail tip on every layer. An uncapped edge lets water and impact get under the gel, causing chips within days.
Troubleshooting
Problem: Gel stays wet or moves after a full cure cycle
Solution: Your lamp may be underpowered or the wrong type for your polish. Confirm whether your kit uses UV or LED and match it to the polish brand, clean the lamp’s reflective surfaces, and re-cure for double the time. If the polish still won’t set, the lamp or polish is incompatible or expired.
Problem: Polish peels off in one piece within a few days
Solution: This indicates poor adhesion from skipped prep or polish touching the skin. Remove the manicure, repeat buffing and alcohol dehydration carefully, and keep a small gap from the cuticle on every layer.
Problem: Wrinkled or bumpy surface
Solution: Layers were too thick or cured in overlapping patches with a small lamp. Remove, reapply in thinner coats, and position the whole hand flat inside the lamp so all nails cure simultaneously.
Problem: Dull or cloudy finish after the final wipe
Solution: Residual tack or lint is usually the cause. Rewipe with a fresh lint-free wipe and fresh alcohol. If dullness remains, the top coat layer was too thin — apply another thin top coat and re-cure.
What Success Looks Like
Your manicure is successful when every nail is smooth, glossy, and completely dry to the touch with no tackiness, the color is even with no streaks or bald patches, and no polish touches the cuticle or surrounding skin. Press a fingernail against each nail: the surface should feel hard with no soft spots or dents. Run a finger across the free edge — it should feel sealed, with no lip of dried polish catching. Over the following week, watch for lifting at the edges; a well-applied gel manicure shows none. Expect the manicure to last two to three weeks, with wear at the free edge as your nails grow out being the normal reason for touch-up or removal.
Next Steps
Reapply cuticle oil daily — hydrated skin dramatically reduces lifting at the edges and keeps the manicure looking fresh. When growth at the base becomes visible or a chip appears, remove the gel rather than picking it off: file the shiny top layer, soak cotton in acetone, press it onto each nail, wrap with foil for 10-15 minutes, and gently push the softened gel off with a cuticle pusher. Never peel gel off, as it removes layers of your natural nail. Give your nails a day or two bare between manicures, with cuticle oil applied generously. If you notice persistent pain, discoloration, or damage to the nail plate, pause gel use and consult a professional before your next set.
Frequently Asked Questions
How long does an at-home gel manicure actually last?
With proper prep, most at-home gel manicures last two to three weeks. They rarely chip; the usual reason for redoing them is visible nail growth at the base. Poor prep shortens wear to just a few days.
Do I need a UV lamp or an LED lamp?
They cure different gel formulas at different speeds, and most polishes specify one or the other. LED lamps cure faster (30-60 seconds per layer) and are what most current kits include. Match your polish to your lamp type and follow the times printed on the bottles.
Why is there a sticky layer after curing, and should I wipe it off every time?
The tacky residue (the inhibition layer) forms where gel meets air. It is normal between coats — do not wipe it between layers, only after the final top coat. If your top coat is labeled ‘no-wipe,’ no final wipe is needed.
Are gel lamps safe for skin exposure at home?
Occasional home use involves low exposure — a few minutes per manicure, far less than typical sun exposure. If you are concerned, apply a broad-spectrum sunscreen to your hands 20 minutes before starting, or use fingerless UV-protective gloves.
Can I use regular nail polish with a gel kit, or gel without the lamp?
No in both directions. Regular polish will not cure properly under a lamp and gel polish will never fully harden without one. Use gel base, color, and top coat together with the matching lamp for a durable result.
Halloween Picks
halloween
As an affiliate, we earn on qualifying purchases.