TL;DR

Get beauty and skincare favorites delivered free — and shop member deals
- Fast, free delivery on millions of items
- Access to Prime Big Deal Days deals on October 6–7
- Prime Video, Amazon Music and more included
A gel nail polish kit bundles an LED lamp, base and top coats, gel colors, and prep tools so you can get 2–3 weeks of chip-free wear at home for $25–80 one-time, versus $35–60 per salon visit. Gel polish hardens when photoinitiators in the formula react with LED or UV light. Most nail damage and peeling problems come from rushed prep and improper removal — not the gel itself.
The math is almost rude. One salon gel manicure costs $35–60. A full at-home gel nail polish kit — lamp, polishes, tools, everything — costs $25–80 once. After about two manicures, every set of nails you do at home is essentially free gloss.
But gel at home is a skill, not a purchase. Do it right and your manicure shrugs off dishes, typing, and gym sessions for 2–3 weeks. Do it wrong and you’re peeling off polish along with layers of your actual nail plate.
In this guide, you’ll learn what’s inside a typical kit, how the curing chemistry actually works, a step-by-step beginner application, safe removal, and the ingredient trends (like HEMA-free formulas) worth knowing before you click buy.
A $25–80 gel kit pays for itself after about two uses compared to $35–60 salon visits, with refill polishes at $8–15 each.
Choose an LED lamp over UV: 30–60 second cures versus 2 minutes, plus longer bulb life — and get at least 24W of power.
Thin coats and thorough nail prep (buff, dehydrate, keep polish off skin) prevent the vast majority of peeling and lifting.
Never peel gel off — soak with acetone and foil for 10–15 minutes; peeling removes nail plate layers and causes thinning.
If you have sensitive skin, look for HEMA-free formulas; the EU restricted HEMA in home kits in 2021–2022 over allergy concerns.
What’s Actually Inside a Gel Nail Polish Kit
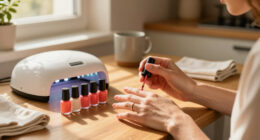
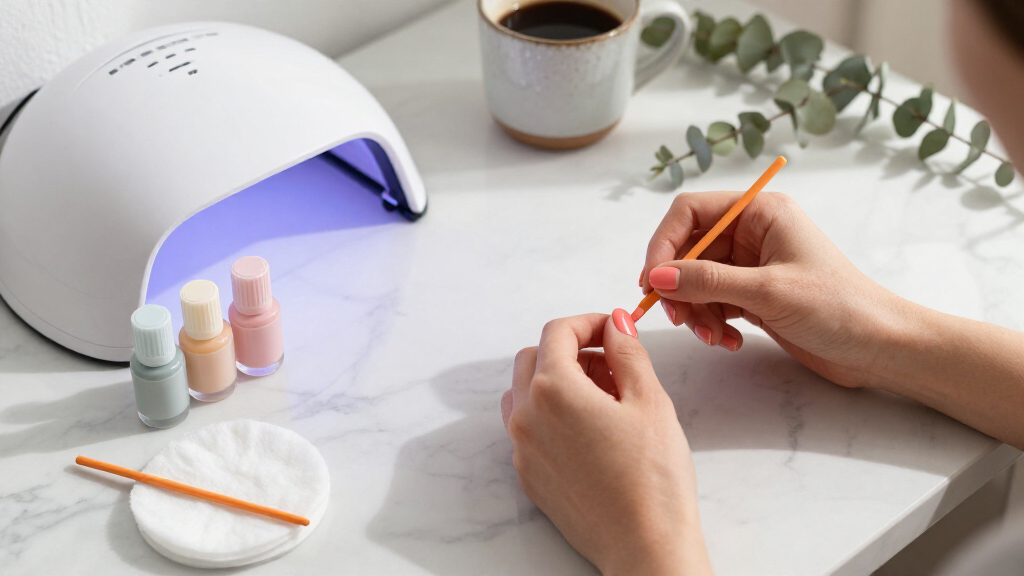
A gel nail polish kit is a bundled set that includes everything needed to cure gel polish at home: an LED or UV lamp, a base coat, colored gel polishes, a top coat, and prep accessories like files, buffers, and cleanser wipes. You’re buying a mini salon in a box.
Here’s the typical contents list, and where quality varies most:
- LED or UV lamp — the heart of the kit. LED lamps cure each layer in 30–60 seconds; older UV lamps take up to 2 minutes per layer. Nearly all new kits are LED because they’re faster and the bulbs last years longer.
- Base coat and top coat — the adhesive sandwich. Skimping here is why cheap kits peel.
- Gel color polishes — usually 4–12 shades depending on price.
- Prep tools — nail file, buffer, cuticle pusher, alcohol wipes or cleanser.
- Sometimes — remover tools, foil wraps, or fingerless UV-protection gloves.
Real-world example: a first-timer buys a $30 kit with a tiny 6W lamp and wonders why her polish stays tacky. A 24–48W lamp cures reliably; underpowered lamps are the number-one cause of beginner frustration.
How Gel Polish Works (And Why It Lasts 3 Weeks)
Gel polish hardens through a process called curing: photoinitiators in the formula activate when exposed to LED or UV light, triggering a chemical reaction that locks the polish into a hard, glossy, chip-resistant layer. Regular polish just air-dries by evaporation — gel polymerizes. That difference is the whole story.
Think of air-dried polish as dried paint, and cured gel as melted plastic that re-solidified around your nail. One sits on top. The other becomes a bonded shell.
That bond is why gel survives three weeks of dishwashing and why removal takes effort. It’s also why prep matters so much: any oil or dust trapped under the base coat gives the gel a weak spot to lift from. In plain terms — clean, dry, slightly rough nails stick; oily, smooth nails don’t.
Each coat must also be thin. A thick coat cures only at the surface, leaving soft gel underneath that wrinkles or peels within days.
LED vs. UV Lamps: Which One Should Be in Your Kit
LED lamps are the better choice for almost everyone: they cure each layer in 30–60 seconds versus up to 2 minutes for UV, they use less energy, and their bulbs last far longer. UV lamps aren’t dangerous villains — they just work slower.
| Feature | LED Lamp | UV Lamp |
|---|---|---|
| Cure time per layer | 30–60 seconds | Up to 2 minutes |
| Bulb lifespan | Years (50,000+ hours rated) | Replace bulbs periodically |
| Polish compatibility | LED-formulated gels (most modern gels) | All gel polishes |
| Energy use | Lower | Higher |
One compatibility note: LED lamps only cure gels labeled LED-compatible, while UV lamps cure everything. If your favorite polish is an older UV-only formula, check the bottle before buying.
7 Steps to a Gel Manicure That Doesn’t Peel by Friday
A successful at-home gel manicure comes down to seven steps done in order, with the most important being thorough nail prep and thin coats. Here’s the exact sequence:
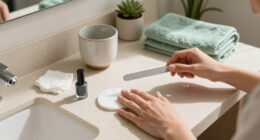
- Shape and buff. File nails to your preferred length, then lightly buff the surface so it’s slightly matte — this gives the base coat something to grip.
- Push back cuticles gently with a cuticle pusher. Gel adhering to cuticle skin is the top cause of early lifting.
- Dehydrate. Wipe each nail with alcohol cleanser to strip oils. Wait a beat, don’t touch anything.
- Apply thin base coat, avoiding skin and cuticles. Cure 30–60 seconds.
- Apply gel color in thin layers, curing between each. Two thin coats beat one thick one every time.
- Seal with top coat and cap the free edge of the nail — swipe the brush across the tip. Cure again.
- Wipe with cleanser to remove the sticky inhibition layer. Done. Admire.
Scenario worth remembering: a beginner skips step 3 because her nails ‘looked clean.’ By day four, the polish lifted at the cuticle in perfect little crescents. Ninety percent of peeling complaints trace back to skipped prep or thick coats, not bad polish.
How to Remove Gel Polish Without Wrecking Your Nails
Safe gel removal means soaking the polish off with acetone and foil wraps for 10–15 minutes — never peeling or ripping it off. Peeling is what gives gel its bad reputation, because it strips off layers of your natural nail plate along with the color.
Golden rule: if it’s still stuck after soaking, soak longer. Never scrape, pry, or peel.
The gentle method: buff the shiny top coat to break the seal, soak cotton pads in acetone, press onto nails, wrap in foil, wait 10–15 minutes, then slide the loosened gel off with an orange wood stick. Finish with cuticle oil, because acetone is brutally drying.
If your nails feel thin or ridged after repeated gels, give them a recovery break — a week or two bare, with oil and a strengthener, before the next set.
The HEMA Question: What’s in Your Polish (and What’s Changing)
HEMA (hydroxyethyl methacrylate) is the adhesion ingredient in many gel polishes — and also the most common trigger for gel-related allergic reactions, typically showing up as redness, itching, or swelling around the nail bed. It’s a documented sensitivity, not internet folklore.
The EU introduced restrictions on HEMA concentrations in home-use kits around 2021–2022, and many brands now advertise HEMA-free formulas alongside “9-free” and “21-free” labels listing omitted ingredients. If you’ve ever reacted to gel polish, HEMA-free is the first thing to look for.
On UV exposure: the dose from a lamp is small — cumulative sessions over decades are the theoretical concern, not your Tuesday manicure. Plenty of people apply SPF to their hands or wear fingerless UV-protection gloves anyway. Cheap insurance.
And a note on支持 for anyone with sensitive skin or pre-existing conditions: patch test new formulas, and check with a dermatologist before use if you have known allergies or are pregnant. Better safe than itchy.
Salon vs. At-Home Kit: The Honest Cost Breakdown
At-home gel kits cost $25–80 once and pay for themselves after roughly two uses compared to salon prices of $35–60 per visit. The trade is money for time and a learning curve — your first few sets won’t look salon-perfect.
| Factor | Salon Gel Manicure | At-Home Kit |
|---|---|---|
| Cost per manicure | $35–60+ every visit | $25–80 once, then ~$8–15 per refill polish |
| Wear time | 2–3 weeks | 2–3 weeks (with good technique) |
| Skill needed | None | Moderate — expect 3–5 practice sets |
| Time | ~1 hour plus travel | 45–90 minutes at home, any hour |
Salon-quality brands like OPI, Gelish, Beetles, Modelones, and Kiara Sky now sell directly to home users, so the quality gap has narrowed dramatically since 2020. Social media tutorials on TikTok and YouTube accelerated that shift hard.
Why Your Gel Is Peeling, Wrinkling, or Staying Sticky
Most gel problems boil down to three culprits: improper prep, coats applied too thickly, or an underpowered lamp. Match your symptom to the fix below.
- Peeling at the cuticle — oil or cuticle skin under the base coat. Re-cleanse and keep polish 1mm from skin.
- Wrinkled surface — coats too thick. The inner layer never fully cured; the top buckled.
- Sticky even after curing — a tacky inhibition layer is normal (wipe with cleanser); persistent stickiness means your lamp is weak or the polish is expired.
- Chipping at the tips — you didn’t cap the free edge with top coat.
- Lifting within days — skipped buffing or dehydration, or nail plates naturally oily.
Expired polish is the sneaky one. Gel has a shelf life of roughly 6–12 months after opening; if a bottle is six months old and behaving strangely, that’s your answer, not your technique.
Frequently Asked Questions
Are at-home gel nail polish kits worth it?
Financially, yes — one kit ($25–80) costs about the same as a single salon visit ($35–60), so it pays for itself in roughly two uses. The real cost is a learning curve: expect your first 3–5 sets to be imperfect before your technique settles in.
Do gel nail kits ruin your nails?
The gel itself doesn’t damage nails — improper removal does. Peeling or ripping polish off strips layers of the nail plate, causing thinning and ridges. Soak-off removal with acetone and foil wraps for 10–15 minutes, plus cuticle oil afterward, keeps nails healthy.
Why is my gel polish peeling or not curing properly?
Almost always one of three causes: oily or poorly prepped nails (lifts at the cuticle), coats applied too thickly (wrinkles because the underside never cured), or an underpowered/expired lamp or polish. Thin coats, thorough dehydration, and a 24W+ LED lamp solve most cases.
LED or UV lamp — which is better for home use?
LED, for almost everyone. It cures each layer in 30–60 seconds versus up to 2 minutes for UV, uses less energy, and its bulbs last years longer. The only catch: LED lamps require LED-compatible gels, while UV lamps cure every formula. Most modern gel polishes work with both.
How long do at-home gel manicures last?
With proper prep and thin layers, 2–3 weeks — comparable to salon results. Watch for visible nail growth at the cuticle around week two; that’s your cue for removal or a fresh set rather than waiting for chips.
Conclusion
If you take one thing from this: your lamp cures the polish, but your prep cures the manicure. Cleanse, buff, thin coats, capped edges, patient removal. Master those five habits and the kit earns its keep in glossy, three-week dividends.
Your first set won’t be perfect. Your third probably will be. And there’s a specific quiet satisfaction in answering “nice nails — where did you get them done?” with a shrug and “my kitchen table.”
Fall Picks
fall essentials
As an affiliate, we earn on qualifying purchases.