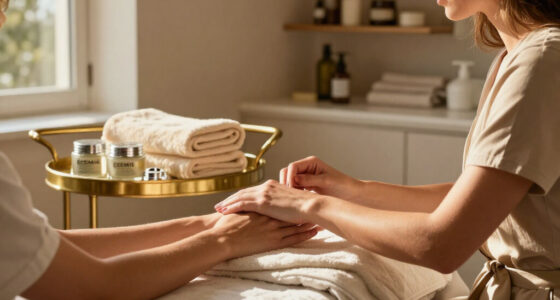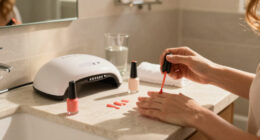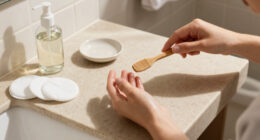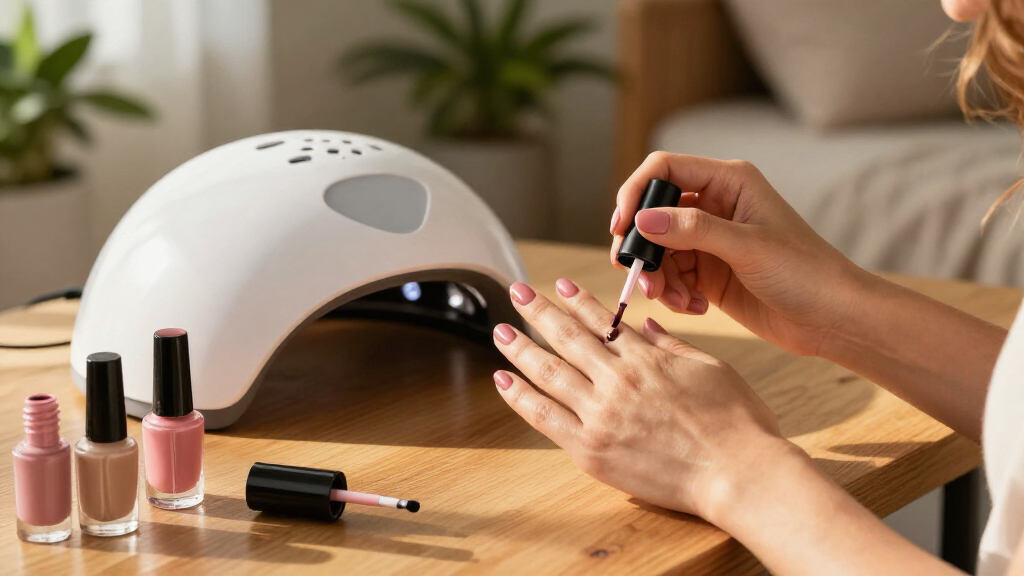
Use this guide to complete a gel manicure at home, from nail preparation through curing and cleanup. It is for beginners with a gel polish kit and a lamp that is compatible with the polish. Plan for about 60-90 minutes, including prep and curing; removal takes longer if you are starting with an existing gel manicure. Follow the product labels because curing times and removal methods vary between brands.

Get beauty and skincare favorites delivered free with Prime
- Fast, free delivery on millions of items
- Prime Video, Amazon Music and more included
- Member-only deals all year

Beetles Gel Nail Polish Kit with U V Light – 80Pcs 55 Colors Gel Nail Kit
- ✔ Color polishes: 55 bottles, 5 ml each
- ✔ Included coats: Base coat, no-wipe top coat, matte top coat, glitter top coat
- ✔ Lamp: Professional nail lamp included

Beetles Gel Nail Polish Kit with U V Light -54 Pcs 32 Colors Gel Nail Set
- ✔ Color polishes: 32 bottles
- ✔ Included coats: Base coat, no-wipe top coat, matte top coat, glitter top coat
- ✔ Lamp: Professional nail lamp included

VANREESA 148Pcs Gel Nail Polish Kit with U V Light Almond Nail Tips Nail Drill -60 All Seasons Colors Gel Polish Set with 6Pcs Ba…
- ✔ Color polishes: 60 bottles
- ✔ Coats: 2 base coats and 4 top coats
- ✔ Lamp: UV/LED lamp with 5-, 30-, and 60-second settings and sensor
Difficulty: Beginner | Time: 60-90 minutes
What You’ll Need
Tools & Materials:
- Gel nail polish kit with base coat, color, and top coat
- Lamp specified as compatible with the polish, such as the kit’s LED or UV lamp
- Nail file and buffer
- Cuticle pusher
- Lint-free wipes
- Nail cleanser or isopropyl alcohol, if specified by the kit
- Cuticle oil
- Acetone, cotton, foil or soak-off clips, and a wooden manicure stick for removing soak-off gel
Knowledge:
- Basic nail filing and cuticle care
- How to read the polish and lamp instructions
Check the polish and lamp instructions before starting. Products may need a particular lamp type and curing time. Work in a well-ventilated area, keep uncured gel off your skin, and stop if you develop burning, itching, swelling, or a rash. Do not cure polish that has touched your skin; wipe it away before placing your hand under the lamp.
Beetles Gel Nail Polish Kit with U V Light – 80Pcs 55 Colors Gel Nail Kit
For a polish-first setup, the 80-piece Beetles kit gives us the broadest color choice in this lineup without adding the drill and extensions found in VANREESA. Its 55 small 5 ml color bottles cover seasonal changes, while the base coat, no-wipe top coat, matte top coat, glitter top coat, lamp, and 20 tools make it possible to vary the finish as well as the shade. That breadth is the reason it ranks ahead of the 54-piece Beetles set: we get 23 more colors and six more tools, with the same general approach to application.The tradeoff is that more shades mean more bottles to sort and store, and the listed 5 ml size may not suit someone who wants fewer, larger bottles of favorite colors. This is still a gel kit, not a shortcut around prep or curing. Beetles advises using a certified 5V/2A adapter and curing each layer for at least 60 seconds; buyers should follow the product instructions and avoid skin contact. Compared with VANREESA, this set is less equipped for extensions because it does not list a drill or nail tips. It is the strongest fit when our priority is trying different gel colors and finishes on natural nails.
Pros:
- 55 color gel polishes for broad shade selection
- Includes base, no-wipe, matte, and glitter top coats
- Lamp and 20 nail tools are included
- Polish-focused setup is less extension-heavy than VANREESA
Cons:
- 55 small 5 ml bottles may be more variety than some users need
- No nail drill or extension tips are listed
- Requires careful prep and lamp curing
Best for: At-home users who want many seasonal shades and several top-coat finishes in a polish-centered kit.
Not ideal for: Buyers who want a nail drill and extension tips, or prefer a compact collection with fewer colors to organize.
Bottom line: Choose this Beetles set for the most color and finish variety in a comparatively straightforward gel polish kit.
“Choose this Beetles set for the most color and finish variety in a comparatively straightforward gel polish kit.”
Beetles Gel Nail Polish Kit with U V Light -54 Pcs 32 Colors Gel Nail Set
The 54-piece Beetles kit is the more restrained choice for buyers who want a lamp-included gel routine without starting with 55 shades. It includes 32 colors, a base coat, no-wipe, matte, and glitter top coats, plus 14 tools. That keeps the core finish options close to the 80-piece Beetles set, while trimming the shade and tool count. If we would rather spend our attention learning prep, thin application, and curing than sorting a larger color library, that smaller assortment is a sensible distinction.Its limitation is equally clear: less color range means fewer options for matching outfits, seasons, or nail-art ideas, and it does not include the drill and 240 tips that define VANREESA’s extension-oriented bundle. The description says to cure each layer for at least 60 seconds and to use a certified 5V/2A adapter. It also emphasizes avoiding skin contact and stopping if irritation occurs. As with the larger Beetles kit, the product listing does not specify lamp power or provide independent evidence for how long a manicure will last. This is the practical middle ground for a basic color-and-finish kit, not the pick for maximum variety or extensions.
Pros:
- 32 colors provide variety without the 55-bottle assortment
- Includes base, no-wipe, matte, and glitter top coats
- Lamp and 14 nail tools are included
- Polish-centered bundle keeps the routine relatively simple
Cons:
- Fewer colors and tools than the 80-piece Beetles kit
- No drill or nail tips are listed
- Layer-by-layer curing and careful prep still take time
Best for: Beginners or occasional home users who want several finish choices and a manageable set of colors.
Not ideal for: Anyone seeking the broadest shade range, drill-assisted removal, or included extension tips.
Bottom line: Pick the 54-piece set when a moderate color range and core finish coats matter more than a large collection.
“Pick the 54-piece set when a moderate color range and core finish coats matter more than a large collection.”
VANREESA 148Pcs Gel Nail Polish Kit with U V Light Almond Nail Tips Nail Drill -60 All Seasons Colors Gel Polish Set with 6Pcs Ba…
VANREESA takes the most ambitious approach: alongside 60 colors and six base/top-coat bottles, it includes a lamp, a nail drill with bits and sanding bands, 240 almond tips, and additional manicure tools and decorations. That combination serves a different buyer than either Beetles kit. If we want to practice shaping extensions as well as painting natural nails, the drill and tips give this bundle a clear purpose; the 80-piece Beetles kit offers a more color-led setup, while the 54-piece one is less extensive still.That extra capability brings a steeper learning curve and more equipment to store. A drill can help with shaping and removal, but it also requires learning to use the bits carefully. The listing describes 15 tip sizes and a lamp with 5-, 30-, and 60-second settings and a hand sensor, though it does not give lamp wattage. It also says pictured polish colors reflect two coats and may vary by lighting or display. We should not choose this solely for its piece count: it makes the most sense if we intend to use extensions and drill-assisted prep. For straightforward gel color changes, one of the Beetles bundles is a less involved fit.
Pros:
- 60 gel colors and six base/top-coat bottles
- Includes a lamp with sensor and three timer settings
- Nail drill includes six bits and six sanding bands
- 240 almond tips in 15 sizes support extension projects
Cons:
- Drill and extension tools add complexity for a basic manicure routine
- More components require storage and technique practice
- Color appearance may differ from images and across lighting
Best for: DIY users who specifically want to explore almond nail tips, extensions, drill-assisted shaping, and gel color.
Not ideal for: People seeking a simple natural-nail polish kit, or anyone uncomfortable learning drill technique and extension application.
Bottom line: Choose VANREESA when extensions and shaping are part of the plan; skip its extra equipment if we only want gel polish.
“Choose VANREESA when extensions and shaping are part of the plan; skip its extra equipment if we only want gel polish.”
As an Amazon Associate we earn from qualifying purchases.
Before You Start
Set out all tools and check that the lamp works. Keep the polish away from your skin and eyes. Uncured gel can cause an allergic reaction, and repeated skin contact increases the risk. Do not use gel polish on irritated, broken, or infected skin. If the lamp or polish instructions are missing, do not guess at curing times; get product guidance before applying.
Remove any old polish using the method recommended for that product. If you have hard gel or extensions, do not try to soak them off as if they were soak-off gel. Avoid cutting cuticles; gently push them back only if they move easily.
Step-by-Step Instructions
Step 1: Prepare your nails
Wash and dry your hands. Shape each nail with a file, working in one direction, then gently push back loose cuticle tissue. Lightly buff the nail surface only if your kit instructs you to; aggressive buffing can thin the nail. Remove dust with a dry brush or lint-free wipe. Apply cleanser or alcohol only if the kit calls for it, then let the nails dry fully.
Tip: Do not apply hand cream or cuticle oil before polish. Oil and moisture can interfere with adhesion.
Check: Each nail is dry, smooth, free of dust, and has no polish or product on the skin around it.
Step 2: Apply a thin base coat
Roll the base coat bottle gently if its label directs you to mix it. Brush a very thin layer over one nail at a time, leaving a small gap between the gel and your skin. If polish touches skin, remove it with a clean, lint-free wipe or the tool recommended by the kit before curing. Seal the free edge with a light brush stroke only if the product directions recommend it. Cure your hand for the exact time specified for the lamp and base coat.
Tip: Thin layers cure more reliably than thick ones. Keep your fingers flat and centered under the lamp so each nail receives light.
Check: The base coat has cured for the listed time, with no gel on your skin or pooled at the nail edges.
Step 3: Brush on the first color layer
Apply a thin, even coat of color, starting near the center of the nail and guiding the brush toward the sides without touching skin. Keep the layer away from the cuticle and sidewalls. Clean up any skin contact before curing, then cure for the polish’s stated time. Some gel colors feel tacky after curing; leave that layer in place unless the instructions tell you to wipe it.
Tip: Use less polish on the brush near the cuticle. A small gap gives you room to apply color without flooding the skin.
Check: The color is cured according to the label. It may look slightly sheer after one coat, which is normal for many shades.
Step 4: Add another color coat if needed
Apply a second thin coat to even out the color, repeating the careful brush placement and skin cleanup. Cure it for the full time listed on the product. Add a further thin coat only if the polish instructions allow it and the color still needs coverage; cure each coat separately.
Tip: Do not try to cover streaks with one thick layer. Thick gel can wrinkle or remain uncured beneath the surface.
Check: The color looks even at the nail edges and center, with no lumps or uncured gel on the surrounding skin.
Step 5: Seal with top coat
Brush on a thin, even top coat without touching the skin. Follow the label if it recommends sealing the free edge. Cure for the full listed time. Check whether the top coat is no-wipe or leaves a tacky layer. For a top coat that needs wiping, use the specified cleanser and a fresh lint-free wipe after curing; do not wipe a no-wipe finish.
Tip: Keep the top coat thin around the sidewalls to prevent a raised bead that can lift.
Check: The finish is cured, smooth, and glossy, or has the matte appearance specified by the product.
Step 6: Finish and check the manicure
Wait until the lamp cycle ends before removing your hand. Check each nail for uncured polish on the skin, rough edges, or areas that remain soft. Do not apply more gel over a problem spot without following the product’s instructions. Once the finish is complete, wash your hands if appropriate and apply cuticle oil around the nails, avoiding any uncured product.
Tip: If your skin feels hot under the lamp, remove your hand and let the heat pass. Check the product directions before resuming; a thick layer may need to be removed and reapplied thinly.
Check: The nails feel hard and smooth, with no polish attached to skin and no soft or wrinkled patches.
Common Mistakes to Avoid
- Getting gel polish on the cuticle or surrounding skin. — Use a small amount of polish, leave a narrow gap at the edges, and clean skin contact before curing.
- Applying thick color or top-coat layers. — Brush on thin coats and cure each one for the time given by the product maker.
- Using a lamp that is not compatible with the polish. — Check the polish instructions for lamp type and wavelength guidance; do not rely on a lamp’s appearance or wattage alone.
- Peeling or picking off gel when it starts to lift. — Remove soak-off gel according to its label. Picking can strip layers from the natural nail.
Troubleshooting
Problem: The polish wrinkles or remains soft after curing.
Solution: Stop layering product over it. Remove the affected polish safely, check that the lamp matches the product and is working, then reapply thinner layers with the listed cure time.
Problem: The manicure lifts or chips soon after application.
Solution: For the next application, remove dust and oils, keep polish off the skin, and cap the edge only as directed. Check that each coat cured fully and that the nail was dry before application.
Problem: The polish feels sticky after the final cure.
Solution: Check whether the top coat is a wipe type. If so, remove its inhibition layer with the cleanser specified by the kit. If it is labeled no-wipe, do not wipe it; inspect the lamp and cure directions if it still feels soft.
Problem: Your skin burns, itches, swells, or develops a rash.
Solution: Stop using the product and remove any uncured gel from the skin. Do not apply more gel. Seek medical advice if symptoms persist or worsen; avoid that product until you have professional guidance.
What Success Looks Like
A successful manicure has smooth, even color and a fully cured top coat. No gel touches the cuticle or surrounding skin, and the finish has no wrinkles, soft patches, or thick pooled edges. Your nails should not hurt or show a skin reaction. If the coating stays soft after the specified cure time, treat the application as incomplete and address the lamp, product compatibility, or layer thickness before wearing it.
Next Steps
Wear the manicure only while it remains intact. If an edge lifts, do not pull it off; remove the gel using the product’s removal directions. For soak-off gel, file the shine from the top coat only if directed, protect surrounding skin, and use acetone with cotton and foil or clips for the stated time. Gently lift softened product with a wooden stick; never force or scrape firmly. Repeat the soak if gel remains, or ask a nail professional to remove hard gel or extensions. Wash your hands and apply cuticle oil after removal.
Frequently Asked Questions
Can I use any UV or LED lamp with my gel polish?
No. Match the lamp to the polish maker’s instructions. Lamps can differ in wavelength and curing performance, so a polish that looks hard may still be undercured if the lamp is not compatible.
Why is gel polish still sticky after curing?
Some gel layers and wipe-type top coats leave a tacky surface by design. Check the label. Wipe only when the product instructions call for it and use the specified cleanser.
How many coats of gel color should I apply?
Follow the product directions. Many colors need two thin coats for even coverage. Cure each coat separately, and avoid adding a thick layer to hide streaks.
How do I remove gel nail polish without damaging my nails?
Use the removal method listed for your product, allow enough time for soak-off gel to soften, and lift it gently. Do not peel, pry, or scrape firmly. Get professional help for hard gel or extensions.