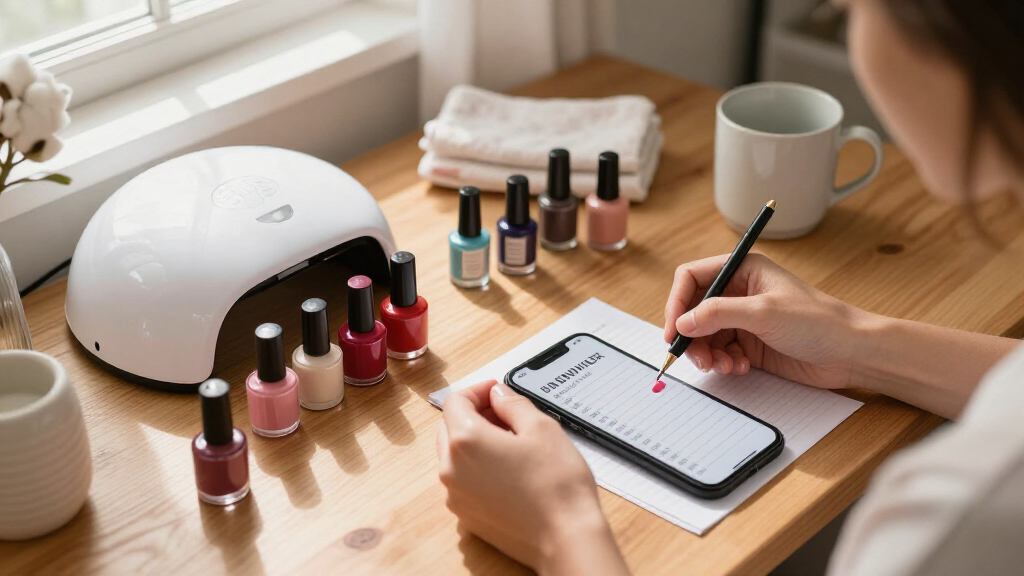

This checklist is for anyone assembling a gel manicure setup, whether you’re starting from scratch or replacing a few essentials. It covers the core lamp and prep tools, plus guidance for choosing base coat, top coat, polish, and removal accessories.

Get beauty and skincare favorites delivered free with Prime
- Fast, free delivery on millions of items
- Prime Video, Amazon Music and more included
- Member-only deals all year
The sections follow the order you’ll typically consider products: curing equipment, coating layers, color, nail preparation, and removal. Some slots name a specific pick; others are advice-only, so you can compare options that suit your routine.
Use each section to check compatibility, fit, and ease of use before adding an item to your kit. Read product instructions carefully, especially for lamp curing and polish removal, and make sure your chosen products are intended to work together.
LED Nail Lamp
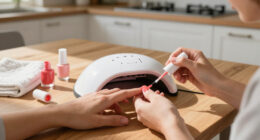
A lamp is a central part of a gel setup: the polish system needs the appropriate light and curing process to set as directed. The listed pick is the Dual Port UV LED Nail Lamp with Thumb Slot, 72W UV Light for Gel Nails. Before choosing it, check that its product instructions and your gel polish instructions are compatible; a lamp’s stated wattage alone does not establish that every formula will cure correctly.Look closely at the lamp’s opening and how your hand or foot sits inside. A thumb slot can be useful to consider if you want to position the thumb separately, but check that the overall interior accommodates your fingers comfortably and lets you follow the manufacturer’s placement directions. Common mistakes include focusing only on wattage, assuming all UV/LED products use the same curing instructions, and overlooking whether the controls and opening work for your routine. Compare the lamp’s stated curing guidance with the specific gel products you plan to use, and follow both sets of instructions rather than extending or shortening curing time by guesswork.
What to look for:
- Curing instructions compatible with your gel polish
- Interior space that suits your hand placement
- A thumb position that works with your routine
- Clear controls and operating instructions
- Manufacturer guidance for lamp use
Dual Port UV LED Nail Lamp with Thumb Slot, 72W UV Light for Gel Nails
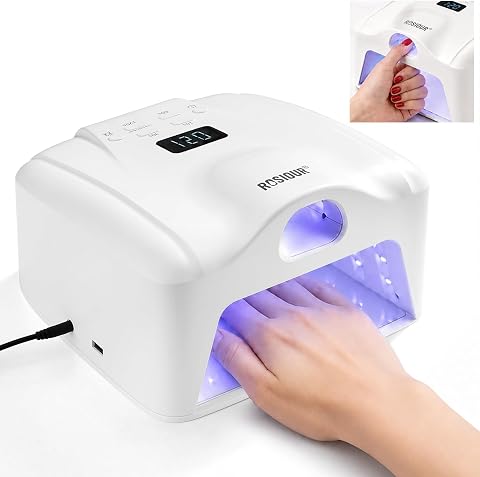
This 72W UV LED nail lamp features a dedicated thumb slot with focused LEDs for even coverage, suitable for various nail styles. It offers dual curing zones, multiple timer settings with a digital display, and a removable base for easy cleaning, making it ideal for home and salon use.
Pros:
- Dedicated thumb slot ensures even curing for all fingers
- Multiple timer options with digital display for precise control
- Removable base makes cleaning easier
Cons:
- Not rechargeable; requires constant power supply
- May be bulky for small workspaces
- Limited to UV/LED gel curing only
Best for: Shoppers considering a lamp with a dedicated thumb slot
Not ideal for: Anyone whose gel products specify incompatible curing guidance
Bottom line: Choose this lamp only after checking its instructions against the gel products you intend to cure.
Gel Base Coat
Base coat is the layer that goes beneath gel color, so choose one intended for the polish system you plan to use. Compatibility matters more than a label that simply says “gel”: formulas and application directions can vary, and the base coat’s instructions should fit both the color coat and curing setup. Since this slot has no specific product pick, use your polish manufacturer’s guidance as the starting point.A common buying mistake is treating base coat as interchangeable with top coat or skipping the directions for application and curing. Check how the product is meant to be applied, whether it calls for a particular lamp type, and whether it is intended for use with your chosen color. Also consider the bottle and brush format if you want control around the cuticle area. Keep product off the surrounding skin and follow the label’s safety and removal instructions. When in doubt, build your kit around products with clearly compatible directions instead of mixing items based on appearance alone.
What to look for:
- A base coat intended for gel polish
- Compatibility guidance for your color coat
- Curing directions that match your lamp
- Application instructions suited to your routine
- Clear safety and removal directions
Gel Top Coat
Top coat is the finishing layer of a gel manicure, so its instructions should work with the color and lamp you have selected. This section is advice-only, with no named product. Decide whether the top coat’s stated finish and application directions suit the look you want, then confirm that it is intended to be used with your gel color system.Do not assume every top coat has identical finishing or cleansing steps. Check the label for curing instructions and whether the product specifies any step after curing. A frequent mistake is choosing a top coat based on finish alone while overlooking compatibility or the final care instructions. Consider the brush and bottle format as well: comfortable, controlled application can help you keep product where it belongs. Follow the product directions closely, avoid skin contact, and make sure your planned removal method is appropriate for the complete manicure system. Keeping the base coat, color, top coat, and lamp instructions aligned makes the shopping decision easier to manage.
What to look for:
- A finish that matches your preference
- Compatibility with your gel color
- Curing directions for your lamp setup
- Any stated post-cure cleansing steps
- Clear application and removal instructions
Gel Nail Polish
The listed pick is the VANREESA 148-Piece Gel Nail Polish Kit with UV Lamp, Nail Drill, and A. Before buying a kit, review the complete product listing and included-item details so you know what is actually supplied and whether it covers your needs. The product name mentions a UV lamp and nail drill, but check the manufacturer’s instructions and the specific contents rather than assuming that every accessory or shade you expect is included.For any gel polish, compare its application and curing directions with the lamp you intend to use. Kits can combine multiple items, but that does not automatically mean every component matches products you already own. Common mistakes include overlooking the curing requirements, not checking how the polish should be removed, and buying a large set without considering whether its contents suit your routine. Review the listed shades, bottle details, instructions, and any stated compatibility information. If you already have a lamp, prep products, or removal tools, compare the kit’s contents against what you own to avoid choosing based on the kit title alone.
What to look for:
- A complete item list in the product details
- Curing instructions compatible with your lamp
- Shade and bottle details that meet your needs
- Application and removal directions
- Clear information about the included lamp and drill
VANREESA 148-Piece Gel Nail Polish Kit with UV Lamp, Nail Drill, and Almond Tips

This kit includes 60 gel polish colors, base and top coats, a UV/LED nail lamp, a nail drill with bits and sanding bands, almond nail tips, and manicure accessories for at-home use. The lamp has three timer settings and a hands-free sensor, while the polish is described as low-odor with a glossy finish.
Pros:
- Includes polish, lamp, drill, nail tips, and manicure accessories
- 60 colors for different seasons and occasions
- Lamp offers three timer settings and an automatic sensor
- Nail tips come in 15 sizes
Cons:
- Polish may look different under different lighting or displays
- Gel polish requires care to avoid contact with skin, eyes, and mouth
Best for: Shoppers comparing a kit with several manicure components
Not ideal for: Anyone who needs verified details before choosing bundled items
Bottom line: Confirm the kit’s contents and curing guidance before deciding it fits your setup.
Nail Dehydrator
Nail preparation products are worth checking carefully because their instructions affect how you prepare the nail before applying gel. The named pick is Aprés pH Bonder 15ml Nail Dehydrator Prep & Cleanse. Read its directions to understand its intended role and where it belongs in your prep sequence; don’t assume that products described as dehydrators, bonders, or cleansers all serve the same purpose.Consider how the product fits with the rest of your manicure system and follow the label for application and handling. A common mistake is applying prep products in an improvised order or using more than the instructions call for. Check whether your base coat or polish maker provides a recommended prep routine, and use compatible directions as your guide. Take care to avoid contact with surrounding skin, and do not substitute this product for a base coat or another layer unless the manufacturer says to do so. The bottle size is stated in the product name; assess the format against how often you expect to do your nails, without assuming a particular amount of use per manicure.
What to look for:
- Directions explaining the product’s role in nail prep
- A prep sequence compatible with your gel system
- Clear application and handling guidance
- Instructions for use before the base coat
- A bottle format suited to your routine
Aprés pH Bonder 15ml Nail Dehydrator Prep & Cleanse

Aprés pH Bonder is a professional-grade nail dehydrator that prepares natural nails for gel, acrylic, or gel-X extensions. It dehydrates and cleanses the nail surface to promote long-lasting adhesion and durability.
Pros:
- Prepares nails for strong adhesion
- Versatile for various nail applications
- Easy and quick to use
Cons:
- Requires careful handling to avoid over-drying
- Limited to 15ml size
Best for: Shoppers looking for a dedicated nail-prep product
Not ideal for: Anyone expecting a prep product to replace other manicure layers
Bottom line: Use Aprés pH Bonder according to its directions and your gel system’s prep guidance.
Gel Polish Remover Clips
Remover clips can be part of a gel removal routine, but they should be considered alongside the remover and removal directions for your polish. This is an advice-only slot with no specific product pick. Before buying clips, check whether your chosen removal method calls for them and whether the clip design can be positioned comfortably on your fingers.Fit and ease of handling matter more than choosing clips by appearance. Look for a design that can hold the intended removal material in place without making it difficult to use, and check the product information for any guidance on hand or nail compatibility. A common mistake is treating clips as the remover itself: they are an accessory, so confirm that you have a suitable remover and clear instructions for the complete process. Follow the polish maker’s removal guidance, avoid forceful scraping or picking, and stop if the process causes discomfort. If your system specifies a different removal approach, use that guidance rather than buying clips by default.
What to look for:
- A clip shape that fits your fingers comfortably
- Product details explaining how the clips are used
- Compatibility with your chosen removal method
- Secure placement for the intended removal material
- Removal guidance from your polish manufacturer
Build your kit in a practical order: start with a compatible lamp and gel system, then choose the base coat, color, and top coat that work together. Add prep and removal products according to the instructions for those items, rather than buying every accessory before you know your routine.
You can assemble a useful setup one step at a time. Keep product directions handy, check compatibility before combining items, and choose tools that feel manageable to use. A little careful comparison can help you avoid mismatched products and make your manicure routine easier to follow.
Halloween Picks

Vexalify 11-Inch Halloween Pumpkin Fog Machine with Bluetooth Speaker and 12-Color LED Lights

MGparty 14.5FT Halloween Inflatable Walk-in Pumpkin House with LED Lights

Pumpkin Halloween Fog Machine with 12-Color LEDs, Bluetooth Speaker, and Remote
As an affiliate, we earn on qualifying purchases.