To create stunning sugar effect nails, start by gathering your glitter and crystal materials, then prepare your nails with a clean base and smooth layer of base coat. Apply your chosen background color, then generously add textured glitter and small crystals to mimic sugar granules using tweezers for precision. Seal the design with a clear top coat to lock in the texture. For detailed steps that will bring your textured glitter design to life, keep exploring further tips and techniques.
Key Takeaways
- Prepare nails with a smooth base coat and colorful polish for optimal adhesion and vibrant background.
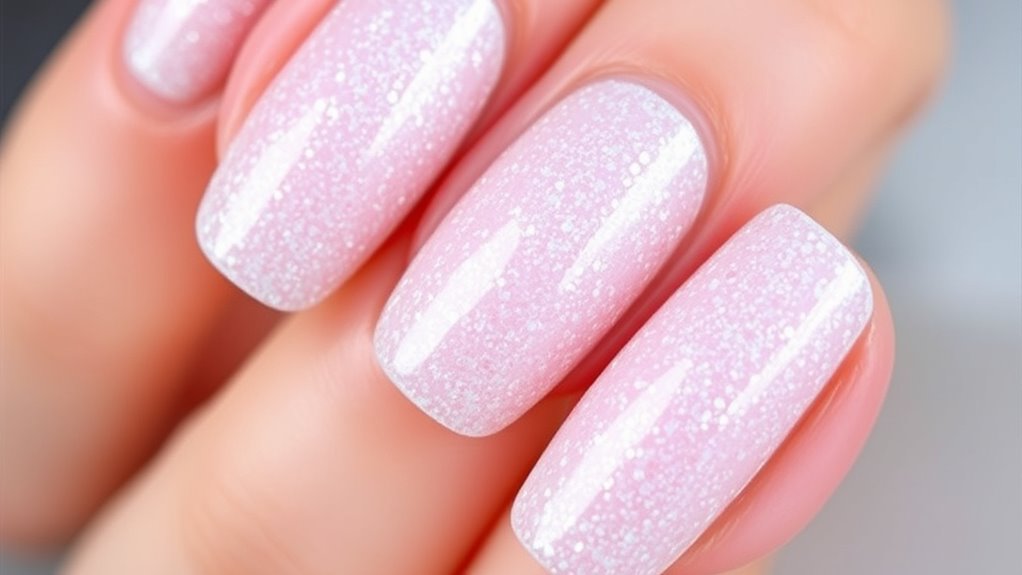
- Apply a generous layer of fine glitter to create a textured, sugar-like surface.
- Use small, irregular crystals or chunky glitter to enhance the textured, sugar effect.
- Seal the design with a high-quality clear top coat in thin layers to protect and lock in the texture.
- Maintain longevity by reapplying top coat regularly and avoiding harsh chemicals or excessive water exposure.
Top picks for "step sugar effect"
Open Amazon search results for this keyword.
As an affiliate, we earn on qualifying purchases.
Gathering Your Materials and Tools

Before you begin, gather all the necessary materials and tools to guarantee a smooth process. You’ll need a selection of nail polishes with your chosen color combinations, along with fine and chunky glitters for the sugar effect. Prepare a clean buffer and nail file to shape your nails, and don’t forget a base coat to ensure longevity. A small brush or toothpick helps with precise glitter placement, so keep one handy. Gather top coats for sealing your design. Having everything within reach prevents interruptions and allows you to focus on creating the perfect textured look. Pay close attention to your color combinations, as they set the overall vibe of your nails. Proper preparation makes the glitter application smoother and helps achieve a professional, eye-catching sugar effect. Additionally, understanding electric bike horsepower can inspire creative color schemes and effects inspired by the dynamic power of electric motors.
Preparing Your Nails for Application
Start by cleaning your nails thoroughly to remove any oils or debris. Next, shape and buff your nails to create a smooth surface for the polish. Finish by applying a base coat to protect your nails and improve adhesion.
Clean Nail Surface
To guarantee your nail polish or nail art lasts, begin by thoroughly cleaning your nail surface. Proper nail hygiene is essential; remove any oils, lotions, or residues that can interfere with adhesion. Use a gentle nail cleanser or acetone to wipe each nail, ensuring a clean, dry surface. Pay attention to cuticle care—pushing back cuticles and removing excess skin helps create a smooth canvas for your design. Avoid cutting or trimming cuticles aggressively, as this can cause damage or infection. Once your nails are clean and free of oils, your surface will be primed for the textured glitter design. This step ensures better adhesion, longer-lasting results, and a professional finish for your sugar effect nails.
Shape and Buff
Shaping and buffing your nails creates a smooth, even surface that enhances the adhesion of your polish or nail art. Proper shaping guarantees your nails are uniform, which is vital for clean, professional-looking designs. Buffing removes ridges and adds a matte finish, helping texture techniques like sugar effect nails adhere better. To get the best results, focus on these steps:
- Shape your nails into your desired form using a nail file.
- Gently buff the surface with a fine buffer to eliminate imperfections.
- Clean off dust and oils to prepare for the next steps in your nail art process.
Apply Base Coat
Applying a base coat is an essential step to guarantee your nail art lasts and looks flawless. It acts as a primer, protecting your nails from staining and creating a smooth surface for application. The base coat benefits include adhesion improvement, nail strengthening, and preventing chipping. Proper nail prep involves cleaning your nails thoroughly and removing oils, ensuring the base coat bonds well. Use a thin layer and let it dry completely before moving on. This simple step enhances durability and helps your textured glitter design stay vibrant longer. Here’s a quick guide:
| Step | Tip | Benefit |
|---|---|---|
| Clean nails | Remove oils | Better adhesion |
| Apply thin coat | Avoid lumps | Even surface |
| Let dry | Wait 1-2 mins | Better durability |
| Use quality base | Prevent stains | Protect nails |
| Finish completely | No rush | Longer-lasting design |
Adding a fresh layer of base coat can also help to smooth out imperfections on uneven nails, providing an even canvas for your glitter design.
Applying a Base Coat for a Smooth Surface

Before applying your base coat, make sure your nails are clean and free of oils or residue. This step helps create a smooth surface for better adhesion. Using a nail prep can further ensure your nails are properly prepared for the polish. Once prepared, evenly apply the base coat to guarantee a flawless foundation for your sugar effect nails.
Preparing the Nail Surface
To guarantee your nail surface is smooth and ready for the design, start by applying a quality base coat. This step helps improve nail health and creates a barrier that enhances polish adhesion. Before applying, ensure your nails are free of polish and residue by thoroughly removing any old polish with a gentle remover. Proper preparation avoids uneven textures and promotes better adhesion for your glitter design. Additionally, using a base coat specifically formulated for textured or glitter nails can further improve the longevity and appearance of your manicure.
Applying the Base Coat
Once your nails are clean and free of old polish, it’s important to apply a thin, even layer of base coat. Proper nail prep guarantees your surface is smooth and ready for color, helping your manicure last longer. When applying the base coat, use gentle, even strokes from cuticle to tip, avoiding excess product that can cause unevenness or bubbles. The goal of base coat application is to create a smooth foundation that enhances adhesion and prevents staining. Allow the base coat to dry completely before proceeding to the next step. This initial layer helps to protect your natural nails and ensures a flawless finish for your sugar effect nail design. Taking your time with nail prep and base coat application sets the stage for stunning, textured glitter nails. Hydrocolloid technology promotes healing by drawing out impurities, which can be beneficial if you have pre-existing blemishes on your nails or surrounding skin.
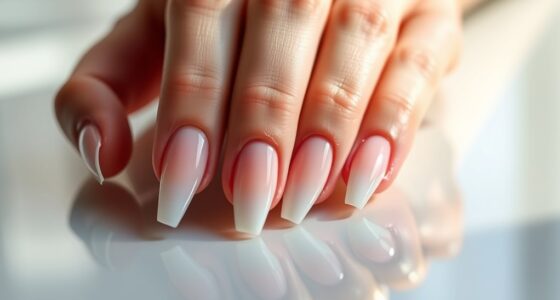
Choosing and Applying Your Base Color

Choosing the right base color sets the foundation for a stunning nail look, so it’s important to pick one that complements your skin tone and matches your style. Consider your overall color palette and decide whether you want a neutral, bold, or pastel shade. When applying your base color, keep these tips in mind:
- Use smooth, even strokes to avoid streaks.
- Apply thin coats to ensure quick drying and a flawless finish.
- Let each layer dry completely before adding the next.
This application technique helps create a smooth surface, making your textured glitter design pop. Selecting a color that suits your tone and applying it carefully *guarantees* your sugar effect nails will look polished and vibrant, setting the perfect stage for the glitter and crystals to shine.
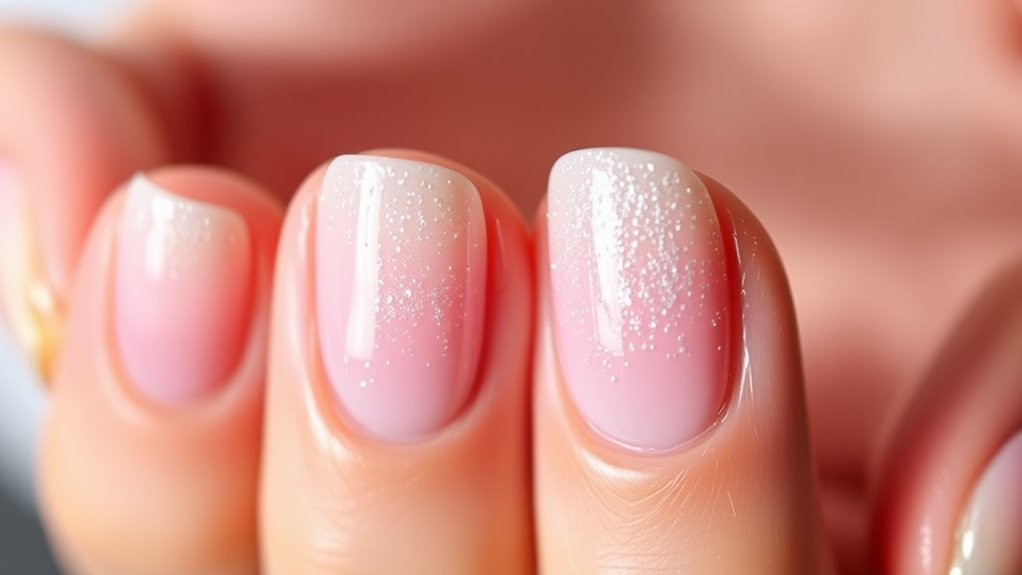
Creating the Sugar Effect With Glitter and Crystals

Creating the sugar effect with glitter and crystals involves carefully layering textured elements to achieve that signature sparkling look. Start by applying a generous layer of glitter, ensuring even coverage for a textured base. For crystal placement, select small crystals that resemble sugar granules and position them strategically on the nail, focusing on areas you want to highlight. Use a fine tool or tweezers for precise placement, creating a natural, scattered effect. To help visualize, here’s a quick guide:
| Step | Action | Tip |
|---|---|---|
| 1 | Apply glitter evenly | Use a flat brush for smoothness |
| 2 | Select crystals | Choose tiny, irregular shapes |
| 3 | Place crystals | Use tweezers for accuracy |
| 4 | Layer for texture | Add more glitter/crystals as needed |
| 5 | Let dry | Avoid disturbance |
This method guarantees your nails sparkle with a textured, sugar-inspired finish. Additionally, understanding the cycle of breakups can help you navigate emotional challenges related to relationship stress, making your nail art process even more rewarding.
Securing the Texture With a Top Coat

After applying the glitter and crystals to achieve that sparkling sugar effect, it’s important to protect and seal the design. A good top coat application ensures durability and maintains the textured look. To nail sealing effectively, follow these steps:
- Use a high-quality, clear top coat to evenly cover the textured surface without disturbing the crystals.
- Apply the top coat in thin, smooth layers to prevent smudging or lifting the glitter.
- Allow each layer to dry completely before adding another, ensuring a strong, protective seal.
- For added safety and to prevent damage, consider using a transfer switch to ensure the longevity of your manicure under various conditions.
This process locks in the glitter and crystals, preventing chipping and ensuring your sugar effect nails stay stunning longer. Proper sealing is essential for a professional finish and long-lasting design.
Finishing Touches and Nail Care Tips
To keep your sugar effect nails looking flawless, adding some finishing touches and practicing proper nail care is essential. Start by ensuring your nails are well-hydrated; use a nourishing cuticle oil daily to prevent dryness and cuticle damage. Proper cuticle care not only improves appearance but also promotes healthy nail growth. After completing your design, apply a thin layer of top coat to seal in the texture and add shine, which also helps protect your nails from chipping. Regularly moisturize your hands and nails to maintain flexibility and prevent breakage. Avoid harsh chemicals and excessive water exposure, as these can weaken your nails and dull your design. Incorporating eco-friendly living practices, such as using non-toxic nail products, can further enhance your nail health and sustainability. These simple steps will keep your sugar effect nails vibrant and healthy longer.
Maintaining Your Sugar Effect Nails for Longevity

Keeping your sugar effect nails looking fresh and vibrant requires consistent maintenance. To maximize nail polish longevity and ensure glitter adhesion, follow these tips:
- Apply a clear top coat every 2-3 days to seal the glitter and prevent chipping.
- Avoid exposing your nails to harsh chemicals or prolonged water contact, which can weaken the polish.
- Use cuticle oil daily to keep your nails and surrounding skin hydrated, enhancing the durability of your manicure.
- Be mindful of proper nail surface preparation before applying your polish to improve adhesion and prevent lifting or peeling.
These steps help preserve the textured glitter design, maintain your nail polish’s shine, and prevent premature peeling. Regular touch-ups and gentle handling extend the life of your sugar effect nails, keeping them looking stunning longer. Proper maintenance is key to enjoying your textured glitter nails for weeks.
Frequently Asked Questions
How Do I Remove Sugar Effect Nails Without Damaging Them?
To remove sugar effect nails without damage, you should opt for gentle removal techniques. Soak a cotton ball in acetone, then place it on your nail, wrapping it with foil to let it sit for about 10-15 minutes. This softens the textured glitter, making it easier to gently lift off without harming your natural nails. Always prioritize nail protection by avoiding force and using nourishing cuticle oil afterward for recovery.
Can I Recreate This Design on Short Nails?
In a heartbeat, you can recreate this stunning sugar effect design on short nails. Focus on design adaptation by using smaller glitter pieces and a detailed brush for precision. Keep the textured look intact, even with limited space. Short nails may require a simplified or more concentrated version of the design, but with creativity, you’ll achieve a gorgeous textured glitter finish that’s just as eye-catching.
What Are Common Mistakes to Avoid During Application?
During application, avoid common mistakes like rushing the process or skipping proper preparation. Use an even application technique to prevent uneven texture, and choose the right glitter selection for your desired effect. Make certain to apply a clear top coat to seal the design and prevent glitter fallout. Also, avoid overloading your brush, which can cause uneven layers. Taking your time ensures a beautiful, professional-looking sugar effect nail design.
How Long Does the Sugar Effect Last With Proper Care?
Your sugar effect nails can shine like stars for up to three weeks with proper care. To keep them looking fresh, follow durability tips like avoiding harsh chemicals and wearing gloves during chores. Maintain their sparkle with regular gentle touch-ups and routine moisturizing. Think of your nails as delicate art; with a little love and attention, their textured glitter design stays stunning and vibrant longer, making every glance a moment of admiration.
Are There Specific Glitter Types Best for This Design?
For the best nail texture, choose fine or chunky glitter depending on your desired look. Fine glitter creates a subtle, smooth texture, while chunky glitter offers a bold, textured finish. When selecting glitter, opt for those with a strong adhesion and vibrant color to guarantee longevity. The right glitter selection enhances your sugar effect nails, making your textured design stand out beautifully and last longer with proper care.
Conclusion
Now your nails are transformed into dazzling works of art that could outshine stars! With every glittering sparkle and textured detail, you’ve created a masterpiece that screams confidence and style. These nails aren’t just a look—they’re a statement that demands attention and admiration. Get ready for compliments to pour in endlessly. You’ve revealed the secret to turning a simple manicure into an unstoppable, jaw-dropping showstopper. Shine on and let your nails steal the spotlight forever!