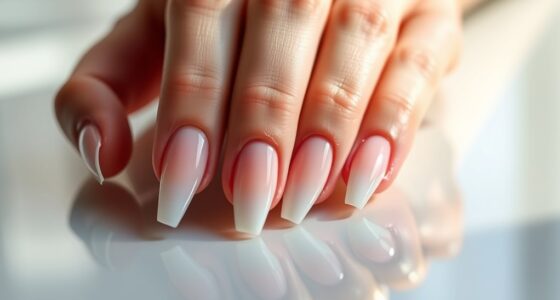
To safely remove dip powder nails at home, start by gathering acetone, cotton balls, foil wraps, a nail file, and moisturizer. Protect your workspace and skin by wearing gloves and applying petroleum jelly around your nails. Lightly buff your nails to break down the top layer, then soak cotton in acetone and place on each nail. Wrap with foil, wait 10-15 minutes, then gently remove the foil and residual dip powder. For helpful tips, keep exploring the process.
Key Takeaways
- File the top layer of dip powder to break the shine and improve acetone penetration.
- Soak cotton balls in pure acetone, place on nails, and secure with foil wraps for 10-15 minutes.
- Gently peel back the foil and wipe away softened dip powder with acetone-soaked cotton.
- Use a soft brush or cloth to remove residual powder without damaging natural nails.
- Hydrate cuticles and nails with oil or moisturizer post-removal to restore moisture and promote healthy growth.
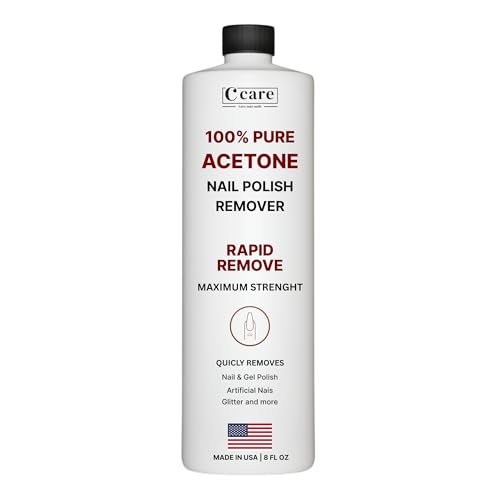
100% Pure Acetone Nail Polish Remover | Professional Quality | Easy To Use | Rapidly Removes Natural, Gel, Acrylic, shellac, and Glitter Nails | 8 Fl oz
100% Pure Acetone: Exceptionally efficient and powerful for swiftly removing all varieties of nail polish, such as gel,…
As an affiliate, we earn on qualifying purchases.
As an affiliate, we earn on qualifying purchases.
Gather Your Necessary Supplies

Before you begin removing dip powder nails at home, gather all the supplies you’ll need to make the process smooth and effective. First, choose the right types of acetone, such as pure acetone or 100% acetone, for faster dip removal. You might also want to explore alternative removal methods like soaking wraps or gel remover kits if you prefer a gentler approach. Confirm you have aluminum foil or acetone-resistant wraps, cotton balls or pads, a nail file, and a buffer to gently loosen the dip. Additionally, gather cuticle oil and moisturizer to nourish your nails afterward. Having everything prepared beforehand prevents interruptions and helps you work efficiently. Proper supplies ensure a safer, cleaner removal process while protecting your nails from unnecessary damage. Consulting professional removal techniques can further help you avoid damaging your natural nails during the process.

MIILYE Nail Polish Remover Foil Wraps for Acrylic/Dip Powder/UV/Gel/Polish Varnish Soak-off Removal, with Pre-attached Lint Free Pad (100x Gel Nail Polish Remover Wraps)
100pcs professional quality gel nail polish remover foil wraps bulk with a pre-attached lint free pads for gel…
As an affiliate, we earn on qualifying purchases.
As an affiliate, we earn on qualifying purchases.
Protect Your Workspace and Skin

Setting up your workspace and protecting your skin helps guarantee a safe and mess-free dip powder removal. Begin by covering your work surface with old newspapers or a disposable plastic sheet to ensure good workspace safety. Wear gloves to shield your skin from harsh chemicals and prevent irritation. Use a nail buffer or file to remove the top layer of the dip powder, which minimizes airborne dust and reduces cleanup. Keep a bowl of acetone nearby in a glass or plastic container, and avoid skin contact by applying petroleum jelly around your nails. Make sure to work in a well-ventilated area to avoid inhaling fumes. Additionally, being aware of the types of electric bikes can help you choose the best tool for any related DIY projects. By taking these precautions, you protect your skin and maintain a clean, safe environment throughout the removal process.

Teenitor Nail File Nail Buffer, 6 pcs Nail Files and Buffers for Natural Nails, Emery Boards for Nails, Nail Buffer and Shine Kit Nail Filer, Nail Buffer Block 100/180 Grit Nail Files Fingernail Files
What A Professional Nail File Set: Teenitor 6pcs Nail File and Buffer Set contains up to 9 different…
As an affiliate, we earn on qualifying purchases.
As an affiliate, we earn on qualifying purchases.
File the Surface of Your Nails

To prepare your nails for removal, start by filing the surface of your dip powder nails. Use a coarse nail file to gently remove the shine and smooth out the top layer. Focus on nail shaping to create an even surface, which helps the removal process go more smoothly. Incorporate buffing techniques by lightly buffing your nails to break down the dip powder, making it easier to lift. Be careful not to over-file or damage your natural nails underneath. This step ensures the acetone will penetrate effectively later. Keep your movements controlled and consistent, avoiding aggressive filing that could cause splitting or peeling. Additionally, choosing the right self watering plant pots can help keep your tools clean and organized during your manicure routine. Once the surface is dull and even, you’ll be ready for the next step in safely removing your dip powder nails.

Cuccio Naturale Milk & Honey Revitalizing Cuticle Oil, Lightweight Fast-Absorbing Hydrating Nail & Cuticle Conditioner, Cold-Pressed Oils + Vitamin E, 2.30 Fl Oz
ADVANCED THERAPY FOR DRY HANDS; Give your cuticles some much-needed love and care; Our Vitamin-infused oil conditioner deeply…
As an affiliate, we earn on qualifying purchases.
As an affiliate, we earn on qualifying purchases.
Soak Cotton Balls With Acetone

Have you prepared your cotton balls with acetone? First, select a high-quality acetone, as different acetone brands vary in strength and purity, affecting removal effectiveness. Next, saturate each cotton ball thoroughly, making certain they’re soaked but not dripping excessively. For convenience, consider cotton ball alternatives like lint-free pads or reusable options that hold acetone well. Arrange the soaked cotton balls on each nail, pressing gently to maximize contact. Guarantee the cotton covers the entire nail surface for even removal. This step is vital for softening the dip powder without damaging your nails. Using the right brand and alternative materials helps assure a smoother, safer removal process at home. Additionally, proper preparation can help prevent damage to your natural nails during removal. Once ready, you can proceed to the next step for efficient dip powder removal.
Apply Aluminum Foil Wraps

Once the cotton balls are in place, wrap each nail with a small piece of aluminum foil to secure them. This foil application helps hold the cotton in contact with your nail during the acetone soaking process. Make sure the foil is snug but not too tight, so it stays in place without cutting off circulation. The aluminum foil acts as a barrier, trapping heat and enhancing the acetone’s effectiveness in breaking down the dip powder. As you wrap each nail, double-check that the cotton ball remains firmly pressed against your nail surface. This method ensures consistent contact, making the removal process more efficient and safer. Keep the foil wraps on for about 10-15 minutes, allowing the acetone to do its job effectively. Proper technique in application can also reduce potential damage to your natural nails.
Wait and Watch the Nails Break Down

After wrapping your nails with aluminum foil, sit back and give the acetone time to work. During this wait, you’ll notice your nails gradually breaking down, signaling the dip powder lifting away. Use this time to observe how your nails respond, which is key for maintaining nail health. Here are some things to keep in mind:
- The powder will start lifting, peeling, or bubbling.
- Your natural nails may appear softer or more pliable.
- You might notice slight discoloration or residue.
- Natural remedies like cuticle oil can be applied afterward to restore moisture.
- Remember the importance of nail health and avoiding harsh removal methods.
Patience is essential—this process ensures minimal damage. Watching your nails break down safely helps you gauge when they’re ready for gentle removal, protecting your nail health in the long run.
Gently Remove the Foil and Residue

Gently remove the foil strips from your nails, taking care not to force or yank, which could cause damage. Use your fingertips to carefully peel back the foil, working from the edges inward. This approach aligns with effective foil removal techniques, minimizing discomfort and preventing nail injury. Once the foil is off, you might notice some residual dip powder on your nails. To clean up this residue, soak a cotton pad in a bit of acetone or nail polish remover and gently press it onto the nails for a few seconds. Then, use a soft nail brush or cloth to wipe away any remaining residue. Avoid scrubbing harshly to prevent damaging your natural nails. Proper residue cleanup methods ensure your nails stay healthy and ready for the next step. Additionally, maintaining good color accuracy during removal helps ensure your natural nail color remains true and healthy.
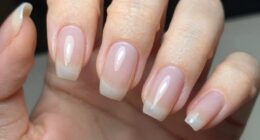
Finish With Nail Care and Moisturizing

After removing your dip powder nails, it’s important to hydrate your cuticles to keep them healthy. You should also nourish your nails with cuticle oil to restore moisture and strength. This final step helps your nails recover and look their best. Incorporating proper nail maintenance practices can further enhance their health and appearance.
Hydrate Cuticles Properly
Properly hydrating your cuticles is a crucial step in finishing your nail care routine, especially after removing dip powder. Well-hydrated cuticles prevent dryness and promote healthy nail growth. To achieve ideal cuticle conditioning, follow these steps:
- Apply a rich cuticle cream or hydrating lotion around your nails.
- Gently massage the product into your cuticles to improve blood flow.
- Use a cuticle pusher to push back excess cuticle skin carefully.
- Leave the moisturizer on overnight for deep hydration.
- Additionally, maintaining your nails with regular hydration supports healthy nail growth and overall nail health.
Focusing on hydrating cuticles helps restore moisture and keeps your nails looking fresh. Proper cuticle conditioning ensures your nails stay strong and healthy, preventing hangnails and dryness. Incorporate these simple steps into your routine for beautifully maintained nails after dip powder removal.
Nourish With Cuticle Oil
Nourishing your cuticles with cuticle oil is an essential step to lock in moisture and keep your nails healthy. Regular application improves cuticle health by preventing dryness and brittleness, which can lead to peeling or cracking. When you apply cuticle oil, you’re providing essential nutrients that promote nail strengthening and overall nail resilience. This simple step helps maintain flexible, strong nails after removal of dip powder, preventing damage and promoting healthy growth. Use the oil daily, massaging it gently into your cuticles and surrounding skin. Consistent nourishment guarantees your nails stay moisturized, reducing the risk of splits or breaks. Additionally, choosing proper nail care tools and products can further support nail health and prevent damage. By prioritizing cuticle care with nourishing oils, you support long-term nail health and keep your nails looking their best.
Frequently Asked Questions
Can I Use Regular Nail Polish Remover Instead of Acetone?
You can try using regular nail polish remover as a remover alternative, but it’s not very effective for dip powder nails. Nail polish remover usually contains less acetone, which is essential for breaking down dip powders. For better results, opt for pure acetone or a specialized dip powder remover. Using regular nail polish remover may take longer and require more effort, so consider investing in the right products for safe, efficient removal.
How Long Does It Typically Take for Dip Powder to Fully Dissolve?
Think of dip powder as a stubborn puzzle; it usually takes about 15 to 20 minutes of soak duration to fully dissolve. During this time, the dip reacts with acetone or nail polish remover, breaking down the layers. Keep in mind, the dissolution time varies based on thickness and brand. Patience is key—don’t rush the process to avoid damaging your natural nails.
Is It Safe to Peel off Dip Powder Nails at Home?
Peeling off dip powder nails at home isn’t safe because it increases peeling risks, damaging your natural nails. Instead, opt for an alternative removal method, like soaking your nails in acetone, which dissolves the dip properly. This prevents unnecessary harm and keeps your nails healthy. Peeling might seem easier, but it can lead to weak, brittle nails, so always choose safer, recommended removal techniques for the best results.
What Are Signs of Damage or Infection After Removal?
Think of your nails and skin as a delicate garden—if you notice nail discoloration or skin irritation after removal, it’s a sign something’s off. These symptoms indicate potential damage or infection, and you should act quickly. Keep an eye out for redness, swelling, or pus. If these appear, consult a healthcare professional promptly to prevent further harm and guarantee your nails recover their natural beauty.
How Often Should I Moisturize My Nails Post-Removal?
You should moisturize your nails daily after removal to promote nail hydration and recovery. Focus on cuticle care by applying cuticle oil or moisturizer, which helps keep your nails and skin healthy. Regular hydration prevents dryness and peeling, especially if your nails feel brittle or sensitive. Consistent moisturizing supports healing and maintains nail strength, so make it part of your daily nail care routine for the best results.
Conclusion
Now that you know how to safely remove dip powder nails at home, you’re well on your way to beautiful, blemish-free nails. With patience, preparation, and a touch of care, you can confidently conquer the process without costly salon visits. Remember, gentle handling and proper hygiene help keep your nails healthy and happy. So, step into your space, stay steady, and enjoy the satisfying success of a safe, stylish nail removal. You’ve got this!