To create clean lines with nail art striping tape, choose high-quality tapes with good adhesive and precision edges. Start with a smooth, dry base for better adhesion, then carefully apply the tape, pressing firmly to prevent bleeding. Use gentle, controlled strokes when painting over the tape, and remove it while the polish is still tacky, pulling back at a 45-degree angle. Want to learn more tips for flawless designs? Keep exploring for detailed guidance.
Key Takeaways
- Choose flexible, high-quality tape with strong adhesive and sharp edges for precise, clean lines.
- Prepare nails thoroughly with a clean, dry surface and smooth base for optimal tape adhesion.
- Press tape firmly and carefully before applying polish; remove while polish is tacky at a 45-degree angle.
- Apply polish in thin layers and layer tape gradually, allowing each to dry to prevent bleeding or lifting.
- Use gentle, controlled brush strokes and replace worn tape to maintain sharp, crisp nail art designs.
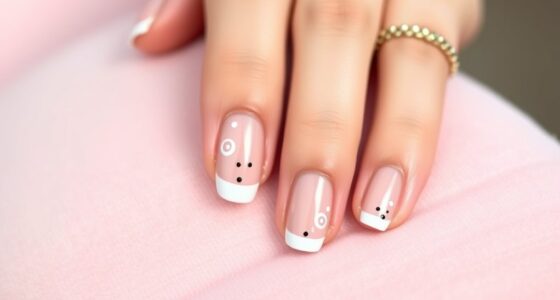
Choosing the Right Striping Tape for Your Nail Art
Selecting the right striping tape is essential for achieving clean, professional-looking nail art. When choosing your tape, consider the color combinations you want to create; contrasting shades can make your designs pop, while similar hues provide a subtle effect. Think about pattern variations—thin tapes are perfect for delicate lines, while wider strips work better for bold stripes or blocks. The tape’s flexibility and adhesive strength also matter, ensuring smooth application without peeling or smudging. If you plan intricate designs, opt for tapes with precise edges to maintain clean lines. Additionally, choosing tapes with good adhesive strength can prevent lifting or bubbling during application. By selecting the appropriate color combinations and pattern variations, you’ll set a strong foundation for stunning nail art that looks polished and well-executed.
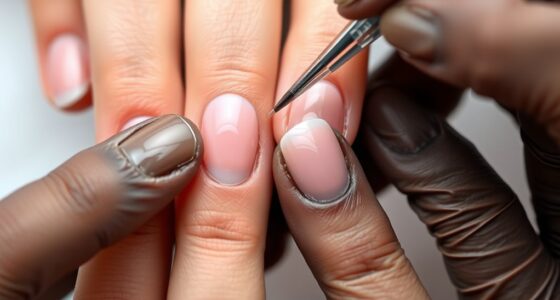
Preparing Your Nails for Precise Application
Before applying striping tape, it’s essential to prepare your nails thoroughly to guarantee precise results. Begin with a clean, dry nail polish base, free of oils and residue, to ensure the tape adheres properly. Apply a smooth, even layer of your chosen base color and let it dry completely. Using nail art accessories like a cuticle pusher or small brush, tidy up the nail edges for a tidy canvas. Proper preparation minimizes smudging and prevents the tape from lifting during application. If needed, lightly buff the surface for better adhesion, but avoid overdoing it to prevent damage. Ensuring your nails are clean, dry, and smooth sets the stage for clean, sharp lines when you lay down the striping tape. Additionally, selecting the appropriate headphone connection method ensures comfortable listening during your nail art session.
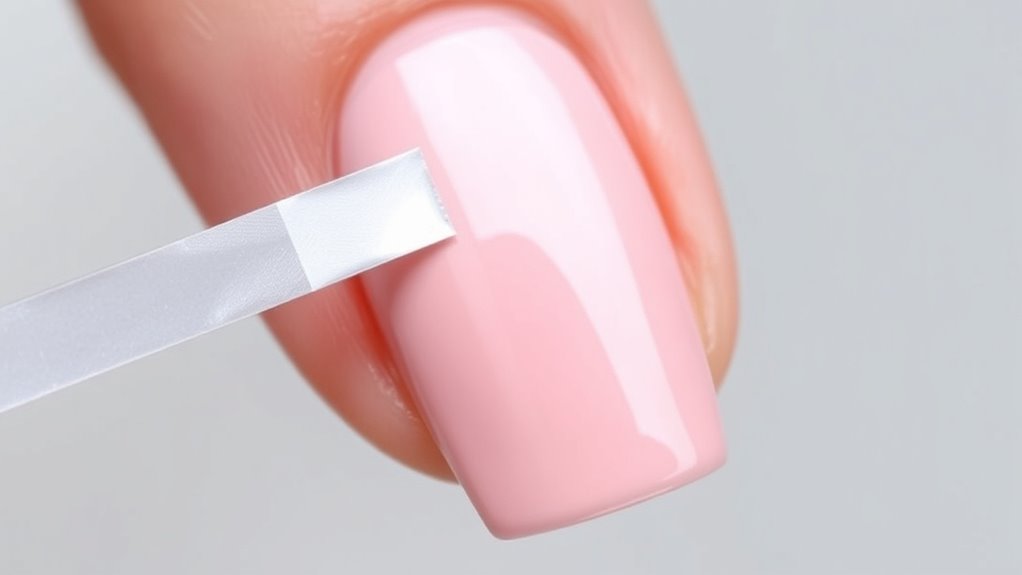
Techniques for Applying and Removing Striping Tape
To achieve clean, crisp lines with striping tape, you need to apply it carefully and remove it at just the right moment. Proper tape placement is vital; ensure the tape is pressed down firmly to prevent bleeding. Use layering techniques by applying tape in stages, allowing each layer to dry before adding more. When applying, start with precise placement, smoothing out air bubbles for sharp edges. To remove, gently lift the tape at a 45-degree angle before the polish fully dries to avoid smudging. For best results, keep your hands steady and use tweezers for delicate placement. Additionally, understanding nail art tape and how it interacts with different polish types can help achieve better results. 1. Position tape accurately before pressing down. 2. Layer tape carefully, allowing drying time. 3. Remove tape promptly, before polish sets. 4. Use tools for precise tape removal.
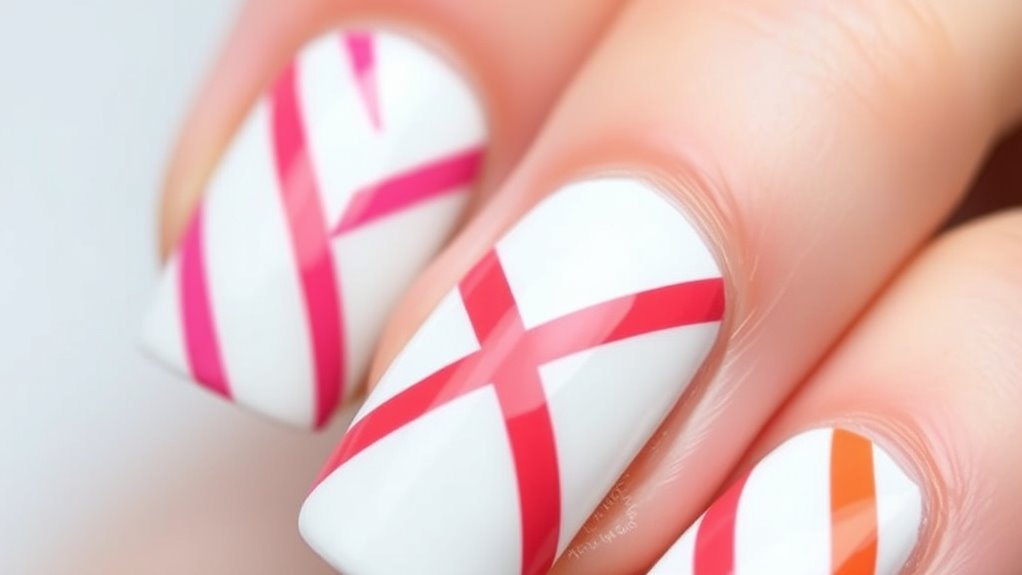
Tips for Achieving Sharp and Clean Lines

Achieving sharp and clean lines with striping tape requires careful technique and precision. Start by applying tape smoothly, ensuring it adheres well without bubbles or wrinkles, which can cause uneven lines. Proper tape placement is vital; position it confidently to define your design before painting. Use brush techniques that involve gentle, controlled strokes to avoid disturbing the tape edges. When painting over the tape, use a steady hand and minimal product to prevent bleeding under the edges. Remove the tape carefully while the polish is still slightly tacky, pulling it back slowly at a 45-degree angle to maintain crisp lines. Practicing these steps will help you achieve professional-looking, sharp nail art designs every time. Additionally, ensuring your workspace is well-lit and steady can greatly enhance precision in application and overall results.
Troubleshooting Common Issues With Striping Tape

Even with careful application, striping tape can sometimes lift, bleed, or create uneven lines. To troubleshoot, consider these steps:
- Check tape durability—use high-quality tape designed for nail art to prevent lifting and ensure clean lines.
- Adjust your color combinations—avoid applying thick layers of polish under the tape, which can cause bleeding.
- Press tape firmly—make sure edges are securely adhered to prevent lifting during topcoat application.
- Use a quick-dry topcoat—this minimizes movement and bleeding, keeping lines sharp and precise.
- Ensure proper application techniques—a properly applied tape will adhere better and reduce issues during the nail art process.
If issues persist, try replacing old or worn tape, as compromised tape durability often causes problems. Proper technique and quality materials make a significant difference in achieving flawless striping designs.
Frequently Asked Questions
How Long Does Striping Tape Typically Last on Nails?
Striping tape usually lasts about 3 to 7 days on your nails, depending on how well you apply it and your nail growth. As your nails grow, the tape’s duration lifespan decreases, and edges might start lifting or chipping. To prolong its hold, seal it with a top coat and avoid excessive water or rough activities. Proper application and care can help you enjoy your nail art longer.
Can Striping Tape Be Used With Gel or Acrylic Nails?
You can absolutely use striping tape with gel or acrylic nails, creating stunning, crisp designs. Just keep in mind gel compatibility and make sure your nails are properly prepped for acrylic adhesion. Gently apply the tape on the tacky layer of gel or over the dry acrylic, then carefully remove it to reveal clean lines. With a little patience, your nail art will look flawless, showcasing your artistic flair and attention to detail.
What Are the Best Top Coats to Seal Striping Tape?
For sealing striping tape, choose a top coat with high durability to prevent chipping and guarantee long-lasting designs. A gel top coat works best for sealing striping tape, providing a glossy finish and extra protection. Look for a fast-drying, no-wipe gel top coat or a high-quality, durable regular top coat. Applying a generous layer helps improve top coat durability and keeps your striping tape securely sealed for weeks.
How Do I Store Unused Striping Tape to Prevent Damage?
Did you know that properly stored striping tape can last up to a year? To maximize tape longevity, store unused striping tape in a cool, dry place away from direct sunlight. Keep it in its original container or a resealable bag with minimal air exposure. Make certain the tape is flat and not bent to prevent damage. These storage tips help you maintain your tape’s quality, so your designs stay crisp and professional.
Is Striping Tape Safe for Sensitive or Damaged Nails?
Striping tape is generally safe for sensitive or damaged nails if you choose hypoallergenic options and avoid prolonged contact. You should be mindful of your nail health and allergy concerns, as some tapes contain adhesives or materials that might cause irritation. Always patch test a small area first, and remove the tape gently to prevent further damage. If you experience redness or discomfort, discontinue use and consult a dermatologist.
Conclusion
Now that you know how to choose, prepare, and apply striping tape, you’ll be able to create stunning, professional-looking nail art at home. With practice, your lines will become sharper and more precise. Don’t let mistakes discourage you—every nail artist starts somewhere. Ready to turn your nails into a canvas? With patience and these tips, you’ll master clean lines and unique designs that impress everyone. Why settle for ordinary when your nails can be extraordinary?