
To start nail stamping, choose high-quality plates with clear designs that match your style, and use stamping tools with silicone or rubber heads that fit comfortably. Prep your nails by cleaning, pushing back cuticles, and applying a base coat. Spread polish evenly, scrape at a 45-degree angle, and pick up the design with your stamper. Practice proper transfer techniques, troubleshoot issues like smudging, and add finishing touches for a flawless look—keep exploring to master the craft.
Key Takeaways
- Select high-quality stamping plates with clear patterns suited to your skill level and style.
- Prepare nails by cleaning, buffing, and applying a base coat for optimal design transfer.
- Use thick, gel-like stamping polish and scrape at a 45-degree angle to pick up crisp designs.
- Transfer the design onto the nail with a silicone or rubber stamper, pressing or rolling gently.
- Seal the finished nail art with a glossy or matte top coat to enhance durability and appearance.
Selecting the Right Stamping Plates and Tools

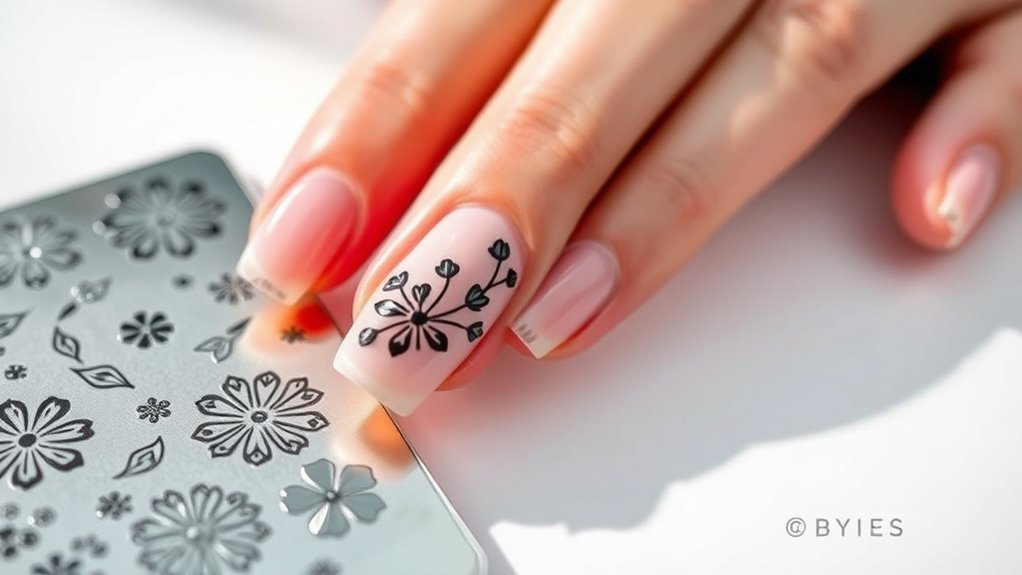
Choosing the right stamping plates and tools is essential for achieving crisp, detailed nail art. When selecting plates, focus on designs that match your style and skill level. Look for high-quality plates with clear, well-defined patterns to ensure sharp images. Tool compatibility is equally important; use stamping tools that fit comfortably in your hand and work well with your plates. Silicone or rubber stamper heads are popular because they pick up polish easily and release designs smoothly. Make sure your scraper and stamper are compatible with your plates to prevent smudging or uneven transfers. Investing in versatile tools can save you time and frustration, helping you create professional-looking nail art every time. Proper plate selection and compatible tools are the foundation for flawless stamping results. Additionally, understanding different product features can help you choose the most effective tools for your manicure style.
Preparing Your Nails for Stamping

Before you start stamping, ensuring your nails are properly prepared can make all the difference in achieving clean, sharp designs. Good nail prep involves more than just cleaning; it sets the stage for flawless application. Focus on three key steps:
Proper nail prep ensures crisp, long-lasting stamping designs.
- Remove any old polish to create a clean surface.
- Gently push back cuticle care to expose the nail bed and prevent interference.
- Buff your nails lightly to smooth out ridges, ensuring the stamping adheres evenly.
- Applying a base coat can further improve adhesion and protect your nails from staining.
Proper nail prep helps the stamping polish transfer smoothly, resulting in crisp designs. Don’t skip cuticle care, as neglected cuticles can cause uneven stamping and reduce precision. Taking these steps ensures your nail art looks professional and lasts longer.
Applying and Transferring the Design

To get a crisp, clean design, you need to apply the stamping polish evenly and with steady pressure. Once you press the stamper onto the nail, make sure to lift it straight up to avoid smudging. A smooth transfer depends on your technique, so practice guarantees your designs come out perfect every time.
Proper Application Technique
Applying and transferring your nail design correctly is essential for a clean, professional look. To do this effectively, focus on these key steps:
- Choose the right stamping plate pattern that complements your style and guarantee the design is clean and well-etched.
- Use high-quality stamping polish colors that contrast well with your base coat for maximum visibility.
- Apply the stamping polish evenly across the pattern, scraping gently, then press firmly with your stamper to pick up the design without smudging.
- Make certain your stamper is clean and your nails are prepped for better transfer. Practice patience with each step, and you’ll achieve crisp, detailed designs that look polished and professional. Proper application technique is crucial for achieving a flawless nail art finish.
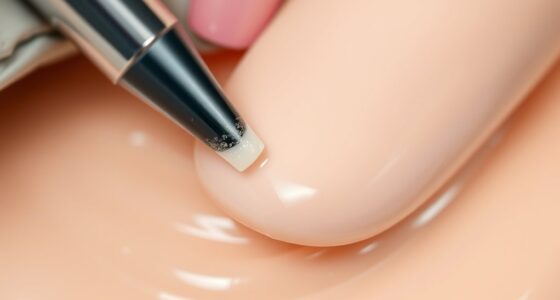
Effective Transfer Process
Once you’ve prepared your stamper and nail surface, focus on the transfer process itself. Choose your stamping plate patterns and select stamping polish colors that contrast well with your base. To transfer the design, apply a generous layer of stamping polish over the pattern, then scrape swiftly at a 45-degree angle. Use your stamper to pick up the design by rolling it gently over the pattern. Next, align the stamper over your nail, then press and roll to guarantee full transfer. Use the table below to guide your process:
| Step | Action |
|---|---|
| 1 | Apply stamping polish on plate pattern |
| 2 | Scrape at a 45-degree angle |
| 3 | Pick up design with stamper |
| 4 | Transfer design to your nail |
Mastering this process ensures crisp, clean nail art every time. Additionally, understanding how to automate in business can inspire new techniques and improve your overall nail art workflow.
Troubleshooting Common Stamping Issues

If your stamper slips or sticks, it can ruin your design; adjusting your pressure or cleaning your tools often helps. Missing or blurred designs usually mean the polish isn’t thick enough or the plate isn’t fully transferred, so tweak your technique accordingly. Uneven or patchy results often come from inconsistent application or insufficient drying time—pay close attention to your process to get a perfect finish. Ensuring the right nail care routine can also improve stamping results and overall nail health.
Stamper Slipping or Sticking
A stamper slipping or sticking can quickly ruin a nail design, but understanding the cause makes troubleshooting straightforward. Often, the issue stems from a poorly prepared stamper or insufficient transfer. Here are three quick fixes:
- Ensure your stamp pad is fully loaded with polish and not dried out. Using a fresh stamp pad helps pick up the design smoothly.
- Clean your plate thoroughly after each use to prevent leftover polish from causing sticking issues.
- Check the stamper surface; if it’s sticky or deformed, try replacing it or cleaning it with alcohol to improve grip.
- Incorporating quality tools can significantly reduce common stamping issues and lead to better results.
Addressing these points will help your stamper pick up designs cleanly and stick securely, preventing slips and ensuring crisp, flawless nail art.
Missing or Blurred Designs
Missing or blurred designs are common issues that can ruin your nail stamping results. To improve design clarity, focus on proper plate selection—choose plates with sharp, well-defined images. If designs appear faint or blurry, check your stamper and scraper technique; too much pressure or uneven scraping can distort the image. Make sure your polish isn’t too thick or dried out, as this affects transfer quality. When stamping, apply even pressure and roll gently for a cleaner image. For clarity, clean your plates thoroughly and store them properly. Here’s a quick comparison:
| Issue | Solution |
|---|---|
| Missing designs | Use better plate selection and ensure proper polish application |
| Blurred images | Check stamping technique and polish consistency |
| Faint designs | Improve plate cleanliness and design clarity |
Additionally, understanding the process of modern hackathons can help you stay updated on innovative tools and techniques that might improve your stamping efficiency and results.
Uneven or Patchy Results
Uneven or patchy stamping results often stem from inconsistent technique or improper preparation. To improve, focus on your process. Here are three key tips:
- Choose compatible color combinations – contrast enhances pattern clarity, avoiding muddy or faded designs.
- Ensure proper plate pattern transfer – press firmly and evenly to get crisp, complete images.
- Use the right stamping polish consistency – a thick, gel-like polish picks up better detail and transfers smoothly.
Additionally, examine your plate patterns; intricate or uneven designs may require more careful application. Testing different color combinations can also help you identify which hues work best together. Paying attention to filter maintenance—such as regularly cleaning your stamping plates—can help prevent residue buildup that causes uneven prints. With consistent technique and attention to detail, you’ll achieve more even, polished results every time.
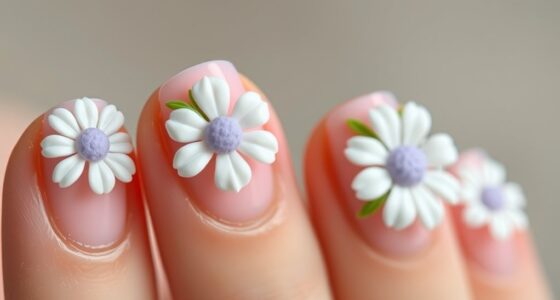
Enhancing Your Nail Art With Finishing Touches

To make your nail art truly stand out, adding finishing touches can elevate your design from good to stunning. Start by refining your color combinations; using contrasting or complementary shades can create visual interest. Nail embellishments like rhinestones, studs, or glitter add texture and dimension, making your nails pop. A glossy top coat not only seals your design but also enhances vibrancy and adds shine. If you want a softer look, a matte top coat can give your nails a trendy, understated finish. Carefully placing small accents or embellishments can draw attention to specific areas of your design. Remember, less is often more—choose a few well-placed details to avoid overwhelming your overall nail art. Incorporating techniques like layered designs can also add depth and complexity to your manicure. These finishing touches help you create professional-looking, eye-catching nails every time.
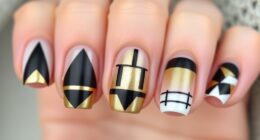
Creative Tips for Unique Stamping Designs

Creating unique stamping designs starts with thinking outside the box and experimenting with different techniques. One way to stand out is by mastering ombre techniques, which blend colors seamlessly for stunning effects. You can also try layering multiple colors using stamped images for depth and dimension. Additionally, incorporate creative color blending directly on your stamping plate before transferring it onto your nails for a one-of-a-kind look. Here are some tips to elevate your designs:
- Use gradient or ombre techniques with multiple shades to create a smooth progression.
- Experiment with color blending on the stamping plate for unique, marbled effects.
- Combine stamping with freehand painting for added detail and originality.
- Remember that active listening and empathy in your creative process can help you better understand what designs truly resonate with your personal style.
These methods help you craft truly personalized and eye-catching nail art.
Maintenance and Care of Your Stamping Supplies

Maintaining your stamping supplies guarantees your nail art always looks professional and vibrant. Proper storage solutions prevent your plates, stamps, and scrapers from damage and keep them organized for quick access. Store plates flat in a cool, dry place away from sunlight to avoid warping or discoloration. Regular cleaning routines are essential; after each use, clean stamping plates with acetone or nail polish remover to remove residual polish. Gently wipe stamps and scrapers to prevent buildup that can affect your designs. Avoid harsh scrubbing, which can scratch surfaces. Keep your tools dry and stored separately to prevent rust or corrosion. By implementing consistent cleaning routines and using appropriate storage solutions, you ensure your stamping supplies stay in top condition, making your nail art process seamless and your designs flawless.
Frequently Asked Questions
Can Stamping Plates Be Used on Artificial Nails or Only Natural Nails?
You can definitely use stamping plates on artificial nails, as they’re compatible with most types for artificial nail compatibility. Just make certain proper stamping plate adhesion by cleaning both the plate and your nails thoroughly before stamping. Using a good-quality stamper and polish also helps achieve crisp designs. With the right technique, you’ll get stunning nail art on both natural and artificial nails, making your manicure look flawless and professional.
What Are the Best Types of Nail Polish for Stamping?
The best stamping polish has a thick, creamy consistency that transfers designs clearly. You should look for nail polish brands specifically labeled as “stamping polish” or those with high pigmentation. Thin or runny polishes won’t give sharp images. Keep your nail polish consistency steady to ensure smooth stamping. Using the right type of polish helps you achieve crisp, detailed designs every time, making your nail art look professional and flawless.
How Long Does Stamped Nail Art Typically Last?
Stamped nail art usually lasts about a week or two, depending on durability factors like your top coat and daily activities. Think of your nails as tiny canvases—protect them with a good sealant and avoid harsh chemicals to keep your design vibrant. Regular maintenance tips, like reapplying top coat every couple of days, help prevent chipping and keep your stamped masterpiece looking fresh longer.
Are There Safety Concerns When Using Stamping Plates and Tools?
You should be cautious about chemical safety when using stamping plates and tools. Always work in a well-ventilated area and avoid inhaling fumes from nail polish or stamping polish. Proper tool sterilization is essential—clean your stamping plates and tools thoroughly after each use to prevent infections. Using non-toxic, skin-safe products also minimizes any safety concerns, ensuring a fun and safe nail stamping experience.
Can Stamping Plates Be Customized With Personal Designs or Images?
Yes, you can customize stamping plates with your personal designs or images. You simply need to create or find a digital version of your design, then have it engraved onto a stamping plate or use a decal method. This allows you to explore endless custom design options, making your nail art truly personalized. With a little creativity, you can showcase unique, one-of-a-kind nail art that reflects your style and personality.
Conclusion
Now that you know the basics, don’t worry if your first attempts aren’t perfect. With practice, stamping becomes easier and more fun. Remember, even pros started somewhere! If a design doesn’t transfer well, it’s often just a matter of adjusting your technique. Keep experimenting, stay patient, and enjoy the process. Soon, you’ll be creating stunning nail art that’s uniquely yours—no special skills required, just a little practice and creativity!