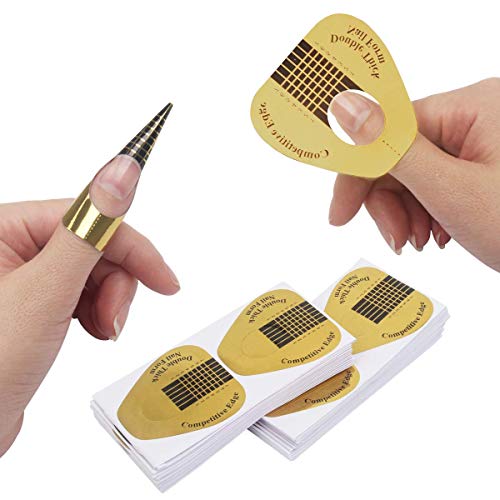
To use nail forms, you start by preparing your natural nails, then position the flexible form beneath the free edge, aligning it with your desired shape. Next, build your extension with acrylic or gel over the form before removing it carefully. For tips, choose the right size for each finger, glue them onto the natural nail, and blend the seam. Both methods require proper preparation and shaping—if you keep exploring, you’ll find detailed steps for perfect application.
Key Takeaways
- Nail tips are glued onto natural nails, while nail forms are placed underneath to sculpt extensions with acrylic or gel.
- Tips are selected by size, glued on, and blended; forms are positioned beneath the natural nail and shaped during application.
- Use tips for quick, uniform length fixes; opt for forms when aiming for natural, customizable extensions with minimal damage.
- Proper adhesion involves cleaning, buffing, and precise fitting; forms require snug placement, while tips need strong glue and blending.
- Finish with shaping, buffing, and sealing to ensure durability and a polished look, regardless of using tips or forms.
200 PCS Nail Forms for Builder Gel, AHIER Self-adhesive Nail Extension Forms for DIY at Home Professional Nails Art Supplies
【Feature】Our nail extension form has a smooth Waterproof Layer, you can paint your nail polish multiple layers as…
As an affiliate, we earn on qualifying purchases.
As an affiliate, we earn on qualifying purchases.
Understanding the Basics of Nail Forms and Tips

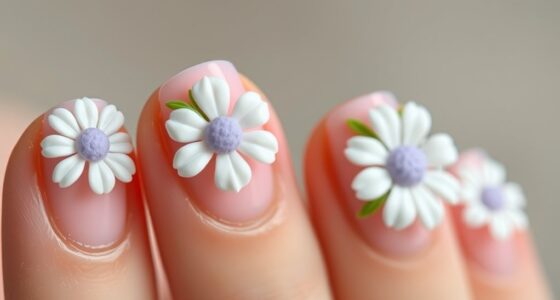
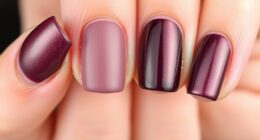
Nail forms and tips are essential tools in the art of creating beautiful, long-lasting nails. Understanding their differences helps you stay current with nail art trends and prioritize nail health awareness. Nail tips are pre-made plastic or acrylic extensions that you glue onto your natural nails, offering quick results and a smooth surface for polish. They’re great for achieving uniform length and style, but improper application can cause damage. Nail forms, on the other hand, are flexible templates placed under your natural nail, allowing you to sculpt extensions with acrylic or gel. They promote healthier nail practices by reducing damage and providing more control. Both tools have their place, but knowing when to use each depends on your style goals and dedication to nail health. Additionally, the choice between forms and tips can influence the overall artistic outcome and the longevity of your manicure. Using nail enhancement techniques effectively can help prevent common issues like lifting or breakage and ensure your nails look their best. Proper application of these tools can also ensure better nail health, which is crucial for maintaining strong, natural nails over time. Incorporating growth mindset principles can encourage continual improvement in your nail art skills and techniques.

modelones Medium Almond Gel Nail Tips Kit, 9-in-One Nail Glue with Portable U V Lamp 216Pcs 12Sizes Pre-Etched Press ons Fake Acrylic Extension Kit DIY Salon Gift for Women
Salon at Home: Modelones Gel Nail Extension Kit includes 1* 10 ml 9-in-One Nail Glue Gel, 216 pcs…
As an affiliate, we earn on qualifying purchases.
As an affiliate, we earn on qualifying purchases.
Choosing the Right Application Method for Your Needs

Choosing the right application method depends on your specific goals and nail health priorities. If you want a natural look and minimal damage, nail forms often provide better control and less risk of lifting, promoting healthier nails. Tips can be faster and more convenient for quick fixes or thicker nail enhancements. Consider your salon safety too; using forms minimizes the need for adhesives, reducing potential allergic reactions. If your nails are weak or prone to breakage, opting for nail forms can help preserve your natural nail structure. Additionally, understanding the educational and skill-building aspects of nail techniques can help you make informed decisions about your nail care approach for better results. Being aware of the resources and tools available can also help you choose the most suitable method for your needs. Tips may be suitable if you want a quick, sturdy extension. Ultimately, assess your desired appearance, nail condition, and safety concerns to choose the method that best aligns with your needs.

SAVILAND Hema-Free Poly Gel Nail Kit for Pretty Gift: 36 Colors Poly Gel Nail Starter Kit with Slip Solution and Mini U V Lamp Curing Light for Quick Extension Home DIY, Manicure Tools for Starter
Ideal for Beginners: SAVILAND Poly Gel Nail Kit provides all essentials for creating nail art in the comfort…
As an affiliate, we earn on qualifying purchases.
As an affiliate, we earn on qualifying purchases.
Preparing Your Natural Nails Before Application

Before applying nail forms or tips, you need to properly prepare your natural nails to guarantee a secure and long-lasting bond. Start by checking your nail health—if your nails are brittle or damaged, address these issues first to prevent lifting or breakage. Gently push back your cuticles using a cuticle pusher, avoiding harsh removal that can harm the nail bed. Clean your nails thoroughly to remove oils, dirt, and any residue that could interfere with adhesion. Lightly buff the surface of your nails to create a smooth base, but avoid over-buffing, which can weaken them. Proper cuticle care and nail health maintenance are essential steps to ensure your nails are ready for the application process, resulting in a better, longer-lasting finish. Additionally, understanding how contrast ratio affects the clarity and depth of images can help you appreciate the importance of a well-prepared surface for optimal adhesion and appearance. Maintaining overall nail health is also crucial for preventing issues like lifting or breakage during and after application. Incorporating protective styling practices can further help preserve your nails’ strength and integrity throughout the process.
200 PCS Nail Forms for Builder Gel, AHIER Self-adhesive Nail Extension Forms for DIY at Home Professional Nails Art Supplies
【Feature】Our nail extension form has a smooth Waterproof Layer, you can paint your nail polish multiple layers as…
As an affiliate, we earn on qualifying purchases.
As an affiliate, we earn on qualifying purchases.
Applying Nail Forms: Step-by-Step Guide

To apply nail forms successfully, you need to start by preparing your natural nails and ensuring the nail bed is clean and smooth. Next, carefully position the forms to match your desired shape, making sure they fit snugly and securely. Additionally, it is important to apply the forms on clean, dry nails for maximum adhesion and a smoother finish. Finally, shape and finish your nails for a polished look that lasts.
Preparing the Nail Bed
Preparing the nail bed is a crucial step to guarantee your nail form application goes smoothly. Start by evaluating nail bed health; make sure there are no infections or damage. Proper cuticle care is essential—you want to gently push back excess cuticles without causing injury, which promotes a clean surface. Clean your nails thoroughly to remove oils, dirt, and residues, creating ideal adhesion. Lightly buff the nail surface to smooth out ridges and improve product adherence. Moisturize the surrounding skin but avoid applying oil directly on the nail bed, as it can interfere with the adhesive. Taking these steps ensures a healthy, clean nail bed that provides a solid foundation for your nail form application, resulting in a longer-lasting and more natural-looking set. Additionally, ensuring proper data privacy when handling client information can help maintain trust and compliance in your nail practice. Maintaining hygiene standards is also vital to prevent infections and ensure a safe, professional environment. Regularly using disinfection protocols for tools and workspaces further supports client safety and health. Also, paying attention to nail bed condition can significantly affect the success of your enhancements.
Applying the Forms Properly
Once you have your nail bed ready, carefully position the nail form beneath the free edge of the natural nail. Guarantee the form aligns with your desired nail shape preferences, whether square, oval, or stiletto. Gently press the form against the skin and natural nail to avoid lifting or gaps that could compromise natural nail health. Make sure the form follows the natural curve of your cuticle area for a smooth, even surface. Secure the form snugly but not too tight, so it supports the acrylic or gel application without causing discomfort. Proper placement is key to achieving a seamless extension that complements your natural nail structure and promotes healthy growth. Incorporating properly secured forms can help prevent lifting and ensure a longer-lasting manicure. Paying close attention to nail form placement is essential for a professional-looking result and maintaining overall nail health. Additionally, paying attention to correct form size ensures the form fits well and provides the best foundation for your extension. Being aware of retail store hours can also be useful if you need to purchase supplies or replacements during your nail care routine.
Shaping and Finishing
After securing the nail form in place, start shaping your extension by gently building up the free edge with acrylic or gel. Focus on creating a smooth, even surface that complements your desired nail art design. Use fine-grit files or buffers to refine the shape, ensuring the edges are crisp and symmetrical. Proper shaping sets the foundation for flawless polish techniques, so take your time to smooth out any imperfections. When finishing, clean the nail surface thoroughly before applying polish or nail art, as a clean base enhances adhesion and results. High-quality nail products from trusted brands can help achieve a durable and polished finish, making your manicure last longer. Whether you’re adding intricate designs or simple color, a well-shaped nail provides the perfect canvas. Proper nail care is essential for maintaining the health and appearance of your nails, especially after shaping. Finishing touches like buffing and sealing give your nails a professional, polished look that lasts.
Applying Nail Tips: Step-by-Step Guide

Applying nail tips begins with selecting the right size for each finger to guarantee a natural fit. Proper sizing ensures your nails look seamless and provides a solid base for nail art designs or gel polish techniques. Once sized, apply a small amount of nail glue to the tip and press it onto your natural nail, holding it firmly for a few seconds. Use a file to smooth any rough edges and blend the tip into your natural nail. For a flawless finish, ensure the tip is aligned correctly. Keep in mind that neat application improves the longevity of your manicure. Here’s a quick reference:
| Step | Action | Tips |
|---|---|---|
| 1. Choose tips | Match size to finger | Avoid tips that are too large or small |
| 2. Apply glue | Use small amount, press firmly | Prevent lifting |
| 3. Trim & file | Shape edges smoothly | Use gentle strokes |
| 4. Final check | Ensure alignment and smoothness | Ready for design work |
Finishing Touches and Shaping for a Flawless Look

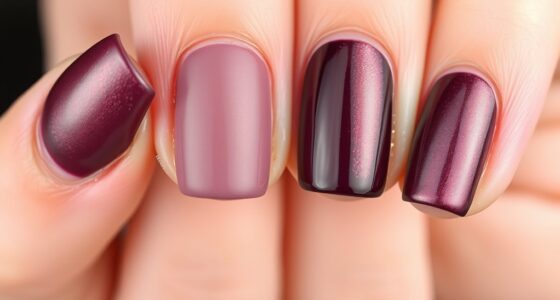
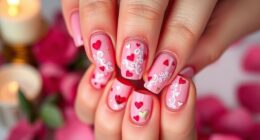
Finishing touches and shaping are the final steps to achieving a flawless nail look. Start by refining the shape with a gentle file to guarantee smooth, even edges that complement your finger shape. As you shape, keep color coordination in mind—choose nail polish shades that enhance your overall style and skin tone. Be careful not to over-file, as this can damage nail health; gentle shaping preserves strength and prevents breakage. After shaping, clean the nails thoroughly to remove dust and residue. Apply a top coat for shine and durability, sealing in your color and smoothening any imperfections. Proper finishing not only boosts the appearance but also supports nail health, making your manicure last longer and look professionally done.
Common Troubleshooting Tips for Nail Forms and Tips

To avoid common issues with nail forms and tips, focus on proper adhesion techniques and selecting the correct size. If your nails lift or break easily, adjusting your application method can make a big difference. Ensuring the right fit from the start helps prevent problems down the line.
Proper Adhesion Techniques
Ensuring proper adhesion is crucial for a durable and seamless nail enhancement, whether you’re using nail forms or tips. Start with clean, oil-free nails to promote better gel application and protect nail health. Lightly buff the surface to remove shine without over-thinning. Apply a primer if necessary, but avoid overusing it, as it can weaken adhesion. Use a gentle, even layer of gel, avoiding pooling at the edges, which can cause lifting. Properly securing the tips or forming over the natural nail guarantees a smooth transition. Here’s a quick guide:
| Step | Tip |
|---|---|
| Nail prep | Clean and buff nails to promote adhesion |
| Gel application | Use thin layers, avoiding excess that can lift |
| Final check | Ensure no gaps or lifts before curing |
This approach helps maintain nail health and prevents common adhesion issues.
Correct Size Selection
Selecting the correct size for nail forms and tips is essential to achieve a natural look and prevent lifting or discomfort. Accurate size selection depends on your ability to assess size accuracy, which can be improved with proper measurement tools like calipers or nail sizing charts. Measure the width of your natural nail at its widest point to find the perfect fit. Using tips that are too large can cause lifting, while undersized tips may look unnatural and cause discomfort. When working with nail forms, choose a size that aligns closely with your natural nail shape. Take your time to compare measurements carefully, ensuring each tip or form fits snugly without overextending. Precise size selection creates a seamless, durable finish and enhances overall nail health.
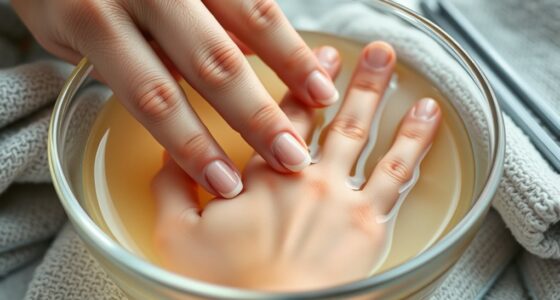
Maintenance and Removal of Nail Enhancements

Maintaining and removing nail enhancements require careful attention to prevent damage and promote healthy nails. Proper removal techniques are essential to protect your nail health. To do this effectively:
Careful removal preserves nail health and prevents damage.
- Soak your nails in acetone to loosen the enhancement.
- Gently lift the edges with a cuticle stick, avoiding force.
- Use a nail buffer to smooth any remaining residue.
- Moisturize your nails and cuticles afterward to restore hydration.
Always avoid peeling or ripping off enhancements, as this can harm your natural nails. Regular maintenance keeps your nails healthy and prevents infections. When removing enhancements, patience is key—rushing can cause damage. Follow these steps carefully to maintain nail health and ensure a safe, effective removal process.
Frequently Asked Questions
Can Nail Forms or Tips Be Reused for Multiple Clients?
You shouldn’t reuse nail forms or tips for multiple clients. Recycling protocols and sanitation practices require you to discard these items after each use to prevent cross-contamination. Nail tips are single-use only, and nail forms are meant for one-time use as well. Always follow strict sanitation guidelines, sterilize reusable tools, and dispose of disposable items properly to guarantee client safety and maintain high hygiene standards.
Which Method Lasts Longer—Forms or Tips?
You’re wondering which method lasts longer, nail forms or tips. When considering durability comparison, nail tips tend to be more durable because they’re pre-made and can withstand daily wear better. Nail forms, however, offer more flexibility and natural growth but might not last as long, depending on your application techniques. Ultimately, the longevity depends on how well you apply and care for the enhancements, regardless of the method used.
Are Nail Forms Suitable for All Nail Shapes?
Nail forms are like a chameleon, adapting to various nail shapes. They’re suitable for most nail shape compatibility, especially if you’re confident with DIY application tips. Whether you have rounded, square, or stiletto nails, forms provide flexibility and precision. For best results, follow proper technique and customize the form to your nail’s natural curve. This approach guarantees a natural look and a strong, long-lasting manicure.
How Do I Prevent Lifting With Nail Tips?
To prevent lifting with nail tips, you need proper gel application and thorough nail prep. Start by cleaning and dehydrating the natural nails to remove oils. Apply a primer if needed, then securely attach the tips, ensuring they’re well fit. When applying gel, layer it evenly from the cuticle to the tip, avoiding excess. Proper curing and sealing will give you a long-lasting, lift-free finish.
What’s the Best Way to Remove Nail Enhancements Safely?
Removal techniques can seem intimidating, but safety precautions keep you protected. You gently file the top coat, then soak cotton balls in acetone before wrapping your nails with foil. This method dissolves the enhancements without damaging your natural nails. Avoid prying or force, which can cause harm. Patience is key—taking your time guarantees a safe, effective removal process that preserves your nail health and keeps your fingers happy.
Conclusion
Whether you prefer nail forms or tips, choosing the right method helps you achieve your desired look. Don’t worry if it feels tricky at first—practice makes perfect, and both techniques can give stunning results. With patience and proper preparation, you’ll create flawless nails that last. So, try both options and see which suits your style best. Remember, the key is confidence—your perfect manicure is just a few steps away!