To achieve a salon‑level buff and shine finish, start by choosing high-quality buffing tools designed for nails and thoroughly prep your nails by cleaning and shaping them. Use gentle, even buffing motions, beginning with coarse grit and finishing with fine buffers until your nails are smooth and reflective. Apply a glossy topcoat and maintain your shine with regular moisturizer and protection from harsh elements. Keep going for more tips to perfect your nail glow.
Key Takeaways
- Use high-quality, fine-grit buffing tools and products designed specifically for nails to ensure a smooth, mirror-like shine.
- Properly shape nails with gentle filing, then buff in stages from coarse to fine grit, applying even pressure for a flawless finish.
- Clean nails thoroughly before buffing to remove oils and debris, creating an ideal surface for shine and polish adhesion.
- Seal the polished nails with a durable, glossy topcoat to enhance shine and prolong the salon-quality look.
- Maintain the shine by regularly applying cuticle oil, hand creams, and a high-quality topcoat to protect and nourish nails.
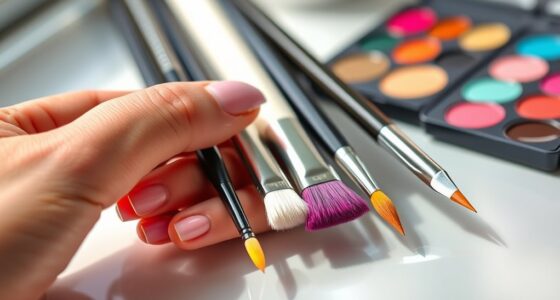
Choosing the Right Buffing Tools and Products

Selecting the right buffing tools and products is essential to achieving a flawless finish. You want tools that are gentle yet effective, so choose high-quality buffing tools designed for nails. Look for various grades, from coarse to fine, to gradually smooth and shine your nails without causing damage. For nail buffing products, opt for those formulated specifically for nail surfaces; they help enhance shine while maintaining nail health. Avoid using metal files or abrasive pads that can be too harsh. Instead, select soft, non-abrasive buffers for the final shine. Using the correct combination of buffing tools and nail buffing products ensures a smooth, glossy finish that looks professional and lasts longer. Proper selection makes all the difference in achieving that salon-level shine at home. Additionally, understanding the different types of buffing tools can help you choose the best options for your specific nail needs. To optimize your results, it’s also helpful to consider the quality of nail buffers, as higher-quality buffers tend to be more durable and gentle on your nails. Paying attention to nail health and maintenance can further improve your buffing outcomes and overall nail appearance.
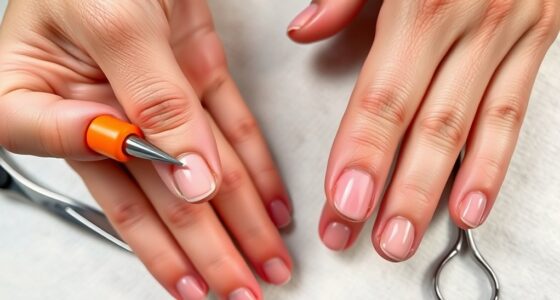
Preparing Your Nails for Buffing

Before buffing, make sure your nails are clean and free of any old polish. Next, shape and file your nails to your desired look, smoothing rough edges. Proper preparation guarantees a flawless, shiny finish that lasts. Additionally, using a gentle nail cleanser can help remove any residual oils or debris for an even buff. Ensuring your nails are free of oils or debris is essential for optimal adhesion of the buffing product, resulting in a smoother, more polished look. Incorporating a proper nail preparation routine can further enhance the final result. Paying attention to regional flavors and traditions can also inspire creative and personalized nail art designs.
Clean Nails Thoroughly
Have you ever underestimated the importance of clean nails before buffing? Clean nails are essential for maintaining nail health and ensuring a smooth, shiny finish. Before buffing, thoroughly wash your hands with soap and water, making sure to remove dirt and oils. Use a soft nail brush to gently scrub under your nails and clean the nail surface. Poor hygiene practices can trap bacteria and debris, which may cause infections or uneven buffing results. Removing oils and residue helps the buffing process work more effectively, revealing a natural luster. Remember, clean, healthy nails not only look better but also promote overall nail health. Taking these simple steps guarantees your nails are properly prepared for a flawless, salon‑level shine. Additionally, ensuring proper nail hygiene can prevent the buildup of bacteria that might lead to infections or other nail issues.
Remove Old Polish
Wondering how to prepare your nails for buffing? The first step is to remove any old polish. Use a gentle nail polish remover to thoroughly eliminate all traces of polish. This guarantees no residue interferes with the buffing process and helps you achieve a smooth, even finish. Be sure to soak a cotton pad with remover and gently wipe each nail, paying attention to the cuticle area. Avoid rushing; complete old polish removal guarantees your nails are clean and ready for the next steps. If there’s stubborn polish remaining, repeat the process until nails are clear. Proper old polish removal is vital—it creates a clean surface for buffing, resulting in a flawless, salon‑level shine. Additionally, using proper nail care techniques can also help maintain healthy nails after buffing, and incorporating tools like a quality nail buffer can further enhance your buffing routine and ensure a professional-looking finish.
Shape and File Nails
To guarantee a smooth buffing process, start by shaping and filing your nails into your desired style. Nail shape affects how your polish and buff shine, so choose one that suits your fingers and preferences. Use nail filing to create clean, even edges, avoiding rough or jagged edges that can snag or break. Smooth and refine your nails with gentle strokes, working from the sides toward the center. Keep the file at a slight angle for a natural look. Proper shaping and filing set the stage for that perfect buff and shine, and selecting the right nail tools ensures precise results. Additionally, understanding your nail anatomy can help you avoid damaging the nail bed during shaping and filing. Knowing your cuticle health can also assist in maintaining overall nail integrity and appearance. Being aware of the proper nail care techniques can further enhance your nail health and the effectiveness of your buffing routine.
Proper Techniques for Buffing and Smoothing

Mastering proper buffing and smoothing techniques is essential to achieving a flawless salon-level finish. Begin by selecting the right buffing tools, starting with a coarse grit to eliminate ridges, then moving to finer grits for a smooth surface. Use gentle, even pressure and keep the buffing motion consistent to avoid creating uneven spots. When applying polish, ensure the surface is perfectly smooth, which enhances the polish application and nail art techniques. Proper buffing also prepares your nails for a more durable finish. Always finish with a gentle wipe to remove dust and oils. Remember, patience and precision are key. By refining your buffing technique, you’ll ensure your nails look polished, smooth, and ready for the next step in your manicure. Proper technique is vital for achieving a professional-looking result. Incorporating expert advice can further improve your finishing skills. Additionally, understanding regulatory requirements for nail products can help ensure safety and quality in your procedures.
Shining Your Nails for a Mirror-Like Finish

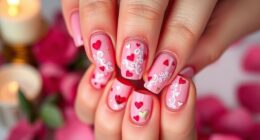
Achieving a mirror-like shine requires carefully buffing your nails with a high-quality, fine-grit buffer until they reflect light like glass. Once your nails are smooth, focus on nail color selection; choose shades that enhance your natural shine or complement your skin tone for a polished look. If you’re into nail art techniques, keep your surface flawless before adding designs, as imperfections can diminish the mirror effect. Use a soft, clean cloth or a lint-free wipe to remove any residue from buffing and polish your nails with a clear, glossy topcoat. This final step seals in the shine, creating a sleek, reflective surface. With proper buffing, thoughtful color choices, and attention to detail in nail art, you’ll achieve that stunning, salon‑level mirror finish.
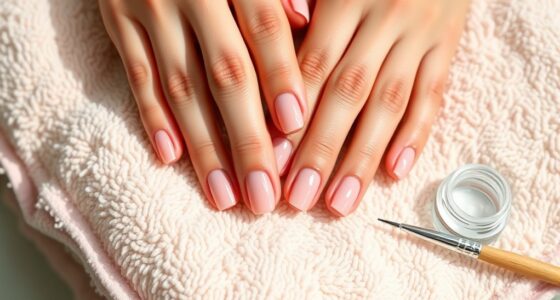
Tips for Maintaining Your Nail Shine

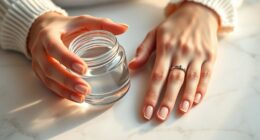
To keep your nails looking salon-perfect, you should regularly apply a clear topcoat to protect your shine. Make sure to hydrate your nails and cuticles daily to prevent dryness and maintain their health. Also, practice gentle daily habits to avoid chipping or damaging your polished finish. Incorporating proper nail care techniques can further enhance your nail’s appearance and longevity. Additionally, choosing nourishing nail and cuticle treatments can support overall nail health and shine.
Regular Topcoat Application
Applying a fresh layer of topcoat regularly is one of the simplest ways to keep your nail shine looking flawless. It protects your polish from chipping and enhances its longevity, so your nails stay glossy longer. Plus, a good topcoat can prevent color fading and maintain that salon-quality finish. Be sure to choose a topcoat that’s quick-drying and durable. Consistently applying it also helps shield your nails from everyday wear and tear, supporting overall nail health. Keep in mind, well-maintained cuticles contribute to a polished appearance, so avoid rough or damaged cuticles that can undermine your shine. Regular topcoats are a simple yet effective step in your routine to preserve your manicure’s vibrancy and ensure your nails look stunning every time.
Proper Nail Hydration
Since proper nail hydration is key to maintaining a high-shine finish, it’s important to keep your nails moisturized regularly. Well-hydrated nails look healthier, shinier, and more resilient. Focus on nourishing your cuticle health to prevent dryness and cracking, which can dull your overall look. To enhance nail hydration, consider these tips:
- Use cuticle oils daily to lock in moisture
- Apply hand cream regularly, especially after washing
- Avoid harsh soaps that strip natural oils
- Stay hydrated by drinking plenty of water
- Limit exposure to harsh chemicals and detergents
These habits help maintain your nails’ natural moisture balance, ensuring your nails stay shiny and strong. Proper nail hydration isn’t just about appearance; it supports healthy cuticle growth and overall nail integrity, giving you that salon-level finish every time.
Gentle Daily Practices
Maintaining your nail shine requires gentle daily practices that protect and preserve your manicure. Prioritize nail health by avoiding harsh chemicals and using cuticle oil regularly to keep cuticles moisturized. Be gentle when washing dishes or cleaning; wear gloves to prevent damage. Regularly apply a nourishing hand cream to support nail and skin health. Keep nails trimmed and filed smoothly to prevent snags. Limit excessive exposure to water, which can weaken nails.
| Practice | Benefit |
|---|---|
| Applying cuticle oil daily | Maintains cuticle health and prevents dryness |
| Wearing gloves during chores | Protects nails from harsh chemicals and damage |
| Gentle filing and trimming | Prevents splits and maintains nail strength |
| Using nourishing hand cream | Supports overall nail health and shine |
| Limiting water exposure | Preserves nail integrity and prevents weakening |
Common Mistakes to Avoid During Buffing

Buffing incorrectly can easily ruin a flawless finish, so it’s essential to recognize common mistakes and avoid them. One major error is overbuffing, which can cause damage to your nails and weaken the surface. Using harsh abrasives might seem effective, but they can scratch or thin your nails, leading to long-term harm. Additionally, pressing too hard can create uneven buffing and diminish shine. Neglecting to clean the buffer regularly allows debris to scratch nails. Finally, rushing the process often results in a dull or uneven look.
Be mindful of these mistakes to protect your nails:
- Overbuffing, leading to damage
- Using harsh abrasives damaging the surface
- Applying excessive pressure
- Failing to clean the buffer often
- Rushing the buffing process
Enhancing Your Manicure With Additional Nail Care

To truly elevate your manicure, incorporating additional nail care steps can make a significant difference in both appearance and health. Prioritize nail health by keeping your nails moisturized with a nourishing cuticle oil daily. Proper cuticle care helps prevent hangnails and promotes stronger nails. Gently push back cuticles after a shower or before applying polish, avoiding cuticle cutting tools to prevent damage. Regularly exfoliate your nails and cuticles with a gentle scrub to remove dead skin. Incorporate a strengthening base coat to protect nails from breakage. Maintaining healthy nails and cuticles not only enhances your manicure’s look but also supports long-term nail vitality. Consistent care ensures your nails stay smooth, shiny, and resilient, giving you a polished, professional finish every time.
Frequently Asked Questions
How Often Should I Buff My Nails to Maintain a Salon Finish?
You should buff your nails about once every two weeks to maintain nail health and a salon‑level finish. Overbuffing can weaken your nails, so it’s important to avoid excessive buffing. Focus on gentle, light buffing during each session to smooth out ridges and enhance shine without damaging your nail surface. Adjust your buffing frequency based on your nails’ condition, and always listen to your nails’ needs to keep them healthy and beautiful.
Can Buffing Damage My Natural Nails Over Time?
Buffing your nails too often can harm your nail health over time. Excessive buffing thins the natural nail layer, making it more prone to damage and breakage. To protect your nails, limit buffing frequency to once every two weeks or so, and use gentle, fine-grit files. Always be cautious, and avoid over-buffing to maintain strong, healthy nails while still achieving that polished look.
What Are the Best Natural Remedies to Enhance Nail Shine?
Think of your nails as tiny, shining stars waiting to glow brighter. To boost their natural shine, focus on nail hydration and cuticle care. Regularly apply nourishing cuticle oil and use a moisturizing hand cream. Gentle buffing with a natural nail buffer can also help, but avoid overdoing it. These remedies keep your nails healthy and luminous, like a mirror reflecting your inner glow.
Is It Safe to Use a Buffing Machine at Home?
Using a buffing machine at home can be safe if you prioritize DIY safety and use professional tools correctly. Make sure you choose the right abrasive for your nails and avoid over-buffing, which can damage your nails. Follow the manufacturer’s instructions carefully, keep the machine clean, and don’t press too hard. If you’re unsure, consulting a professional or using manual buffing tools may be a safer option.
How Do I Remove Scratches or Marks From Buffed Nails?
Imagine your nails as a canvas, waiting for a masterstroke. To remove scratches or marks, gently polish removal with a soft buffer or fine grit file can work wonders, like erasing a sketch. For scratch repair, apply a matching nail polish or a specialized top coat, then blend it seamlessly. Always work delicately, like whispering to your nails, to restore their smooth, shining perfection.
Conclusion
Think of your nails as tiny canvases—each buff and shine revealing your inner artistry. When you care for them with patience and the right tools, you’re painting a masterpiece of confidence and elegance. Every gentle stroke symbolizes your dedication, transforming dullness into brilliance. Keep nurturing your nails, and they’ll consistently reflect your inner light, shining just like a polished gemstone—resilient, radiant, and uniquely yours.