
To master the “Floating” top-coat method, you’ll want to focus on preparing a clean, smooth surface by thorough cleaning, sanding, and priming. Use controlled, gentle strokes with quality tools to apply thin coats that create the illusion of levitation. Work systematically, maintain proper drying times, and correct imperfections as they appear. With patience and precision, you’ll achieve a flawless, mirror-like finish. Continue exploring these techniques to elevate your craftsmanship even further.
Key Takeaways
- Ensure thorough surface cleaning, sanding, and priming to create a smooth, contaminant-free base for a flawless floating finish.
- Use high-quality brushes and thin, controlled applications to minimize brush marks and achieve a seamless, elevated top coat.
- Apply coats systematically with consistent, gentle strokes, maintaining a wet edge for an even, floating effect.
- Allow proper drying time between coats and address imperfections immediately for a mirror-like, durable finish.
- Adjust environmental conditions like airflow and temperature to optimize drying and prevent surface imperfections.

PinStone 3 Pack 2 Inch Angled Paint Brush Set, Synthetic Bristles, Easy Grip Rubber Short Handle, Smooth Finishes Paint Brushes for Painting Walls, Cabinets, Sash, Edge, Corner, Cut in, Trim, Touch up
【What You Get】3pcs 2-Inch short handle angle paint brush, featuring synthetic bristles, stainless steel ferrule, and rubber grip…
As an affiliate, we earn on qualifying purchases.
As an affiliate, we earn on qualifying purchases.
Understanding the Principles of the Floating Technique

To understand the floating technique, you need to grasp its core principle: creating a seamless, elevated top coat that appears to hover over the surface beneath. This is achieved through the float technique, which relies on coating principles designed to minimize contact lines and seams. Instead of heavy, opaque layers, you use thin, controlled applications that give the illusion of levitation. The key is to work quickly and smoothly, ensuring the coating remains even and free of brush marks or drips. By understanding these coating principles, you’ll learn how to manipulate the surface tension, layer carefully, and produce a clean, floating effect. Mastering the float technique requires precision, but once you get the hang of it, your finishes will look sleek and professional. Paying attention to color consistency can further enhance the seamless appearance of the top coat, and practicing proper paint thinning techniques can improve flow and reduce imperfections. Additionally, selecting the appropriate tip size ensures the application remains delicate and controlled, which is crucial for achieving the floating look. Understanding how application techniques influence the final result can help you refine your skills and produce a more polished finish.

AEROPRO TOOLS R500 LVLP Air Spray Gun with 1.3/1.5/1.7mm Nozzles & Air Regulator, A610 Paint Guns Automotive, Car Paint Gun Sprayer, Paint Gun for House Painting, Car, Furniture, Varnish and Top Coat
【Upgrade Appearance】 R500 paint gun with new Teflon coating (also named as model A610), wear-resistant and dirty resistant.
As an affiliate, we earn on qualifying purchases.
As an affiliate, we earn on qualifying purchases.
Preparing Your Surface for a Flawless Finish

Before applying your top coat, make sure your surface is thoroughly cleaned to remove dust, grease, and debris. Sand the area smoothly to guarantee the new layer adheres properly and creates an even finish. Taking these steps now sets the stage for a flawless, professional-looking result. Cultivating mindfulness practices during surface preparation can help you stay attentive to detail and reduce small errors. Regularly assessing and adjusting your approach can also foster a sustainable and efficient workflow. Incorporating proper surface preparation techniques, such as ensuring the surface is free from contaminants, is essential for achieving a high-quality finish. Additionally, verifying that your workspace has good air quality, similar to the importance of HEPA filtration for allergen removal, can improve your focus and safety during the process.
Surface Cleaning Techniques
Ensuring a clean surface is essential for achieving a flawless top-coat finish, as dirt, grease, or dust can cause imperfections. Start by wiping the surface with a damp cloth or tack cloth to remove dust and debris. Make sure the surface is dry and free of grease or oils, which can interfere with paint adhesion. Pay attention to the paint consistency; it should be properly mixed and free of lumps, ensuring smooth application. Also, consider your drying environment—avoid high humidity or direct sunlight, which can slow drying or cause uneven curing. Before applying the top coat, inspect the surface carefully for any lingering contaminants. Regular maintenance and proper cleaning can improve air quality in your workspace, helping to ensure a cleaner surface. Proper ventilation and the use of air purifiers can reduce airborne pollutants that settle on surfaces, maintaining a cleaner environment. Maintaining a dust-free workspace is crucial, as airborne particles can settle on the surface and compromise the finish. Additionally, using power tools for surface preparation can significantly increase efficiency and ensure a more consistent clean. Cleanliness and proper preparation set the foundation for a smooth, professional-looking finish.
Proper Surface Sanding
After cleaning the surface thoroughly, the next step is to sand it properly to create a smooth, even base for your top coat. Focus on achieving a uniform surface texture by using the right grit sandpaper—start with medium grit and finish with fine grit for a silky finish. Keep environmental conditions in mind; humidity and temperature can affect how the surface sands and how the finish adheres. Sand in a consistent, circular motion, applying gentle pressure to avoid gouges or uneven spots. Remove dust thoroughly afterward to prevent particles from marring the finish. Proper surface sanding ensures your top coat will float smoothly, enhancing adhesion and resulting in a flawless, professional look. Incorporating aquatic exercise techniques can also promote better muscle relaxation and reduce tension during preparation. Additionally, understanding surface preparation best practices can significantly improve the longevity and appearance of your finish. Being aware of the impact of organic and natural juices on your overall health can motivate you to maintain proper surface preparation routines, much like choosing healthy ingredients for a nutritious juice. Recognizing how expiring products can affect your project emphasizes the importance of preparing fresh, uncontaminated surfaces for optimal results.

Flood Floetrol 1 qt. Clear Latex Paint Additive
Fortifies acrylic and latex paints to improve performance and reduce brush marks
As an affiliate, we earn on qualifying purchases.
As an affiliate, we earn on qualifying purchases.
Selecting the Right Finish and Tools

Choosing the right finish and tools is essential for achieving a smooth, professional-looking floating top coat. Start by selecting a finish known for its durability, such as polyurethane or epoxy, to ensure longevity. The type of finish impacts how well your coat resists wear and environmental damage. When it comes to tools, use high-quality brushes designed for the chosen finish; synthetic bristles often work well for water-based products, while natural bristles suit oil-based finishes. Mastering brush techniques—like maintaining a wet edge and applying even, light strokes—helps prevent streaks and uneven texture. Proper tool selection and technique directly influence the finish’s appearance and durability, so choose wisely to get the best results for your project. Additionally, understanding Kia Tuning options can inspire creative customizations that enhance the overall aesthetic and performance of your vehicle. Being aware of finishing techniques can further improve your craftsmanship and ensure a flawless result.

Polar All Surface Primer Matte Gray – 2 x 13.5 Fl Oz – Ideal for Wood, Metal, Plastic, Brick – Enhanced Adhesion & Quick Drying
Enhanced All Surface Primer: Polar All Surface Primer Spray Paint is a high-build primer resistant to chipping, peeling,…
As an affiliate, we earn on qualifying purchases.
As an affiliate, we earn on qualifying purchases.
Step-by-Step Application of the Floating Coating

To get the best results, start by preparing your surface thoroughly to make certain it’s clean and smooth. When applying the coat, do so gently to avoid streaks or uneven layers. Focus on achieving a smooth, even finish for a professional-looking top coat. Remember to consider the adhesion of the coating to ensure durability and a flawless appearance. Additionally, adjusting your pressure settings appropriately can help achieve a more consistent spray pattern. Ensuring proper surface preparation is crucial for the coating to adhere effectively and last longer.
Preparing the Surface Properly
Before applying the floating top-coat, you must guarantee the surface is properly prepared to achieve a smooth, durable finish. Start by inspecting the surface for any imperfections, cracks, or loose material. Surface priming is essential to ensure good adhesion and even absorption of the coating. Use a high-quality primer suited for your surface type, and apply it evenly. Moisture control is critical; make sure the surface is dry and free of excess moisture, as trapped moisture can cause peeling or bubbling. If needed, use a moisture meter to confirm dryness before proceeding. Proper surface priming and moisture management create a stable base, preventing issues down the line and ensuring your floating top-coat adheres smoothly and lasts longer.
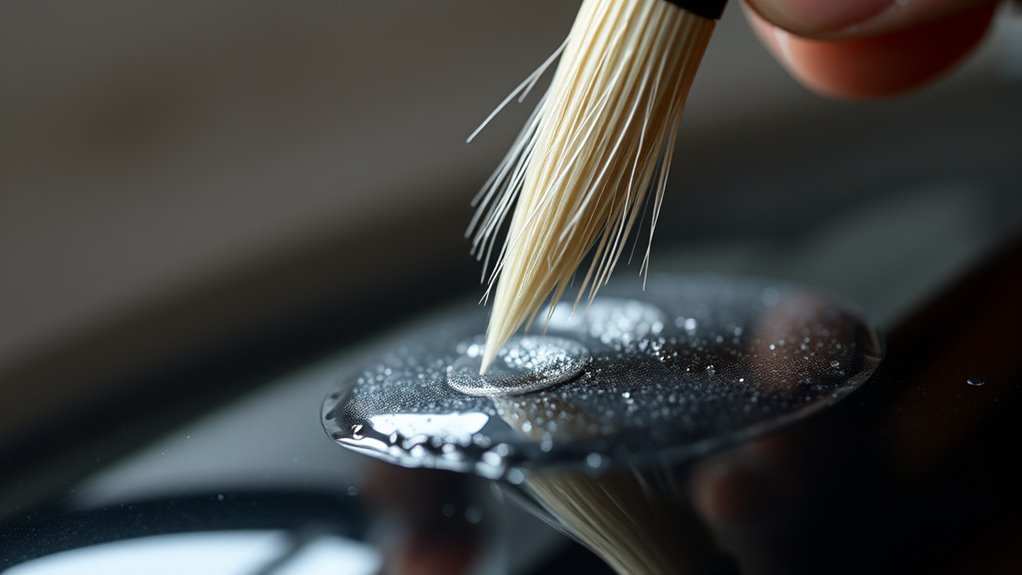
Applying the Coat Gently
Gently applying the floating top-coat is essential for achieving a smooth, even finish. Use a light brush technique, keeping your brush almost parallel to the surface to avoid applying too much pressure. Maintain a consistent coating by regularly checking your coating’s thickness, ensuring it’s neither too thick nor too thin. Work in small, manageable sections, and use smooth, continuous strokes to spread the coat evenly. Avoid pressing down hard or reworking areas excessively, as this can disturb the finish. Instead, focus on a delicate touch that allows the coating to float over the surface without creating ridges or streaks. By controlling your brush technique and maintaining proper coating consistency, you’ll set the foundation for a flawless floating finish.
Achieving Smooth, Even Finish
Achieving a smooth, even finish with the floating top-coat requires a precise, step-by-step approach. Start by using controlled brush techniques, applying the coating with long, consistent strokes to reduce streaks and uneven texture. Keep your brush well-loaded but not overloaded to maintain even coverage. Pay close attention to drying times; allow each layer to dry thoroughly before adding the next. Rushing the process can cause imperfections, so patience is key. When applying the floating coat, work systematically across the surface, avoiding overworking areas. This ensures a uniform, sleek finish. Proper brush techniques combined with adherence to drying times help you achieve a polished, professional look, making the floating top-coat an effective method for a flawless top layer.
Troubleshooting Common Challenges and Fixes

Even with careful preparation, you might encounter issues when applying the floating top-coat method. Common problems include uneven coverage, brush marks, or excess pooling. To fix these:
- Check your brush techniques—use light, consistent strokes to avoid streaks and brush marks.
- Adjust drying conditions by ensuring proper airflow and temperature; too fast or slow drying can cause uneven finishes.
- If pooling occurs, gently remove excess with a clean, dry brush before it dries completely.
Addressing these challenges helps maintain a smooth, professional look. Remember, patience with drying and careful brushwork are key. Troubleshooting these issues early keeps your project on track and results flawless.
Tips for Achieving a Durable, Mirror-Like Finish

Once you’ve mastered the application process and fixed common issues, the next step is to focus on creating a finish that’s not only visually stunning but also highly durable. To do this, pay close attention to brush techniques—use smooth, even strokes to prevent streaks and ensure a uniform coat. Lighting considerations are equally important; work in a well-lit environment to spot imperfections and gauge gloss levels. Proper lighting helps you avoid cluttered or uneven finishes, making your work appear mirror-like. Additionally, allow ample drying time between coats and follow manufacturer recommendations for top-coat products. Use the table below to keep key tips in focus:
| Tip | Technique | Lighting Tip |
|---|---|---|
| Brush Strokes | Use even, consistent strokes | Work in bright, natural light |
| Drying Time | Follow manufacturer guidelines | Inspect finish regularly |
| Coat Thickness | Apply thin, overlapping coats | Adjust lighting angles for reflection |
| Surface Prep | Sand and clean surfaces thoroughly | Use adjustable lighting for best view |
| Final Inspection | Check for flaws with bright light | Correct imperfections immediately |
Frequently Asked Questions
Can the Floating Top-Coat Method Be Used on All Surface Types?
You might wonder if the floating top-coat method works on all surface types. It’s important to take into account surface compatibility and material limitations. While it’s effective on many surfaces like wood and concrete, it may not suit materials like plastic or metal without proper preparation. Always evaluate the surface’s texture and material properties to ensure the floating top-coat method provides a durable, smooth finish without issues.
How Long Should I Wait Between Coats for Optimal Results?
Oh, the suspense of waiting between coats! You should give each layer enough time to dry, typically 2-4 hours, but don’t forget environmental factors. Humidity, temperature, and airflow can turn your patience into frustration. Rushing it might cause smudges or peeling. So, check the drying time on your product label and adjust for conditions. Trust us, good things really do come to those who wait!
Is Special Cleaning Required for Tools Used in Floating Coating?
You should always follow proper tool maintenance and cleaning procedures after floating coating. Clean your tools thoroughly with the appropriate solvent or water immediately after use to prevent the coating from drying and becoming hard to remove. This helps maintain their effectiveness and prolongs their lifespan. Regular cleaning guarantees smooth application in future projects, reduces mess, and ensures consistent, high-quality results every time you perform a floating top-coat.
What Safety Precautions Are Necessary During Application?
Did you know that poor ventilation causes over 50% of coating-related health issues? During application, you should always wear protective gear like gloves and masks to prevent inhaling fumes or skin contact. Make sure to follow ventilation precautions, such as working in well-ventilated areas or using exhaust fans. These safety measures protect you from potential hazards, ensuring a safer, more effective floating top-coat application.
Can This Technique Be Applied Outdoors or Is It Indoor-Only?
You can apply this technique outdoors, but you need to consider weather conditions first. Avoid painting on windy, rainy, or very hot days, as these can affect the finish. Proper surface preparation is crucial—make sure the surface is clean, dry, and smooth. If weather conditions are stable, this method works well outside, but always check the forecast and prepare the surface thoroughly for best results.
Conclusion
Mastering the floating top-coat method isn’t just about technique—it’s about trusting your skill and patience. When done right, it creates a flawless, mirror-like finish that lasts. Some believe perfection is impossible, but with practice and attention to detail, you can defy that myth. Every smooth layer you apply proves that mastery comes from perseverance. Believe in your ability to transform surfaces and let the floating technique elevate your craftsmanship beyond expectations.