To strengthen your nails at home with a DIY builder gel overlay, start by thoroughly cleaning and shaping your nails, gently pushing back cuticles. Apply a primer to improve adhesion, then carefully brush on thin layers of builder gel, extending slightly beyond the nail edge for added strength. Cure each layer under a UV or LED lamp, and remove the tacky layer afterward. With proper technique and patience, you’ll achieve durable, professional-looking nails—keep going to learn more tips and tricks for perfect results.
Key Takeaways
- Thoroughly clean, shape, and buff nails to ensure proper adhesion and reduce lifting or chipping.
- Use a high-quality primer before applying builder gel for better durability.
- Apply thin, even layers of builder gel, extending slightly beyond the nail edge for strength.
- Cure each gel layer under UV or LED light according to manufacturer instructions.
- Finish with a wipe to remove tacky residue and apply cuticle oil for healthy, long-lasting nails.

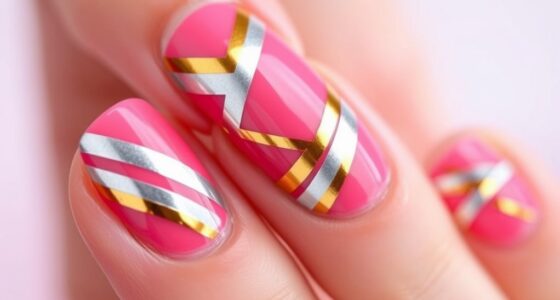
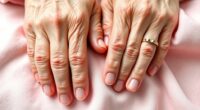
Are you ready to give your nails a professional-looking upgrade without visiting the salon? Doing a DIY builder gel overlay is a fantastic way to strengthen your nails at home, and the key to a flawless finish starts with proper gel application and nail prep. Before you plunge in, gather your tools: a good nail file, a buffer, gel brush, primer, builder gel, and a UV or LED lamp. Clear instructions and patience will help you achieve results that rival professional work.
The first step is nail prep. You need to clean your nails thoroughly, removing any oils, lotions, or residues that can interfere with adhesion. Use a gentle nail cleanser or alcohol wipe to dehydrate the nail surface. Then, shape your nails with a nail file, focusing on smooth, even edges. Buff the surface lightly to eliminate shine, which allows the gel to adhere better. Pay special attention to the cuticles, gently pushing them back to create a clean, open nail bed. Proper nail prep is vital because it lays the foundation for a long-lasting overlay and prevents lifting or chipping later.
Once your nails are prepped, it’s time for the gel application. Start by applying a thin layer of primer to prime the nail. This step enhances adhesion and minimizes the risk of lifting. Follow with a base coat or builder gel specifically designed for overlays. Using your gel brush, carefully apply a thin, even layer of builder gel over the entire nail, extending slightly beyond the nail edge for strength. Be mindful not to flood the cuticle area—this can cause lifting or an uneven finish. Cure the gel under your UV or LED lamp according to the manufacturer’s instructions—usually around 30-60 seconds.
After curing the first layer, assess whether you need additional thickness for strength. If so, apply another thin layer of builder gel, ensuring it’s smooth and even, then cure again. This layering technique creates a sturdy, durable overlay. Once the gel has fully cured, gently remove the sticky inhibition layer with a lint-free wipe soaked in alcohol. Finish with a nourishing cuticle oil to hydrate your skin and enhance the overall look.
With patience and practice, you’ll find that mastering gel application and nail prep at home is not only cost-effective but also incredibly satisfying. Your nails will look professionally done, and you’ll enjoy the strength and durability of your DIY builder gel overlay for weeks. Just remember, the key is in the prep work and applying thin, even coats—these small details make a big difference in your results.

JODSONE U V LED Nail Lamp, Nail Dryer for Gel Polish, Led Light with Automatic Sensor & 4 Timers
The Professional Nail Lamp and Drying Almost All Nail Gel: including led gels, hard gels, sculpture gel, gem…
As an affiliate, we earn on qualifying purchases.
As an affiliate, we earn on qualifying purchases.
Frequently Asked Questions
Can Builder Gel Be Applied on Natural Nails Without Tips?
Yes, you can apply builder gel directly on natural nails without tips. First, you need to do proper natural nail prep—clean, buff, and dehydrate your nails. Use correct gel application techniques, like applying thin layers and curing between coats. This method strengthens your nails and creates a smooth, durable overlay, all without the need for tips. Just make sure to follow proper prep and application steps for best results.
How Long Does a DIY Builder Gel Overlay Last?
Ever wonder how long your DIY builder gel overlay will last? Well, it varies. If you follow proper application techniques, your nail’s longevity can extend up to three weeks. Durability factors like your daily activities, nail prep, and curing process influence this. Keep your nails protected and avoid harsh chemicals, and you’ll enjoy a beautiful, durable finish longer. But beware—any slip-up could shorten that perfect wear.
Is Builder Gel Suitable for Brittle or Damaged Nails?
Builder gel can be suitable for brittle or damaged nails as it offers extra strength and protection. It helps improve nail health by providing a sturdy overlay that reduces breakage. However, it’s essential to contemplate alternative treatments and consult a nail professional for personalized advice. Proper application and care are key to ensuring your nails stay healthy and strong while using builder gel.
What Should I Do if I Experience an Allergic Reaction?
Think of your skin as a delicate garden, and allergic symptoms as sudden weeds threatening to take over. If you experience an allergic reaction, take immediate action by rinsing the area with cold water and removing any products. Stop using the gel right away, and if symptoms worsen, seek medical help promptly. Acting swiftly can prevent the allergy from spreading and help your nails recover safely.
Can I Remove Builder Gel at Home Safely?
You can remove builder gel at home safely if you follow proper gel removal and safety precautions. Start by gently filing the top layer to break the seal, then soak your nails in acetone for 10-15 minutes. Use a wooden stick to carefully lift the gel, avoiding excessive force. Always work in a well-ventilated area, wear gloves, and be gentle to prevent nail damage and guarantee safety throughout the process.

Beetles Builder Gel for Nails-3 Colors 9 in 1 Nail Extension Sculpting Building,Clear Nude Pink Hard Gel Kit with Base Top Coat for Pros Women,UV & LED Lamp Cured Needed
Beetles Builder Gel Nail Kit: 30g*3 sculpture gel (Clear,Nude,Pink), 7.5ml*2 Base & Top Coat ,1* Double-ended Nail Brush,1*Nail…
As an affiliate, we earn on qualifying purchases.
As an affiliate, we earn on qualifying purchases.
Conclusion
Now that you know how to apply a builder gel overlay at home, you can confidently strengthen your nails whenever needed. Imagine Sarah, who struggled with brittle nails, tried this method and saw a noticeable difference in just weeks. With some practice, you’ll enjoy durable, beautiful nails without the salon hassle. So go ahead—give it a try and transform your nails into a strong, stunning statement of your DIY skills!

Morovan Professional Natural Nail Prep Dehydrate and Acid-Free Primer, Dehydrator for Acrylic and Gel Nail Polish, Non Acid Primer for UV Gels Fast Dry Superior Bonding Agent Gift Box Set
GET STRONG ADHESION – This kit includes nail dehydrator and primer. It is important to pre-treat your nail…
As an affiliate, we earn on qualifying purchases.
As an affiliate, we earn on qualifying purchases.

Nail File and Buffer Set, 4 Way Nail Buffers Shine Kit Professional Nail Files for Natural Nails Manicure Filer Filing Polishing Buff Nail Care Smoother Buffing Fingernail 100/120/240/600/3000 Grit
All-in-one Handy Manicure Tools: what you get are 10 pieces of black rectangular emery board nail files, and…
As an affiliate, we earn on qualifying purchases.
As an affiliate, we earn on qualifying purchases.