
To perfect your acrylic ratio and prevent lifting or bubbles, focus on achieving the right consistency. Use a slightly viscous, syrup-like mixture that flows smoothly but doesn’t spread too quickly. Practice adjusting the amount of monomer and powder until you form small, cohesive beads. Always observe your mixture’s texture and modify as needed—adding more powder if it’s too runny or more monomer if it’s too crumbly. Keep experimenting to master the balance for flawless nails.
Key Takeaways
- Achieve a slightly viscous, syrup-like consistency for smooth blending and uniform bead formation.
- Use high-quality, fine powder to ensure predictable reactions and reduce clumping.
- Adjust the powder-to-monomer ratio: add powder if beads are too runny, add monomer if too crumbly.
- Dip your brush into monomer first, then into powder to control mixture consistency effectively.
- Observe bead texture during application to fine-tune ratios and prevent lifting and bubbles.
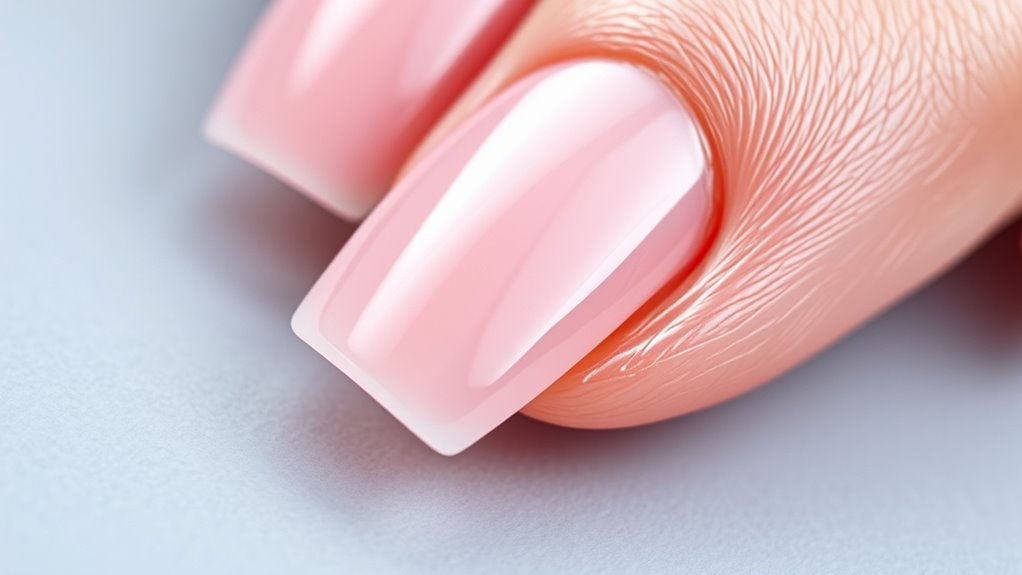
Have you ever wondered what the ideal acrylic ratio is for your project? Achieving the perfect balance between monomer and powder is vital to create a durable, smooth, and professional finish. The key lies in understanding how monomer consistency and powder quality influence this ratio. When you get these elements right, you’ll notice a significant reduction in lifting, bubbles, and other common acrylic issues.
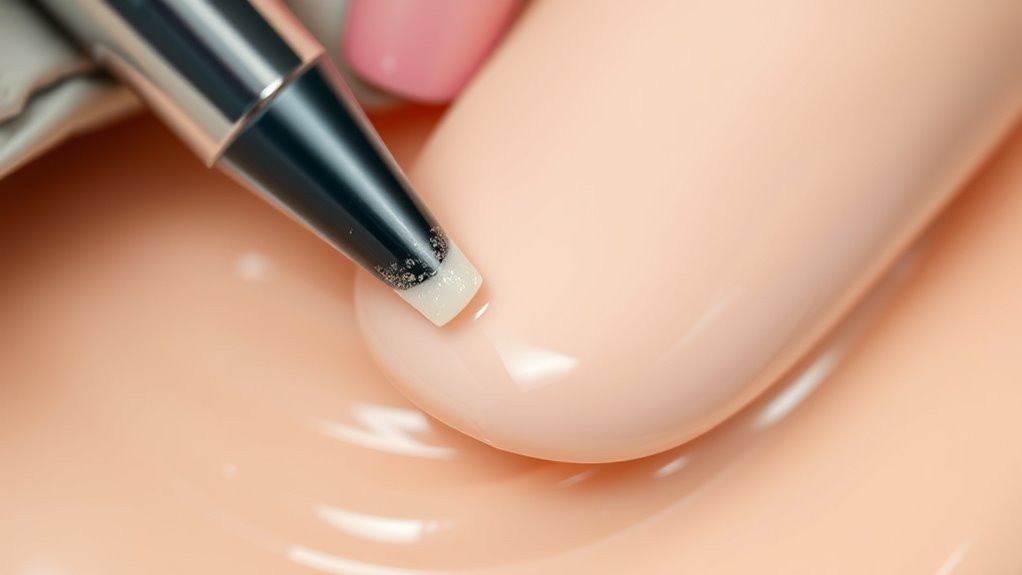
First, focus on the monomer consistency. If it’s too runny or too thick, it’ll be tough to control the mixture. A proper monomer should have a slightly viscous, syrup-like consistency—not too thin or watery. When the monomer is just right, it allows the powder to blend smoothly without becoming overly sticky or dry. This consistency ensures you can work efficiently, creating a uniform bead that adheres well to the natural nail. If the monomer is too fluid, it can cause the acrylic to spread too quickly, leading to bubbles and uneven surface textures. Conversely, if it’s too thick, it may not flow well enough, resulting in a lumpy or uneven application.
Achieve a smooth acrylic mix with a syrup-like, viscous consistency for optimal application.
Next, pay attention to the powder quality. High-quality acrylic powder has a fine, consistent particle size, which promotes a smooth, even mixture. Poor-quality powders tend to clump or produce a grainy texture, making it hard to achieve a seamless finish. When the powder is of good quality, it reacts predictably with the monomer, giving you more control during application. This control is vital because it helps prevent issues like lifting, where the acrylic doesn’t stick properly, and bubbles, which form when trapped air escapes unevenly.
The right acrylic ratio isn’t a fixed number; it’s a balance you develop through practice and observation. Typically, you want to dip your brush into the monomer first, then into the powder, making a small, cohesive bead. If the bead is too wet and runny, add a little more powder. If it’s too dry and crumbly, add a few more drops of monomer. Adjusting these proportions based on monomer consistency and powder quality will give you a more predictable, manageable mixture.
Top picks for "perfect acrylic ratio"
Open Amazon search results for this keyword.
As an affiliate, we earn on qualifying purchases.
Frequently Asked Questions
How Do Temperature Changes Affect Acrylic Mixing?
Temperature fluctuation can markedly impact your acrylic mixing consistency. When it’s too hot, the acrylic may dry faster, making it harder to work with and increasing the risk of bubbles. Cooler temperatures slow down the curing process, which can lead to uneven mixing. To keep your acrylic perfect, work in a controlled environment, and adjust your mixing time based on the room temperature to avoid lifting or bubbles.
Can Acrylic Ratios Vary for Different Nail Shapes?
Did you know that nail shape considerations can influence how you apply acrylic? Yes, different shapes like stiletto or oval may require slight adjustments in your acrylic application techniques. You might find that ratios vary slightly to guarantee proper adhesion and a smooth finish. Experimenting with these ratios helps prevent lifting or bubbles, especially when customizing for specific nail shapes. Always observe how your acrylic responds and adapt accordingly for flawless results.
What’s the Best Way to Store Acrylic Powders?
When storing acrylic powders, you should follow acrylic storage tips to keep them fresh and effective. Store your powders in an airtight container in a cool, dry place away from direct sunlight. The temperature impact on acrylic is significant; high heat can cause clumping or hardening. Avoid storing powders in humid areas, and always seal the container tightly after use to prevent moisture absorption.
How Often Should I Recalibrate My Mixing Tools?
You should recalibrate your mixing tools regularly to maintain consistent mixing consistency. Check your tools after every few uses, especially if you’re switching between different acrylic powders or brands. Proper tool maintenance ensures accurate measurements and smooth application. If you notice uneven mixes, it’s a good sign to reconfigure or clean your tools thoroughly. Consistent maintenance helps prevent lifting and bubbles, keeping your acrylic nails flawless.
Are There Specific Brands That Promote Optimal Ratios?
Your question about brands promoting ideal ratios is vital because it impacts your work’s perfection. Some brands excel in ensuring brand consistency and superior product formulation, making your acrylic mix flawless. While no brand can promise perfection, reputable ones like Young Nails or CND focus on reliable ratios to help prevent lifting and bubbles. Always check product instructions and stick with trusted brands to achieve the best results.
Conclusion
Now that you’ve mastered the perfect acrylic ratio, you’re like a chef seasoning a dish—getting just the right balance makes all the difference. I once watched a beginner struggle with lifting, but once they adjusted their mix, it was smooth sailing. Think of your acrylic mix as the foundation of a sturdy bridge; with the right ratio, it’ll support flawless nails every time. Keep experimenting, and soon, perfection will be your second nature.