TL;DR

Get beauty and skincare favorites delivered free with Prime
- Fast, free delivery on millions of items
- Prime Video, Amazon Music and more included
- Member-only deals all year
UV gel nail polish sets bundle base coat, color gels, top coat, and often an LED lamp so you can get 2–3 weeks of chip-free manicures at home for a fraction of the $35–60 salon price. The gel hardens when photoinitiators in the formula react to UV or LED light — which is why thin coats, full curing, and proper soak-off removal matter more than the brand you buy.
A salon gel manicure costs $35–60. A decent at-home UV gel nail polish set costs about the same — and covers your nails for the next six months. That math is why bathroom-counter gel kits exploded from niche hobby to mainstream beauty staple.
But there’s a catch. Plenty of first-timers end up with gummy nails that won’t cure, polish that peels off in three days, or thin, painful nails after a month of picking at gel. Almost none of that is the polish’s fault.
In this article, you’ll learn what actually comes in a gel kit, how the chemistry works, the step-by-step application process, and the safety habits that separate people with gorgeous two-week manicures from people with wrecked nail beds. Let’s get into it.
A complete starter kit (base coat, colors, top coat, LED lamp) costs about the same as one salon gel manicure at $35–60 — making it a break-even purchase after…
Thin coats are the single biggest application rule: light only penetrates a thin layer, and thick coats stay soft underneath, causing lifting, wrinkles, and sk…
The sticky layer after curing is normal — it’s called the inhibition layer, and you wipe it off with alcohol rather than re-curing.
Peeling gel off by hand is the top cause of nail damage; always buff the shine off the top coat, then soak in 100% acetone for 10–15 minutes before gently push…
Under-cured gel touching skin is the main trigger for acrylate allergies — clean up edges before curing, and consider HEMA-free formulas or UV gloves if you ha…
What’s Actually Inside a UV Gel Nail Polish Set
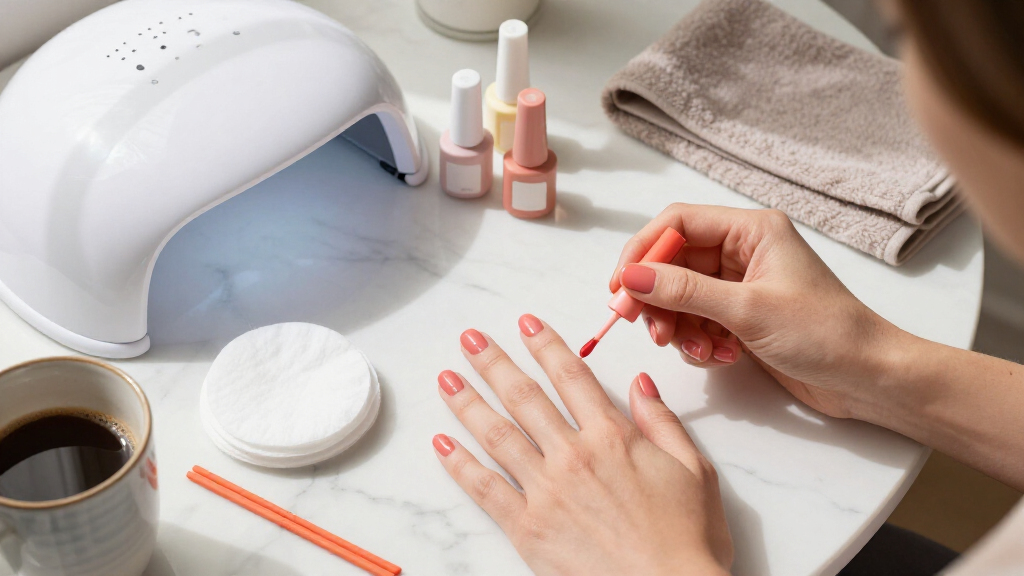
A UV gel nail polish set is a bundled kit containing the three gel layers — base coat, color gel, and top coat — plus, in most starter kits, a curing lamp and prep tools. Sets range from tiny 6-color collections to mega-boxes with 40+ shades, and the lamp is often bundled in as the headline feature.
Why three separate layers instead of one all-in-one bottle? Because each layer does a chemically distinct job. The base coat is formulated to bond to keratin — it’s the glue between your nail and everything above it. Color gel is pigmented for opacity, not adhesion. Top coat is hard and glossy but has no grip at all. This is why you can’t skip or swap layers: the system only works as a stack, and a failure at the base layer takes the whole manicure down with it.
Here’s what a well-equipped kit typically includes:
- The holy trinity: base coat, top coat, and at least one color gel
- An LED or UV lamp (LED is now standard in new kits)
- Prep tools: nail file, buffer, cuticle pusher, alcohol wipes
- Removal tools: foil wraps, wooden sticks, sometimes a coarse file
Scenario: you unbox a $40 Beetles starter kit. Inside are 6 mini colors, base and top coat, a small 48W LED lamp, and a flimsy file. That’s genuinely everything you need for your first manicure — except remover, which almost no kit includes. Buy 100% acetone separately. The tradeoff worth knowing: bundled tools are usually the weakest link. The included file and buffer wear out fast, so upgrading those two items for a few dollars improves your results more than upgrading the polish.
One warning worth bolding: don’t cure regular polish in the lamp. Regular air-dry polish hardens by solvent evaporation; gel hardens by a light-triggered chemical reaction. They’re chemically different animals, and mixing them is the fastest route to a sticky mess — or worse, trapping wet solvent under a cured layer that peels within days.
Why the Lamp Makes or Breaks Your Manicure (UV vs. LED)
UV and LED lamps do the same job — they harden gel polish — but LED lamps cure faster, run cooler, and their bulbs never need replacing. That’s why nearly every new gel kit ships with an LED lamp instead of a traditional UV one.
The chemistry, in plain terms: gel polish contains photoinitiators — molecules that spring into action when hit by specific wavelengths of light. They trigger the reaction that turns liquid gel into a hard, glossy shell in seconds. UV lamps emit a broad spectrum around 365nm; LED lamps emit a tighter band around 395–405nm that matches modern gel formulas more efficiently. Here’s the implication most people miss: your lamp and your polish are a matched pair, not generic components. An underpowered or mismatched lamp doesn’t just cure slowly — it leaves a partially cured layer sitting against your skin for two weeks, which is both an adhesion failure and an allergy risk. The lamp isn’t an accessory; it’s half the chemical reaction.
| Feature | UV Lamp | LED Lamp |
|---|---|---|
| Cure time per layer | ~2 minutes | 30–60 seconds |
| Bulb lifespan | Needs replacing | Lifetime of the lamp |
| Heat spike | Lower | Can feel warm on thin gels |
| Compatibility | Works with most gels | Best with LED-formulated gels |
Are they interchangeable? Often, but not always. Check your gel’s label — if it says “LED only,” an old UV lamp may cure it slowly or not at all, which causes the gummy-nail problem we’ll fix later. The reverse matters too: a UV-cure gel in an LED lamp may cure fine on the surface but stay soft underneath, because the photoinitiator in that formula simply doesn’t respond to the LED’s wavelength band. When in doubt, match the brand of lamp to the brand of gel — manufacturers engineer them as a system.
How to Apply Gel Polish in 7 Steps (Without Bubbles or Lifting)
A flawless gel manicure comes down to seven steps, and two of them happen before any color touches your nail. Follow this order every time:
- Shape and buff. File nails to your desired length, then lightly buff the shine off the nail surface — gel needs a slightly rough surface to grip. Buffing is mild abrasion on purpose: you’re creating microscopic scratches the base coat can lock into. Skip it and you’re asking a smooth, oily surface to hold a hard shell for two weeks.
- Push back cuticles with a wooden stick. Gel touching skin doesn’t just look messy; it’s the main cause of acrylate allergies, and gel bonded to skin is the first thing to lift.
- Dehydrate. Wipe each nail with alcohol or a dehydrator. This removes oils — the #1 reason gel lifts within days. Your nail plate naturally produces oil that keeps skin supple; it’s great for your skin and catastrophic for adhesion.
- Apply thin base coat and cure under the lamp.
- Apply color in 2–3 thin coats, curing between each. Thin means you can barely see the brush strokes.
- Seal with top coat, capping the free edge of the nail, and cure. Capping — brushing the top coat across the exposed edge — is what waterproofs the tip, where water seeps in and starts lifting first.
- Wipe off the sticky layer with alcohol. That tackiness is normal — it’s called the inhibition layer, the thin film where oxygen in the air blocked the curing reaction at the surface. It’s not a defect; wipe it and you’re done.
Why thin coats? Because light only penetrates so far. A thick glob of gel cures on the surface but stays soft underneath — that under-cured layer causes lifting, sensitivity, and wrinkling. It also means the solvents trapped inside have nowhere to go, so the manicure fails from within. Two whisper-thin coats beat one thick one every single time, even though the thick coat feels faster in the moment. That impatience is exactly what the habit is designed to counteract.
The Safety Stuff Nobody Tells You Before Your First Kit
Gel polish is safe for most people when used correctly, but three real risks exist: UV exposure, acrylate allergies, and nail damage from improper removal. None of them are reasons to skip gel — they’re reasons to build good habits. The important framing: all three risks scale with your technique, not with the product itself. Sloppy technique makes a safe product risky; careful technique makes the same product nearly harmless.
UV exposure: a gel session adds only minutes of low-level UV, but dermatologists recommend fingerless UV gloves or broad-spectrum sunscreen on your hands before curing. Cheap insurance against long-term skin aging. The dose per session is small — comparable to a few extra minutes of sun — but gel users often do this weekly for years, and cumulative exposure is the number dermatologists actually worry about.
Allergies: acrylate allergies are real and increasingly documented, and they’re triggered mainly by uncured gel touching your skin. Fully cured gel is largely inert; the danger is the reactive liquid state. Clean up stray polish before curing. This is the tradeoff that matters most: a two-minute cleanup habit versus a permanent sensitization, because acrylate allergies — once developed — don’t fade and can rule out gel, and even some dental and medical procedures, for life. If you develop persistent redness, itching, or lifting around the nail bed, stop and see a dermatologist. The EU has already restricted HEMA concentrations in gels over allergy concerns, and HEMA-free formulas are a growing option for sensitive users — though no gel is guaranteed allergy-proof.
Peeling off your gel might feel satisfying, but it takes a layer of nail plate with it. That’s the classic cause of thin, peeling, painful nails — not the gel itself. And because the nail plate takes months to grow out, one bad peel can set you back longer than the manicure ever lasted.
Pregnancy or pre-existing conditions? Gel is generally considered low-risk, but check with your doctor first — and if you have any skin condition or prior allergic reaction, get professional guidance before using at-home kits. Always do a patch test when trying a new brand.
Why Your Gel Is Peeling Early (and How to Fix It)
Most gel problems trace back to three culprits: oily or poorly prepped nails, thick coats that didn’t fully cure, or a worn-out lamp. Understanding why is the diagnostic shortcut: prep failures break the bond at the nail-to-base-coat interface, while curing failures break down between the layers. Where the failure happens tells you which culprit to chase. If your manicure is lifting inside a week, run through this checklist.
- Lifting at the edges? You skipped the alcohol wipe or didn’t cap the free edge with top coat. Water enters at the edges first, working its way under the gel like a slow leak.
- Wrinkles or ripples? Your coats are too thick, or you cured a layer that had already started to dry unevenly.
- Gummy, never-hard gel? Your lamp doesn’t match the formula, the lamp is old, or the layer is too thick for light to penetrate. Don’t just re-cure it repeatedly — under-cured gel stays chemically active against your skin, so remove it and start over.
- Bubbles? You’re working with old, thickened gel or shaking the bottle like a cocktail. Roll it between your palms instead — shaking whips air into a formula that’s too viscous to let it escape before curing.
- Peeling by day 3? Ninety percent of the time, it’s cuticle oil or leftover lotion on the nail plate before application. The gel cured perfectly; it just bonded to oil instead of nail, and oil doesn’t stay put.
Real example: a friend blamed her “cheap kit” for manicures lasting four days. I watched her apply it once — no buffing, no alcohol, and base coat painted over her cuticles. Same kit, proper prep: 14 days chip-free. The kit was never the problem. That’s the broader lesson: people upgrade their polish when they should be upgrading their prep, and the market happily sells them more product that fails the same way.
Can you mix brands? Usually yes — one brand’s base with another’s color typically works, because the industry builds around similar chemistry — but base and top coats from the same system are engineered to bond to each other precisely. For guaranteed results, stick to one system, especially when you’re starting out and can’t yet tell a formula problem from a technique problem.
Removal Done Right: Soak, Don’t Peel
Removing gel polish safely takes about 15–20 minutes and requires 100% acetone, foil wraps or clips, and patience — never picking or prying. Here’s the process: buff the shiny top coat off, soak cotton in acetone, press it onto the nail, wrap in foil for 10–15 minutes, then gently push the softened gel off with a wooden stick.
That first buffing step matters more than people think, and understanding why saves you ten minutes of frustration. The top coat is a shield — acetone can’t penetrate a properly cured, hardened surface. Buff through the shine and the remover reaches the layers underneath, cutting your soaking time dramatically. The same chemistry that keeps your manicure chip-proof for two weeks is what makes removal slow; you’re dismantling the armor before you can dissolve what’s inside it.
A word on acetone: it’s harsh on skin and nails, stripping natural oils along with the polish. That’s an acceptable tradeoff for occasional use, but moisturize afterward — cuticle oil and hand cream restore what the acetone removed. And regular nail polish remover won’t do the job; it’s diluted with oils and water that gel simply shrugs off.
Unopened gel polish lasts roughly 12–24 months, so the bottle you soaked off today has plenty of life left — if you store it away from light and heat. A desk drawer beats a sunny windowsill every time, because heat and light slowly trigger the same curing reaction inside the bottle, thickening the gel even without a lamp.
If the gel doesn’t budge after 15 minutes, soak longer. Forcing it with a metal tool is how “gel scars” and onycholysis (nail separation from the bed) happen — and a separated nail bed is both painful and slow to heal, taking months to reattach as the nail grows out. Your nails will thank you in six months when they’re still strong.
Budget vs. Premium Kits: Where Your Money Should Go
For most beginners, a mid-range starter kit with a reliable LED lamp beats both the cheapest box on the marketplace and the $100+ professional setup. The logic: while you’re still learning, your technique causes most of your failures — so paying for premium polish is like buying racing tires before you can drive. Upgrade the product only after your prep and application are consistent. Here’s the honest breakdown:
| Price Range | What You Get | Best For |
|---|---|---|
| Under $25 | Small color set, mini lamp, no prep tools | Testing whether you like gel at all |
| $30–60 | Full system, decent 48W lamp, prep basics | Most beginners — the sweet spot |
| $70+ | Pro-grade formulas (Gelish, OPI, Kiara Sky), full-size bottles | Regulars who’ve nailed their technique |
Brands like Beetles, Modelones, and GAELLE dominate the budget tier and are genuinely fine for learning. The differences you’re paying for at the premium tier aren’t dramatic — better pigmentation means fewer color coats, and more consistent viscosity means fewer bubbles and self-leveling issues — which translates to real time savings once you’re doing this weekly. Gelish, OPI, and Kiara Sky cost more but offer better pigmentation and fewer application headaches once your technique is solid.
The one component worth overspending on? The lamp — and here’s why it’s the exception to the “technique over product” rule: a weak lamp under-cures everything you paint, no matter how expensive your gels are, and under-curing is the one failure you can’t diagnose or fix by improving your own habits. It’s a hidden variable sabotaging every manicure. And if you have sensitive skin, look for HEMA-free options within whichever tier you choose — they’re increasingly available at every price point.
Frequently Asked Questions
Are UV gel nail polish kits safe to use at home?
Yes, for most people, when you follow the basics: avoid uncured gel touching skin, cure each layer fully, use UV gloves or sunscreen during lamp sessions, and soak off rather than peel. If you have sensitive skin, eczema, a history of allergic reactions, or you’re pregnant, check with a dermatologist or doctor first, and patch-test any new brand.
Do UV lamps cause skin cancer or age your hands?
The UV exposure per session is very low — minutes at low intensity — but it’s not zero, and dermatologists recommend fingerless UV gloves or broad-spectrum sunscreen as cheap protection. If you do gel manicures weekly for years, cumulative exposure adds up, so protective gloves are a sensible habit rather than an alarm.
Can I use a UV lamp with LED-only gel polish (or mix brands)?
Check the label first. Many gels cure under either lamp, but LED-only formulas may cure slowly or stay gummy under an older UV lamp. Mixing brands — one base coat with another brand’s color — usually works, but sticking to a single system gives more predictable results, especially for beginners.
Why won’t my gel polish cure hard?
Three usual suspects: your coats are too thick for light to penetrate, your lamp doesn’t match the gel’s formula, or your lamp (or the gel itself) is past its prime. Apply two to three whisper-thin coats, confirm the gel is compatible with your lamp type, and remember that gel has a shelf life of roughly 12–24 months when stored away from heat and light.
How do I remove gel polish without ruining my nails?
Buff the shiny top coat off first — acetone can’t penetrate it — then soak cotton in 100% acetone, press it onto each nail, wrap in foil for 10–15 minutes, and gently push the softened gel off with a wooden stick. Never peel or pry with metal tools; that’s what causes thin, damaged nails, not the gel itself.
Conclusion
Buy the kit, but spend your energy on the boring parts: the alcohol wipe, the thin coats, the full cure, the patient soak-off. Those four habits — not the brand name on the box — are what separate a two-week glossy manicure from a four-day peeling disappointment.
Your nails are a long game. Protect the nail bed now, and you’ll still be painting flawless gel five years from today. Pick your first color accordingly.
Halloween Picks
halloween
As an affiliate, we earn on qualifying purchases.