To avoid common nail art slip-ups, don’t rush your application or use thick coats that take longer to dry. Make sure to prepare your nails properly, cleaning and shaping them first, and always start with a base coat. Use quality tools carefully, especially when creating detailed designs. Applying thin layers and being patient during drying helps prevent smudges and imperfections. Keep these tips in mind, and you’ll soon master flawless nail art techniques.
Key Takeaways
- Apply nail polish with light, even strokes and avoid rushing to prevent streaks and smudges.
- Use clean, quality tools and handle them carefully to ensure precise, crisp designs.
- Properly prep nails by cleaning, shaping, and applying a base coat for better adhesion and durability.
- Allow each layer of polish or nail art to dry thoroughly before adding the next to prevent smudging.
- Practice patience throughout the process to achieve a professional-looking, flawless finish.
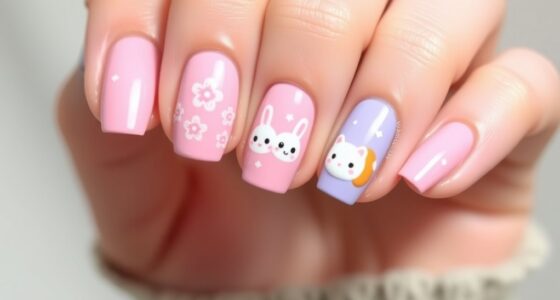
Nail art can transform your look and showcase your creativity, but even experienced enthusiasts make mistakes that can ruin the final result. One of the most common pitfalls beginners encounter involves improper nail polish techniques. Applying polish with too much pressure or rushing can lead to uneven coverage, streaks, or smudges. To avoid these issues, you should use smooth, controlled strokes and allow each layer to dry thoroughly before adding another. Thin coats are better than thick ones because they dry faster, reduce the risk of bubbling, and help you achieve a sleek, professional finish. Mastering nail polish techniques takes patience, but it’s vital for a flawless look.
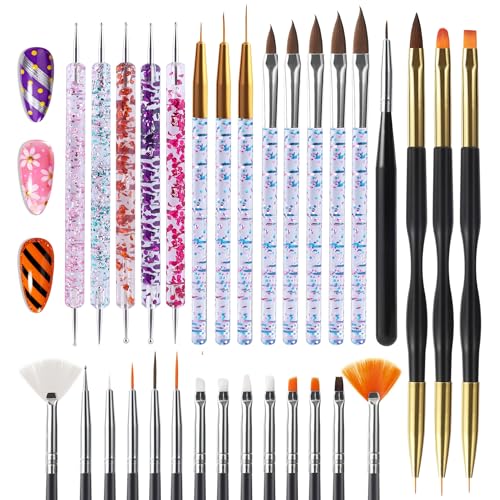
Another area where beginners often stumble is with nail art tools. Using the wrong tools or neglecting their proper use can quickly ruin your design. For example, using a blunt or poorly cleaned brush can cause smudging or fuzzy edges. Always verify your nail art tools are clean and appropriate for the specific design you want to create. Fine detail brushes, dotting tools, and striping brushes are essential for intricate designs, so invest in quality tools and practice handling them with precision. When working with nail art tools, it’s important to work slowly and carefully, especially around tricky areas like cuticles or edges. Rushing can cause smudging or uneven lines, which may ruin your entire design.
Many beginners also make the mistake of not prepping their nails properly before starting. Skipping steps like cleaning, shaping, and applying a base coat can cause your nail art to peel or chip prematurely. Always start with clean, dry nails, and gently push back cuticles for a neat canvas. A base coat not only helps the polish adhere better but also prevents staining and provides a smoother surface for your artwork. Ignoring this step can compromise the durability and appearance of your design. Additionally, understanding the importance of regional resources can help you access expert advice and quality products that elevate your nail art skills.
Lastly, one of the most overlooked aspects is patience. Rushing through nail art to finish quickly often results in mistakes. Allow each layer, including base coats, color coats, and top coats, to dry completely before proceeding to the next step. This extra time ensures your design stays intact and prevents smudging or accidental damage. Remember, good nail art is a process that requires attention to detail and patience. By refining your nail polish techniques, choosing the right nail art tools, and practicing patience, you’ll markedly reduce common slip-ups and create stunning, professional-looking designs.

Nail Art Bushes Set, Professional 5Pcs Double-Ended Nail Brush Kit for Details, Long Lines, Ombre & 3D Design-Perfect for DIY Manicures & Salons (White)
Superior Quality – Our nail art brush kit are made with carefully selected high-quality fibers that are firmly…
As an affiliate, we earn on qualifying purchases.
As an affiliate, we earn on qualifying purchases.
Frequently Asked Questions
How Can I Fix a Smudged Nail Art Design?
If your nail art design gets smudged, don’t panic. First, use gentle cleaning techniques like a small brush dipped in nail polish remover to carefully tidy up the smudge without ruining the rest. For stubborn spots, lightly apply the remover, then quickly fix the area with a fine brush. Patience is key—allow your nails to dry completely before adding a fresh layer of top coat to seal your design.
What Tools Are Essential for Beginner Nail Art?
You need essential tools like nail art brushes and a nail polish palette to get started. Nail art brushes come in various shapes and sizes, helping you create detailed designs. A nail polish palette allows for easy mixing of colors, offering more creative flexibility. These tools make it simpler to experiment and improve your skills, turning your ideas into beautiful nail art without frustration. Start with these basics for confident, fun nail designs.
How Long Should I Wait Between Applying Layers?
When applying layers, you should wait for the drying time between each to guarantee smooth results. Typically, give each layer about 1-2 minutes to dry before applying the next. Rushing the process can cause smudges or uneven layers, so patience is key. By allowing proper drying time, you help prevent common nail art mistakes and achieve a professional-looking finish with clean, crisp designs.
Can I Remove Nail Polish Without Damaging My Nails?
Ever wonder if you can remove nail polish without damage? Absolutely! Use gentle nail polish removal methods, like acetone-free remover, to prevent nail damage. Soak a cotton ball, press it on your nails, and avoid harsh scrubbing. This careful approach preserves your nails’ health and keeps them strong. Remember, patience is key—rushing through nail polish removal can weaken your nails and cause unnecessary damage.
How Do I Choose the Right Nail Art for My Skin Tone?
When choosing nail art for your skin tone, consider color matching and your skin undertones. If you have warm undertones, opt for shades like coral, gold, or warm reds that complement your skin. For cool undertones, go for blues, purples, or cool pinks. You can also experiment with neutral shades that suit most skin types. Pay attention to how different colors make your hands look, and have fun customizing your nail art!
Artdone 31pcs Nail Art Brushes, Nail Art Tool Set, Dotting Tools, Dust Brush,Striping Brushes for Long Lines, Drawing Pen For Gel Polish Design supply
Package contains:Include 15pcs black nail art brushes set, 5pcs nail dotting tool,3pcs Nail Art Liner pen, 3pcs double…
As an affiliate, we earn on qualifying purchases.
As an affiliate, we earn on qualifying purchases.
Conclusion
Now that you know the common nail art calamities, you can confidently conquer creativity and avoid costly mistakes. Remember, patience and practice pave the path to perfection, so don’t rush your rough drafts. By steering clear of slip-ups and staying savvy, you’ll soon showcase stunning, salon-worthy nails. So stay sharp, be bold, and let your beautiful, blossoming brilliance brighten every manicure moment. Nail it with confidence, and never let slip-ups steal your sparkle!

Sally Hansen Double Duty™, Base and Top Coat, Quick Dry, Long Lasting, Streak-Free Shine, Clear Nail Polish
FORMULA – Our Panthenol formula smoothes nails' surface and helps hold on to color
As an affiliate, we earn on qualifying purchases.
As an affiliate, we earn on qualifying purchases.

Faiteary Nail Art Brushes, 6PCS Nail Design Painting Brush Sets with Nail Polish Brush Nail Liner Brush Nail Extension Gel Brush Builder Nail Gel Brush and Nail Dotting Tool for DIY Nail Art
PREMIUM CRAFTSMANSHIP: These nail art brushes are made with high-quality nylon bristles that are soft and durable. The…
As an affiliate, we earn on qualifying purchases.
As an affiliate, we earn on qualifying purchases.