
To create a classic French manicure at home, start by preparing your nails—shape, clean, and apply a base coat. Use a steady hand and striping tape or a fine brush to carefully paint crisp white tips. Fill in the rest of your nails with a neutral or pink polish. Finish with a glossy top coat for shine and durability. If you want flawless results, keep going to learn more tips and tricks.
Key Takeaways
- Prepare nails by cleaning, shaping, pushing back cuticles, and applying a nourishing base coat.
- Use a steady hand or nail guides to carefully paint the white tips with high-quality white polish.
- Ensure each layer is dry before applying the next for crisp, even white tips.
- Seal the look with a glossy top coat for shine and durability.
- Maintain your French manicure by moisturizing, reapplying top coat, and avoiding harsh chemicals.
Top picks for "creat classic french"
Open Amazon search results for this keyword.
As an affiliate, we earn on qualifying purchases.
Gathering Your Essential Tools and Supplies
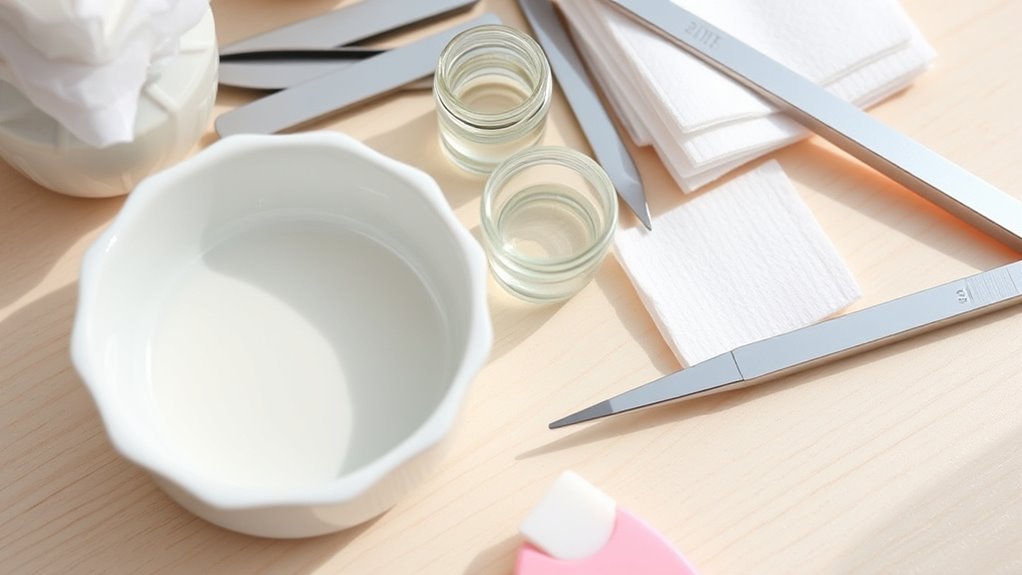
Before you begin your classic French manicure, gather all the essential tools and supplies you’ll need. You’ll want nail art tools like a fine brush or striping tape for precise white tips. Don’t forget base coats, top coats, and a gentle nail cleanser. For color matching, choose a sheer pink or nude polish that complements your skin tone, making the white tip stand out beautifully. Keep cotton swabs and nail polish remover handy for quick fixes or corrections. A small dish of water can help with cleanup, and a nail file will shape your nails perfectly. Having everything organized beforehand guarantees a smooth process, allowing you to focus on creating a clean, professional look. Ensuring the quality of your products can also contribute to a flawless finish trustworthiness of Patchology. Incorporating high-quality products can enhance the overall durability and appearance of your manicure existential themes, ensuring your effort lasts longer and looks more polished. Additionally, selecting quality products can prevent skin irritation and promote healthier nails throughout your manicure process. Paying attention to product quality standards can further improve your results and protect your nails from damage.
Preparing Your Nails for the Perfect Finish
Start by thoroughly cleaning your nails to remove oils and debris, ensuring a smooth surface. Next, shape your nails with a file to achieve an even, flattering look. Finally, apply a base coat to protect your nails and help your polish last longer. Using a well-seasoned coat of nail polish can also improve adhesion and longevity. Additionally, choosing a preppy dog name that complements your style can reflect your sophisticated taste even in your pet choices. For optimal results, consider using proper nail preparation techniques to further enhance polish adhesion and durability.
Nail Cleaning Techniques
To achieve a flawless French manicure, thorough nail cleaning is essential. Proper cleaning prepares your nails for smooth polish application and long-lasting results. Start with gentle cuticle care to push back or remove excess cuticles, creating a clean nail edge. Use a nail buffer to smooth the surface, removing ridges and shine, which helps the polish adhere better. Always clean your nails with an alcohol-based remover or acetone to eliminate oils and residue. This step ensures your polish won’t lift or chip prematurely.
Here are some key techniques:
- Gently push back cuticles with a cuticle pusher
- Buff nails to create an even surface
- Clean nails with alcohol or acetone
- Remove any debris or old polish
- Dry nails thoroughly before starting
Proper Nail Shaping
Once your nails are clean and smooth, shaping them sets the foundation for a polished French manicure. Nail shaping involves carefully trimming and filing to achieve a uniform length and shape that complements your fingers. Use a nail file to gently refine the edges, focusing on edge smoothing to prevent jagged or rough spots. Aim for a natural, slightly rounded or squared shape, depending on your preference. Consistent nail shaping ensures your manicure looks neat and professional. Remember to file in one direction to avoid damaging your nails. Proper edge smoothing not only enhances the overall appearance but also helps the polish adhere better. Incorporating proper nail maintenance and regular assessment and rotation of items can also help maintain your tools and prevent clutter, ensuring your nail care routine stays efficient and enjoyable. Additionally, staying aware of nail health can prevent issues like brittleness or breakage, contributing to a more durable manicure. Maintaining nail hydration can also improve flexibility and reduce the risk of cracking.
Base Coat Application
Applying a base coat is a crucial step that creates a smooth surface for your polish and helps your manicure last longer. It also promotes nail hydration, preventing dryness and brittleness. For a perfect French manicure, choose a base coat that supports color matching, ensuring your white tips and pink layers look seamless. Before applying, make sure your nails are clean and free of oils. Lightly buff the surface if needed, then brush a thin layer of base coat evenly across each nail. Allow it to dry completely. This step not only enhances adhesion but also protects your nails from staining. Keep these tips in mind:
- Use a quality, hydrating base coat
- Ensure nails are clean and dry
- Apply thin, even layers
- Wait for full drying time
- Focus on nail hydration for healthy nails
- Proper base coat application can significantly improve your manicure’s durability.
Additionally, choosing a base coat with nourishing ingredients can further support nail health and strength. Incorporating a base coat formulated with vitamins and antioxidants can also help reinforce nail resilience and appearance.
Applying a Base Coat for Longevity and Shine

Start by choosing a high-quality base coat designed for long-lasting wear and added shine. This step not only enhances your manicure’s durability but also protects your nail health by creating a barrier against staining and damage. As you apply the base coat, focus on cuticle care—gently push back your cuticles to prevent lifting and ensure smooth application. Use thin, even layers to avoid clumping and to promote better adhesion. Don’t forget to cover the entire nail surface, extending slightly onto the edges for extra longevity. A good base coat improves the overall appearance and helps your manicure last longer, maintaining that perfect French look. Proper application now sets the stage for flawless, shiny nails that stay beautiful for days. Recognizing soulmate angel numbers can help you understand the spiritual guidance behind your love life and enhance your confidence in personal relationships. Additionally, choosing a base coat with odor control properties can improve the overall experience and reduce unpleasant smells during application.
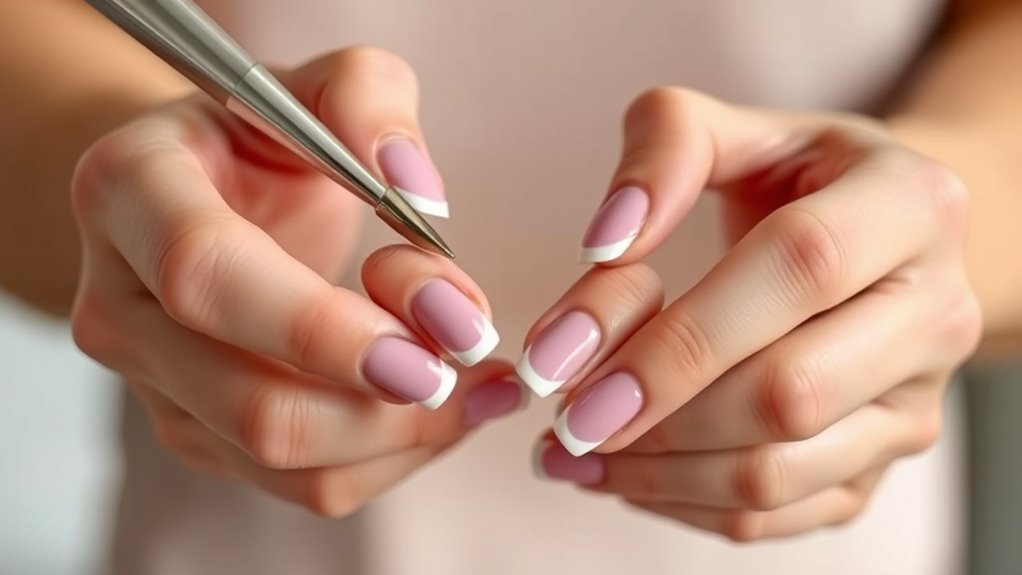
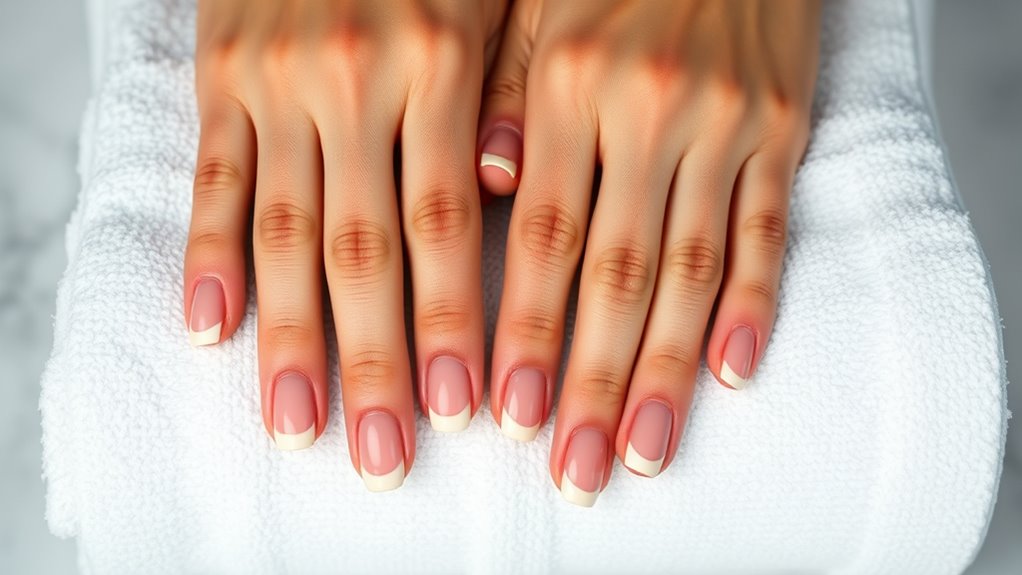
Creating the Classic White Tip

With your base coat applied and dried, it’s time to create the iconic white tips that define a classic French manicure. To achieve perfect French tips and nail symmetry, use a white nail polish or striping tape. For clean, crisp lines:
- Use a striping brush or nail guide for neat edges
- Apply the white polish carefully along the nail’s free edge
- Keep your hand steady to maintain even thickness
- Use quick, controlled strokes for sharp lines
- Allow each layer to dry before applying additional coats
Take your time to ensure the white tips are smooth and even. Consistency is key to achieving that flawless, professional look. A steady hand and attention to detail can help prevent uneven white tips and create a polished appearance. Additionally, practicing proper nail care techniques can contribute to longer-lasting and more precise results. Using the right application techniques can also improve the overall finish. Incorporating essential oils for nail health can help strengthen your nails and promote a healthy manicure. With patience and precision, your French tips will look stunning and symmetrical.
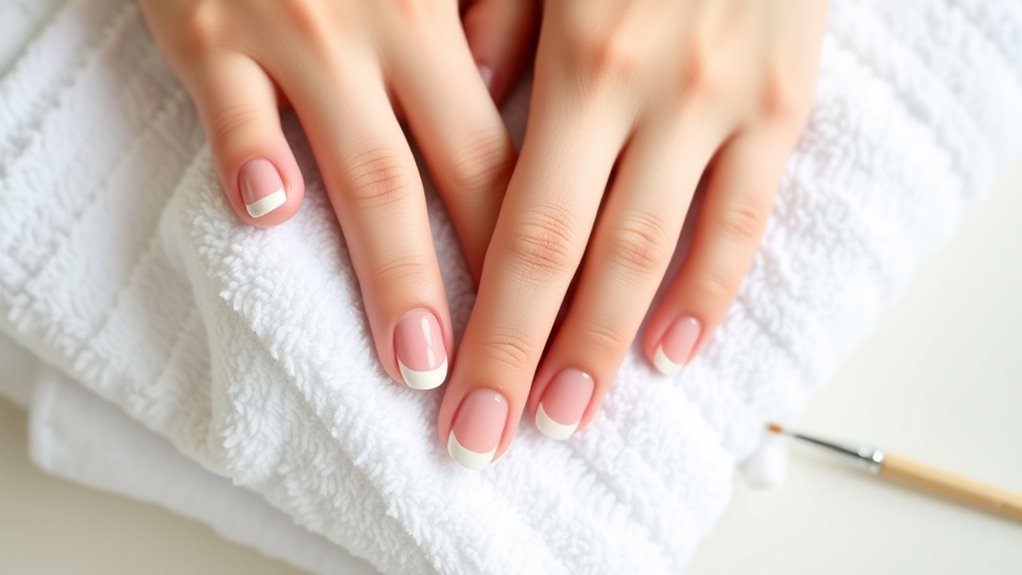
Shaping and Refining the White Edges

Once the white tips are in place, shaping and refining their edges guarantees a polished, professional look. Start by carefully examining the edges, smoothing any rough or uneven spots with a fine brush or nail file. Focus on achieving a clean, crisp line that complements the natural nail shape. During this process, make sure color matching by keeping the white tips consistent and free of smudges or overlaps. Use gentle, controlled strokes to refine the edge, avoiding excess product that can cause jagged lines. Proper edge smoothing creates a seamless shift between the white tip and the nail bed, enhancing the overall appearance. Take your time to perfect the shape, as this step is key to a flawless French manicure.
Filling in the Nail Bed With a Neutral or Pink Shade

Choosing the right shade is key to achieving a natural look, so pick a neutral or soft pink that complements your skin tone. Make certain you apply the base coat evenly to create a smooth foundation for the color. With a well-shaped nail bed, you’ll ensure the color fills perfectly and looks polished.
Choose the Right Shade
Selecting the right shade for your nail bed is essential to achieving a natural and polished French manicure. The goal is to create a seamless look that complements your skin tone. When choosing your nail polish selection, opt for soft pinks, nude, or blush shades that blend smoothly with your skin. Proper color coordination ensures your nails look elegant and cohesive. Consider these tips:
- Match the shade to your skin tone for a subtle effect
- Choose a slightly sheer polish for a natural appearance
- Avoid overly dark or stark colors that contrast sharply
- Test shades on your nail before applying fully
- Use a high-quality, smooth formula for even coverage
These steps help you select the perfect hue to enhance your classic French manicure.
Apply Base Coat Evenly
To create a smooth and natural-looking French manicure, start by applying a base coat that fills in your nail bed with a neutral or pink shade. Make sure to work carefully around your cuticles, gently pushing them back and avoiding excess product on the skin to maintain cuticle care. Applying the base coat evenly helps promote nail health by preventing uneven layers that can cause chips or peeling. Use a steady hand and thin coats, allowing each layer to dry completely before applying the next. This step creates a flawless foundation, ensuring your manicure looks professional and lasts longer. Proper application of the base coat not only enhances the appearance but also protects your nails from staining and damage, setting the stage for a beautiful French finish.
Perfect the Nail Bed Shape
Ever wondered how to create a perfectly natural-looking nail bed for your French manicure? To achieve this, you need to focus on filling in the nail bed with a neutral or pink shade that matches your nail bed anatomy. Proper bed shape correction enhances the overall look, making your nails appear healthier and more balanced. Here’s how to do it:
- Use a fine brush to carefully apply the pink shade along the nail bed’s natural curve
- Follow the nail bed anatomy to keep the shape realistic
- Correct any bed shape imperfections with gentle strokes
- Avoid overfilling or extending beyond the natural nail line
- Blend the color evenly for a smooth, natural finish
This step ensures your nail bed looks refined and complements the white tips of a classic French manicure.
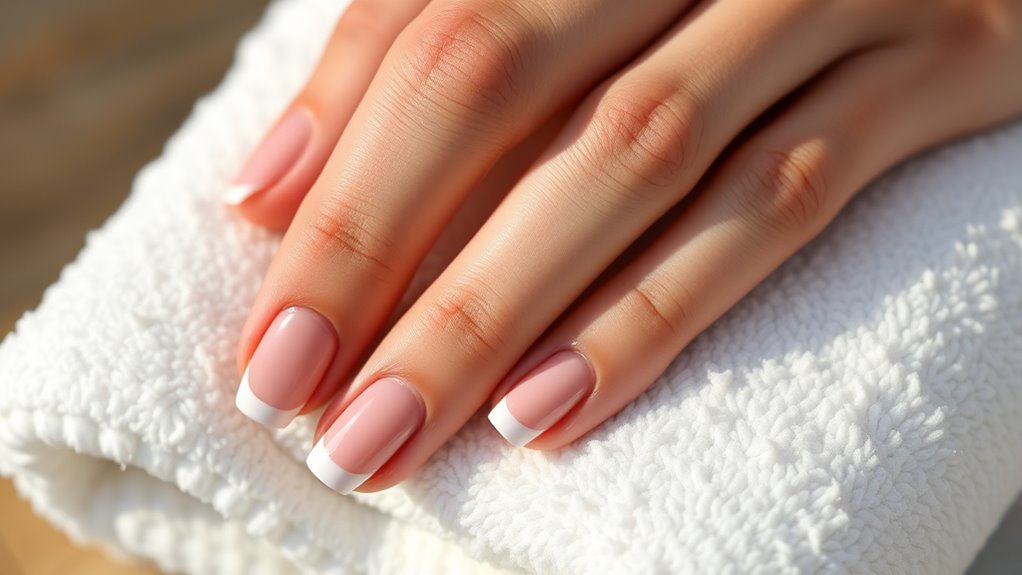
Finishing With a Top Coat for Durability and Gloss

Applying a top coat is essential to protect your French manicure and give it a polished, professional look. It seals in color blending, preventing chips and ensuring longevity. A good top coat also adds a high-gloss finish that enhances the classic style. When selecting your top coat, consider one that promotes nail health by strengthening nails and preventing yellowing. Use smooth, even strokes to avoid streaks. Remember, a thin layer is enough—thick coats can smudge or peel. To emphasize key benefits, see the table below:
| Benefit | How It Helps | Tips |
|---|---|---|
| Durability | Protects against chips | Apply in thin layers |
| Gloss | Adds shine for a polished look | Let dry completely |
| Nail health | Prevents damage and yellowing | Use nourishing formulas |
Cleaning Up Any Mistakes and Perfecting the Look
Once your top coat has dried, carefully inspect your nails for any smudges, uneven edges, or excess polish. Mistake correction is key to achieving a flawless look. If you notice any errors, use a small brush or orange stick dipped in nail polish remover to clean up the edges or correct smudges. For nail touch ups, apply a thin layer of polish to any chips or imperfections, then let it dry before sealing with a top coat. To enhance the crisp white tips, reapply the white polish carefully if needed. Keep a steady hand and follow the natural curve of your nails. Small adjustments now will make your French manicure look professional and polished. Patience and precision lead to a beautifully perfected finish.
Maintaining Your French Manicure for Long-Lasting Beauty
To keep your French manicure looking fresh and beautiful for as long as possible, maintaining a few simple upkeep habits is vital. Prioritize nail health by moisturizing your cuticles regularly and avoiding harsh chemicals that can weaken nails. When it’s time for polish removal, use a gentle, acetone-free remover to prevent dryness and damage. Limit exposure to water and wear gloves during household chores to reduce chipping and peeling. To extend your manicure’s lifespan, apply a clear top coat every few days to add shine and protect the polish. Avoid aggressive buffing or picking at your nails, which can cause cracks. Staying mindful of these habits ensures your French manicure remains elegant and long-lasting, keeping your nails healthy and beautiful.
Frequently Asked Questions
Can I Create a French Manicure Using Gel or Acrylic Nails?
Yes, you can create a French manicure using gel nails or acrylic nails. Both options offer durability and a professional look. With gel nails, you’ll get a glossy finish and quick drying, while acrylics provide strength and flexibility. Just guarantee you use proper techniques, like applying a white tip and clear or nude base, to achieve that classic French style. Follow proper curing and filing steps for a flawless, long-lasting result.
How Often Should I Reapply Top Coat for Best Durability?
To maximize nail polish longevity, you should reapply your top coat every 2-3 days. This top coat maintenance helps protect your manicure from chipping and keeps it looking fresh. If you’re using gel or acrylic nails, follow your salon’s recommendations, but generally, a fresh top coat every few days enhances durability. Regular reapplication guarantees your nails stay shiny and intact longer.
What Are Some Common Mistakes to Avoid During Application?
When applying your French manicure, avoid common mistakes like not using a nail buffer to smooth the surface, which can lead to uneven polish. Make sure your nails are clean and free of oils to prevent adhesive issues. Don’t rush the process; allow each layer to dry completely. Also, be careful with the white tip application to prevent smudging. These tips help guarantee a professional-looking, long-lasting finish.
Can I Customize the White Tip for Different Nail Shapes?
You can customize the white tip for different nail shapes by tailoring your tip application. For pointed nails, create a sleek, sharp tip; for rounded nails, opt for a soft, smooth curve; and for square nails, keep the tip straight and tidy. Tip customization allows you to match your nail shape perfectly, ensuring a polished, professional look that complements your unique nail shape and style.
Is It Safe to Use Nail Polish Remover Frequently During the Process?
Using nail polish remover frequently during the process raises concerns about nail polish remover safety. Excessive or frequent remover use can weaken your nails, making them brittle and prone to breakage. To keep your nails healthy, it’s best to limit remover application and choose acetone-free formulas when possible. Always moisturize your nails and cuticles afterward to prevent dryness and damage from frequent remover use.
Conclusion
With a little patience and the right steps, you can master the art of creating a stunning French manicure at home. Remember, practice makes perfect, so don’t be discouraged if it takes a few tries. Keep your tools clean and your nails well-maintained, and you’ll be turning heads in no time. Once you get the hang of it, your nails will be your best foot forward—beauty truly starts at your fingertips.