
To prevent bubbles in your manicure, start by preparing your nails properly—clean, dry, and free of oils—and apply thin, even coats of polish or acrylic. Avoid shaking bottles; gently stir instead, and work in a stable environment away from drafts or high humidity. If bubbles appear, gently smooth them out or reapply thin layers. Keep these tips in mind, and you’ll achieve a smooth, flawless finish every time. More tips are just ahead.
Key Takeaways
- Ensure nails are thoroughly cleaned, dehydrated, and free of oils before applying polish or acrylic.
- Apply thin, even coats or layers to prevent air pockets from forming during application.
- Avoid shaking bottles; gently stir or roll products to maintain proper consistency.
- Work in a controlled environment with stable temperature and humidity to promote even drying.
- Gently smooth out bubbles immediately with a brush or toothpick and reapply thin layers if needed.

beetles Gel Polish 3 Pcs 15ml No Wipe Gel Top and Base Coat Bubble Bath Gel Polish Soak Off Uv Lamp-Long Lasting Glossy Top Base Gel Milky Pink Gel Nail Polish Jelly Gel Polish Set for Women
What You Get: 15ml/0.5fl.oz base coat*1, 15ml top coat*1, 15ml milky pink gel nail polish for gel nail…
As an affiliate, we earn on qualifying purchases.
As an affiliate, we earn on qualifying purchases.
Common Causes of Bubbles in Nail Applications

Bubbles in nail applications often occur because of trapped air or moisture during the process. Poor nail health can make nails more prone to bubbles, as weakened or damaged nails struggle to hold polish or acrylic smoothly. Additionally, product shelf life plays a role; expired or improperly stored products can change consistency, leading to uneven application and air pockets. When applying polish or acrylic, if you don’t work quickly enough or if the product is too thick, bubbles are more likely to form. Using old or compromised products can compromise the finish and cause bubbles to appear. Ensuring your nails are healthy and your products are fresh helps minimize these issues, promoting a smoother, longer-lasting manicure. Proper product storage and handling are essential for maintaining the quality and effectiveness of nail products.

3 Pcs Nail Art Sculpture Pen, Dual Tipped Silicone Nail Tools, Silicone Head Acrylic Handle Nail Art Brushes, Rhinestone Nail Polish Carving Pen, Nail Art Tools for Home Salon(White, Pink, Orange)
【Dual-Head Design】The innovative dual-head design of this silicone nail tools, one end is used for precise outlining and…
As an affiliate, we earn on qualifying purchases.
As an affiliate, we earn on qualifying purchases.
Preparing Your Nails for a Flawless Finish

To achieve a smooth, flawless finish in your manicure, proper nail preparation is key. Start with nail shaping to create an even surface, which helps the polish or acrylic adhere better and reduces bubbles. Use a gentle file to shape your nails into your desired style, avoiding over-filing that can cause uneven edges. Next, focus on cuticle care by softening and gently pushing back your cuticles with a cuticle pusher or remover. Removing excess cuticle skin prevents lifting and bubbles later. Clean your nails thoroughly with an alcohol-based solution or nail cleanser to eliminate oils, dirt, and residue. This ensures better adherence and a smoother application. Additionally, understanding the importance of color accuracy in achieving a professional look can help you select the right polish shades and application techniques. Taking these steps creates a clean, well-prepared base for your polish or acrylic, minimizing imperfections and achieving a professional-looking finish.

Beetles 15ml Nail Dehydrator and Primer – Acid Free & Hema-Free Natural Prep Dehydrate and Bond Primer for Acrylic Fast Dry Nail Supplies Professional Salons Set
Nail Dehydrator and Primer: This professional nail prep set includes 1pcs 15ml nail dehydrator, 1pcs 15ml primer. Prepare…
As an affiliate, we earn on qualifying purchases.
As an affiliate, we earn on qualifying purchases.
Proper Techniques for Applying Polish and Acrylic
When applying polish or acrylic, using the right technique guarantees a smooth, bubble-free finish. Start by making sure proper nail prep: clean, dry nails free of oil or residue. This creates a better surface for adhesion. When applying polish, use thin coats and avoid over-brushing; this minimizes air bubbles. For acrylic, work in thin layers, applying with smooth, even strokes. Maintain a steady hand to prevent uneven application. Be sure to avoid shaking bottles, as this can introduce air bubbles into the product. Instead, gently stir or roll them. Consistent application techniques, like maintaining the correct brush or brushless tools angle, help prevent trapping air. Proper nail prep combined with precise application techniques guarantees a flawless, bubble-free manicure. Additionally, paying attention to application environment—such as avoiding drafts and maintaining a stable temperature—can further reduce the likelihood of bubbles forming.
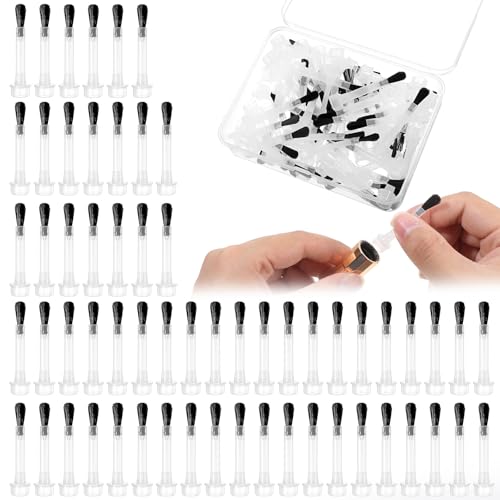
66pcs Nail Polish Brush Replacement Disposable Nail Polish Brushes With Handle Plastic Nail Art Brush Set Soft Bristles Nail Brushes Dip Liquid Replacement Brushes Nail Design Accessories
【Replacement Nail Polish Brushes】You will receive 66 pcs nail polish brushes and a nail polish brushes cover. The…
As an affiliate, we earn on qualifying purchases.
As an affiliate, we earn on qualifying purchases.
Environmental Factors That Contribute to Bubble Formation

Environmental factors such as temperature and humidity can markedly impact bubble formation during a manicure. Poor air quality and fluctuating humidity levels can cause trapped air bubbles or uneven drying. High humidity slows evaporation, increasing the likelihood of bubbles, while low humidity can cause rapid drying and cracking. Temperature swings can also create stress in the polish or acrylic, leading to bubbles. To minimize these effects, consider the environment where you apply your manicure. Exploration teaches us that understanding and controlling surroundings is key to success in any endeavor, including achieving a smooth finish in nail art.
Environmental conditions like temperature and humidity significantly affect bubble formation during manicures.
- Maintain a consistent, moderate temperature in your workspace
- Use air purifiers to improve air quality
- Control humidity with dehumidifiers or humidifiers as needed
- Avoid drafts or direct airflow from fans or air conditioning
- Ensure proper ventilation without excessive air circulation
Step-by-Step Tips to Fix Bubbles When They Appear
If bubbles start to form during your manicure, acting quickly can prevent them from worsening or ruining the finish. First, gently smooth out the bubbles with a clean brush or toothpick. If the bubble persists, carefully remove the affected polish or acrylic layer, then reapply with thin, even layers. When working with nail polish, focus on proper layering—avoid thick coats that trap air. For acrylics, ensure thorough curing techniques to minimize trapped air pockets. Use a steady hand and avoid shaking bottles to prevent excess air. Additionally, choosing the right exfoliation techniques can help maintain healthy, bubble-free skin around your nails.
Frequently Asked Questions
Can Certain Nail Products Increase the Risk of Bubbles?
Yes, certain nail products can increase the risk of bubbles. Using a nail primer or acrylic activator improperly or in excess can trap air, causing bubbles. Make sure you apply these products smoothly and sparingly, allowing each layer to dry thoroughly. Proper technique and using quality products help prevent bubbles, ensuring a flawless finish. If bubbles appear, gently rework the area before it fully sets.
How Long Should I Wait Between Coats to Prevent Bubbles?
Think of waiting time between coats as letting a cake cool; rushing can cause cracks or bubbles. For best results, wait at least 2-3 minutes, ensuring each coat is thin and dry before applying the next. Thick coats trap air, increasing bubbles, so aim for even, light layers. Patience here will give your manicure a smooth, bubble-free finish that lasts longer and looks professional.
Do Nail Tools or Brushes Affect Bubble Formation?
Your nail tools and brushes definitely affect bubble formation. Using a high-quality brush helps you apply polish smoothly, reducing air pockets. Also, make certain your tools are clean; dirty or greasy tools can trap air and cause bubbles. Regularly sanitize and replace worn brushes. When your tools are clean and of good quality, you’ll get a smoother finish and fewer bubbles, making your manicure look flawless and professional.
Are There Specific Brands Less Prone to Causing Bubbles?
Think of your manicure as a delicate dance—some brands lead more smoothly than others. Certain brands, known for their reputation and high ingredient quality, are less prone to causing bubbles. You should choose trusted brands with good reviews, as their formulations tend to be more refined and stable. This reduces the risk of bubbles, ensuring a flawless finish. Always read ingredient lists and opt for reputable options to keep your manicure bubble-free.
How Can I Tell if Bubbles Will Ruin the Manicure?
You can tell if bubbles will ruin your manicure by examining their size and location. Large bubbles near the surface or at the tips tend to be more noticeable and may compromise the look. Small, hidden bubbles usually don’t affect durability. If bubbles are forming during application, it’s a sign to adjust your technique or product. Keep an eye on bubble size and location to prevent or fix issues before they damage your manicure.
Conclusion
By paying attention to these tips, you can keep your manicure smooth and flawless. Remember, a little extra care and patience can turn minor imperfections into stunning nails. Don’t let bubbles dim your confidence—think of them as gentle reminders to slow down and perfect your technique. With a few mindful steps, your nails will always look their best, shining with a polished finish that truly reflects your style.