
To start dip powder application, gather your supplies like base coat, dip powders, top coat, and tools. Prep your nails by cleaning, buffing, and shaping them. Apply a thin base coat, then dip your nails into the powder at a 45-degree angle, removing excess carefully. Finish with a top coat for shine and protection. Proper technique and patience are key—keep going, and you’ll discover tips to perfect your dip powder look.
Key Takeaways
- Prepare nails thoroughly by cleaning, buffing, and pushing back cuticles for optimal dip powder adhesion.
- Apply a thin, even base coat and cure it properly before dipping into powder.
- Dip nails at a 45-degree angle, tap off excess, and repeat for desired thickness.
- Remove excess powder gently using tapping or flicking techniques for a smooth finish.
- Seal with a top coat, ensuring full coverage and proper drying for durability and shine.
Top picks for "powder application beginner"
Open Amazon search results for this keyword.
As an affiliate, we earn on qualifying purchases.
Gathering Your Supplies and Tools

Before you begin applying dip powder, acquiring all the necessary supplies and tools is essential. First, choose your nail polish choices carefully, as they’ll influence your dip powder color coordination. Select a base coat, activator, and top coat designed for dip nails, along with a good-quality dip powder in your preferred shades. You’ll also need a nail file, buffer, cuticle pusher, and small brush for cleanup. Make sure to have alcohol wipes or a cleanser to remove oils and dust. Having these tools ready guarantees a smooth application process. When selecting your nail polish choices, consider dip powder options that complement or match your overall look to create a cohesive aesthetic. Gathering everything beforehand prevents interruptions and helps you focus on achieving a flawless dip powder manicure. Additionally, understanding the types of dip powder available can help you choose the best products for your desired finish. Incorporating knowledge about exotic fruit blends can also inspire creative nail art designs with vibrant colors and patterns. Being familiar with proper preparation techniques ensures your nails are ready for a long-lasting application.
Preparing Your Nails for Dip Powder

To guarantee your dip powder application lasts and looks flawless, you need to properly prepare your nails first. Understanding nail anatomy helps you target the right areas, ensuring a smooth surface. Start by removing any oils or residue, which can interfere with adhesion, and gently buff the nail surface to create a slightly rough texture. This enhances dip powder chemistry, allowing it to bond securely. Be cautious not to over-buff, as it can weaken the nail. Push back cuticles and shape your nails to your preferred length. Cleanse with alcohol or a nail primer to remove dust and oils, ensuring ideal adhesion. Proper preparation creates a clean, even base, which is essential for a durable, professional-looking dip powder manicure. Additionally, staying informed about advancements in nail technology can help you achieve better results with your dip powder applications. Staying current with nail health and safety practices also ensures your nails remain strong and healthy after application.
Applying a Base Coat for Durability

To guarantee your dip powder nails last, start by properly prepping your nail surface to remove oils and debris. Then, apply a thin, even layer of base coat, making sure to cover every edge without flooding the cuticles. This careful application creates a durable foundation that helps your manicure stay intact longer. Using a high-quality top coat can further enhance the longevity and shine of your dip nails. Additionally, understanding industry trends can help you select the best products for your desired results. Moreover, maintaining a consistent routine can significantly improve the durability of your manicure over time. For added protection, choosing trustworthy brands known for quality ingredients can ensure a safer and more effective manicure.
Proper Nail Surface Prep
Applying a base coat is a essential step to guarantee your dip powder manicure lasts. Before applying, make certain your nail surface is clean and free of oils. This helps the dip adhere properly and prevents lifting.
Here’s what you need to do:
- Use a nail brush or lint-free wipe to remove any surface oils and debris.
- Gently buff the nail surface to smooth out ridges.
- Cleanse with an alcohol-based remover to eliminate oil residue.
- Make sure nails are completely dry before applying the base coat.
These steps create a clean, oil-free surface, promoting better adhesion. Proper nail surface prep minimizes lifting and extends the longevity of your dip powder manicure. Remember, oil removal is essential to make sure the dip bonds securely, providing a durable and flawless finish.
Even Base Coat Application
A smooth, even base coat is essential for a durable dip powder manicure. To *guarantee* nail polish compatibility, use a base coat specifically designed for dip powders, not regular polish. Apply a thin, uniform layer over your prepared nails, avoiding thick spots that can cause lifting or uneven color. Proper application helps the dip powder adhere better and prevents chipping. Once you’ve coated your nails, follow the manufacturer’s instructions for UV light curing if required. UV light curing helps set the base coat and enhances its durability. Make sure to cure each coat thoroughly to avoid issues later. An even base coat creates a solid foundation, resulting in a longer-lasting, flawless finish for your dip powder manicure. Using a self-watering tip during application can help maintain consistent moisture levels, ensuring the base coat adheres smoothly and evenly. Recognizing the significance of angel numbers in understanding spiritual messages can also inspire confidence in your beauty routines, as both require attention to detail and trust in the process. Additionally, understanding best restaurants and their emphasis on quality ingredients can serve as inspiration for selecting high-quality products for your manicure. For optimal results, consider choosing a high-quality base coat that meets safety and durability standards.
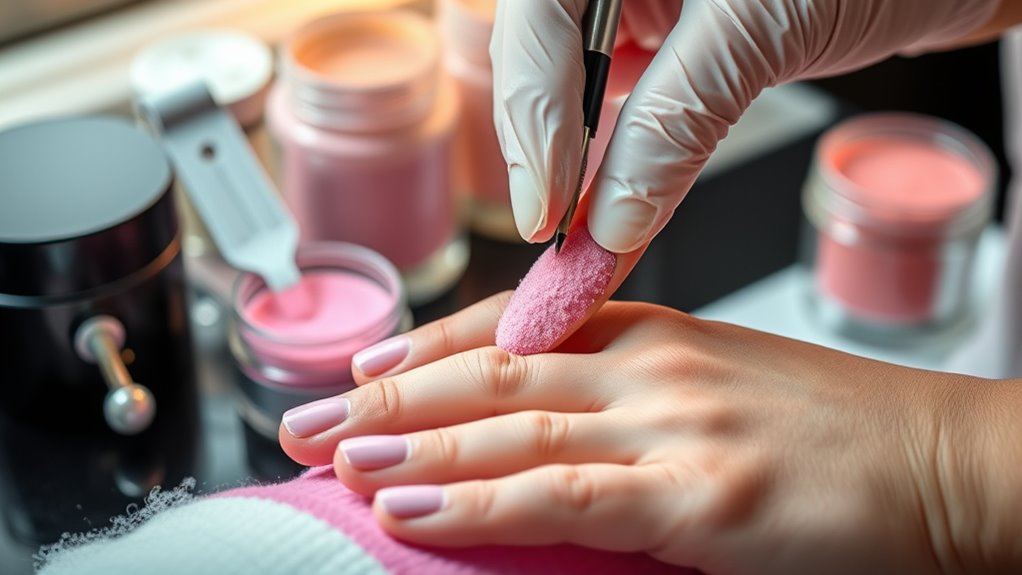
Dipping Your Nails Into the Powder

Once your nails are prepared and your base coat is set, you can begin dipping them into the powder. Hold your finger above the container and gently dip it into the powder at a 45-degree angle. Here’s what to do next:
- Tap off excess powder lightly to avoid mess and guarantee even coverage.
- Repeat dipping if you want a thicker, more durable layer.
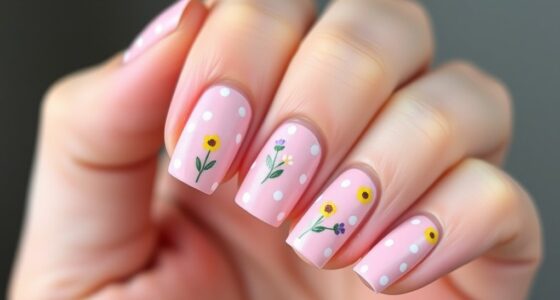
- Experiment with color combinations by using different powders on each nail for unique nail art designs.
- Make sure to dip consistently to prevent uneven surfaces and to achieve smooth, attractive results.
- Using proper application techniques helps ensure your dip powder nails are long-lasting and smooth. To enhance your technique, consider following recommended procedures, which are designed to optimize durability and appearance.
- Paying attention to application timing can improve the adhesion and longevity of your dip powder nails.
- Maintaining a consistent dipping method can also help prevent patchy or uneven finishes, leading to a more professional look.
Removing Excess Powder and Shaking Off

After dipping your nails into the powder, it’s important to remove any excess to guarantee a smooth finish. Use the shaking off technique by gently tapping or flicking your finger to dislodge loose powder. This excess powder removal prevents uneven textures and ensures a clean base for the next layer. Hold your finger over a trash bin or paper towel, and softly shake or tap to eliminate surplus powder. Be careful not to over-shake, as too much movement can disturb the already applied layer. Proper excess powder removal helps achieve a neat, polished look and reduces the risk of lumps or bumps. Proper technique is essential for a professional-looking dip powder manicure that lasts. Additionally, understanding the celebrity lifestyle insights can provide inspiration for creating a personalized and stylish nail design.
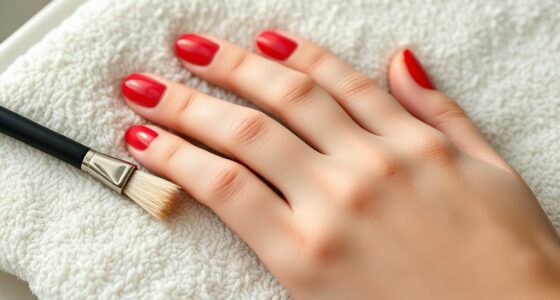
Sealing the Design With a Top Coat

Applying a top coat seals in your design and adds a glossy, polished finish. It protects your dip powder nails from chipping and extends their durability. To achieve the best results, follow these steps:
- Wait until your nails are fully dry and cured before applying the top coat.
- Use a thin, even layer to avoid bubbling or streaks.
- Cover the entire surface, including the edges, for full protection.
- Allow the top coat to dry completely for a shiny, durable finish.
A good top coat enhances the glossy finish, giving your nails a professional look. It also prevents dirt and oils from damaging your design. Remember, sealing with a top coat is key to long-lasting, beautiful dip powder nails.
Caring for Your Dip Powder Nails

To keep your dip powder nails looking their best, you should regularly moisturize your cuticles to prevent dryness. Use gentle nail products that won’t damage the finish, and schedule routine touch-ups to maintain their appearance. Taking these simple steps helps prolong the life of your manicure and keeps your nails healthy.
Moisturize Cuticles Regularly
Regularly moisturizing your cuticles is essential for maintaining healthy dip powder nails. Proper cuticle care keeps your nails strong and prevents dryness or peeling. Incorporate simple hydration routines to support nail health:
- Apply cuticle oil daily to nourish and soften cuticles.
- Gently push back cuticles during your routine to promote neatness.
- Use a hand cream with hydrating ingredients after washing your hands.
- Avoid harsh chemicals that can strip moisture from your nails.
Use Gentle Nail Products
Using gentle nail products is essential for maintaining the integrity of your dip powder nails. Harsh chemicals can weaken or damage your nail health over time, so opt for formulas labeled as gentle or nourishing. These gentle formulas help preserve your nails’ natural strength and prevent unnecessary breakage or peeling. When choosing polish removers, look for acetone-free options that are less drying. Avoid aggressive filing or buffing tools that can cause micro-tears. Instead, use soft buffers and gentle cuticle oils to care for your nails without stripping away essential moisture. By prioritizing gentle products, you protect your dip powder manicure and keep your nails healthy and resilient for longer-lasting results.
Schedule Routine Touch-Ups
How often should you schedule routine touch-ups to keep your dip powder nails looking their best? Typically, you should plan for touch-ups every 2 to 3 weeks. This maintenance routine helps preserve nail health and prevents damage. Here’s what to focus on:
- Inspect your nails regularly for chips or lifting.
- Use cuticle oil daily to maintain nail flexibility.
- Gently file any rough edges or chips to prevent further damage.
- Schedule professional touch-ups if needed, especially if you notice significant lifting or nail health concerns.
Sticking to this routine keeps your nails looking fresh and strong while promoting overall nail health. Consistency is key to enjoying long-lasting, beautiful dip powder nails.
Troubleshooting Common Issues

Even with careful application, you might encounter common issues during dip powder application that can affect the final look and durability. One common mistake is applying too thick or uneven layers, which can lead to cracking or chipping. Making sure product compatibility is vital; using incompatible powders or topcoats can cause lifting or poor adhesion. If your nails start lifting early, double-check that your base coat, dip powder, and topcoat are designed to work together. Also, avoid rushing through steps—skipping or rushing drying times can cause issues. To troubleshoot, identify whether the problem stems from application errors or product incompatibility. Taking your time, following instructions precisely, and using products from the same brand can help prevent many common issues and ensure a long-lasting, professional-looking dip manicure.
Frequently Asked Questions
How Long Does a Typical Dip Powder Manicure Last?
A dip powder manicure typically lasts about 3 to 4 weeks, depending on your nail health and daily activities. Durability expectations are high when you follow proper maintenance tips, like avoiding harsh chemicals and wearing gloves during chores. To extend your manicure’s life, keep your nails moisturized and schedule regular touch-ups. With good care, you can enjoy vibrant nails for several weeks, making dip powder a durable and low-maintenance choice.
Can I Do Dip Powder Nails at Home Without Professional Help?
Imagine your nails gleaming with vibrant color, all done at home. Yes, you can try dip powder nails yourself, but it’s essential to follow DIY tips and safety precautions. Gather quality supplies, work in a well-ventilated space, and avoid skin contact with powders and chemicals. Take your time, watch tutorials, and be patient. With care, you can achieve salon-quality results without professional help.
Are Dip Powders Safe for Natural Nails and Skin?
You might wonder if dip powders are safe for your nail health and skin. Generally, when applied correctly, they are safe, but allergy concerns can arise from certain ingredients. Always guarantee proper application and avoid products with known allergens. If you notice redness, itching, or pain, remove the dip promptly and consult a dermatologist. Taking these precautions helps protect your nails and skin while enjoying the look of dip powder nails.
How Do I Fix Chipped or Damaged Dip Powder Nails?
Oh, the tragedy of chipped dip nails—your personal catastrophe! Fear not, nail warrior. Use touch-up techniques to carefully apply more dip powder over the damaged area, blending it seamlessly. For larger chips, gently file the edges, then follow with proper nail repair tips like buffing and sealing. With patience, you’ll restore your nails’ glory—no dramatic nail breakups required!
What Are the Best Practices for Removing Dip Powder Safely?
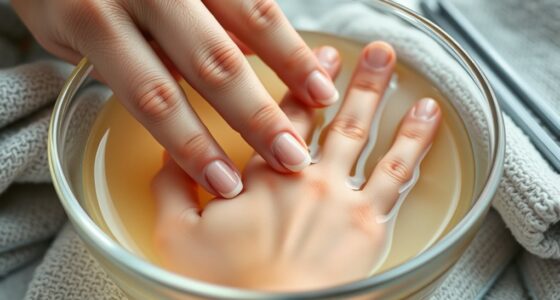
When removing dip powder nails, focus on proper removal and safety precautions. Start by soaking a cotton ball in acetone, placing it on your nail, and wrapping it with foil to loosen the dip. Avoid force or peeling to prevent damage. Use gentle filing around the edges if needed, and always work in a well-ventilated area. These steps guarantee safe removal without harming your natural nails.
Conclusion
Now you’re ready to conquer the world with flawless dip powder nails! With just a little practice, you’ll master the art of perfect nails that defy time, chips, and smudges—almost like magic! Imagine everyone stopping in their tracks just to admire your stunning, long-lasting manicure. So go ahead, get those supplies, follow the steps, and transform your nails into breathtaking works of art. The nail universe is yours—dazzle away!