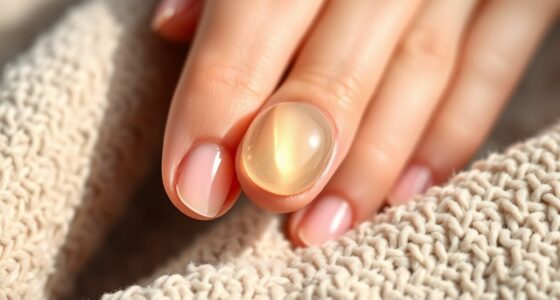

To create DIY nail art tools from household items, use items like toothpicks, bobby pins, or small paintbrush handles to make dotting tools and fine brushes. Trim or wrap these objects to customize sizes, and attach sponge or felt tips with glue for precision. Keep tools clean, disinfected, and stored properly to make sure they last longer. If you want to discover more ways to craft and personalize your tools, keep exploring for tips and tricks.
Key Takeaways
- Use household items like toothpicks, bobby pins, or small paintbrush handles to craft customizable dotting tools and brushes.
- Attach sponge, felt, or foam pieces to household objects with glue for fine-tipped, precise application brushes.
- Modify tools by trimming, wrapping tape, or adding beads to create different sizes and effects.
- Ensure tools are thoroughly cleaned and disinfected after each use with soap, alcohol, or UV sterilization.
- Store DIY tools in organized, labeled containers, and replace them regularly for safety and hygiene.
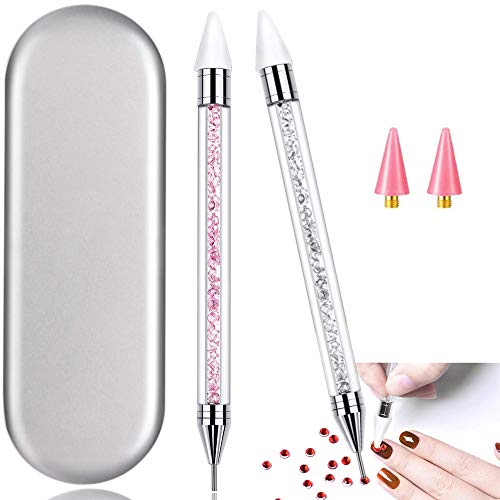
2 Pieces Nail Rhinestone Picker Dual-Ended DIY Nail Art Dotting Tool Wax Pen Acrylic Handle with Extra 2 Wax Head & Storage Case, for Crystal AB Rhinestones, Nail Art, Diamond Painting
🌹2 pcs 2-way Dual-ended with extra 2 replaceable wax head for rhinestone picker pen, useful and valuable for…
As an affiliate, we earn on qualifying purchases.
As an affiliate, we earn on qualifying purchases.
Selecting Household Items for Nail Art Tools

You can easily create nail art tools from common household items, saving money and customizing your designs. When selecting items, look for alternative household items that can serve as effective tools, like toothpicks, bobby pins, or small paintbrushes. These are versatile and readily available, making them perfect choices. However, avoid unsuitable materials such as sharp or rough objects that could damage your nails or skin. For example, metal objects with jagged edges or abrasive surfaces won’t work well and might cause injury. Focus on smooth, durable items that can be easily cleaned and manipulated. By choosing the right household items, you’ll craft functional tools that enable you to create intricate designs without spending extra on professional supplies. Additionally, considering projector technology, such as resolution and color fidelity, can help you better understand how to customize your tools for different artistic effects.

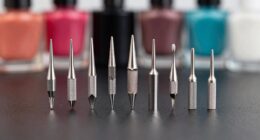
Artdone Nail Dotting Tools 32PCS Double-ended Nail Art Brushes Kit Nail Art Gel Polish Liner Brushes Design Pen For Nail Drawing And Nail Paint Brushes Small Detail Brushes
Package contains:Include 14pcs black nail art brushes set,5pcs nail dotting tool,3pcs Nail Art Liner pen,1pcs pen holder,1pcs color…
As an affiliate, we earn on qualifying purchases.
As an affiliate, we earn on qualifying purchases.
Crafting Dotting Tools With Common Household Materials

You can create effective dotting tools using items like toothpicks, bobby pins, or paper clips. Modify these materials by trimming or wrapping them to improve precision, but always clean them thoroughly before use. Prioritizing safety and cleanliness guarantees your DIY tools are both effective and safe for your nail art projects. Additionally, considering retirement planning strategies can help you secure your financial future, just as careful preparation ensures successful nail art.
Selecting Appropriate Household Items
Creating DIY nail art tools can be simple and cost-effective by using common household items. To craft your perfect dotting tools and brushes, consider these options:
- Toothpicks or bobby pins for small dots and fine lines—ideal for intricate designs with gel polish.
- Makeup sponge or foam can be cut into shapes for blending or creating textured backgrounds.
- Old paintbrushes or toothbrushes work well for broader strokes or creating textured effects.
- Nail art stickers or decals can be used as stencils or to add extra detail without needing extra tools. These household items help you customize your tools while working with gel polish and nail art stickers, making your nail art experience both fun and budget-friendly.
Modifying Items for Precision
To achieve more precise dot sizes and shapes, consider modifying household items into customized dotting tools. Precision modification allows you to tailor tools to your specific nail art needs, giving you better control over your designs. Start by selecting household items with suitable tips or ends, such as the rounded end of a bobby pin, the tip of a sewing pin, or the end of a toothpick. You can also alter the thickness by wrapping or trimming parts of the item. Choose household items carefully, considering their size and shape, to ensure your dots are uniform and clean. Use small tools like paper clips or push pins for tiny dots, and larger items for bigger accents. Proper household item selection and precision modification are key to achieving professional-looking nail art at home.
Ensuring Cleanliness and Safety
Ensuring cleanliness and safety when crafting dotting tools from household materials is essential for healthy and hygienic nail art practice. To prevent infections, follow proper sterilization procedures. Here are four key steps:
- Use non-toxic materials whenever possible, avoiding harmful chemicals.
- Wash all tools thoroughly with soap and water before and after use.
- Sterilize metal parts by soaking them in rubbing alcohol or boiling water.
- Replace homemade tools periodically to maintain hygiene and prevent deterioration.
Always prioritize non-toxic materials in your DIY tools to reduce skin irritation. Proper sterilization procedures help eliminate bacteria, fungi, and viruses, ensuring your nail art remains safe. By maintaining cleanliness, you protect your health and enjoy beautiful, worry-free designs.
Artdone Nail Dotting Tools 32PCS Double-ended Nail Art Brushes Kit Nail Art Gel Polish Liner Brushes Design Pen For Nail Drawing And Nail Paint Brushes Small Detail Brushes
Package contains:Include 14pcs black nail art brushes set,5pcs nail dotting tool,3pcs Nail Art Liner pen,1pcs pen holder,1pcs color…
As an affiliate, we earn on qualifying purchases.
As an affiliate, we earn on qualifying purchases.
Making Fine Brushes Using Everyday Items
If you want to craft fine brushes for detailed nail art without buying specialized tools, you can easily make them from everyday items around your house. Start by choosing a sturdy, thin object like a toothpick or a small paintbrush handle. For the brush tip, use a piece of sponge or a thin strip of felt, glued securely to the handle. This guarantees good brush quality and material durability, allowing for precise application. You can also repurpose old eyeliner brushes or tiny paintbrushes, trimming them as needed. To improve brush longevity, seal the glue with clear nail polish. This simple DIY method provides a reliable tool for intricate designs, giving you control and accuracy without investing in expensive equipment. Additionally, understanding the importance of father-daughter bonds can inspire you to create designs that celebrate these meaningful relationships.
Artdone 31pcs Nail Art Brushes, Nail Art Tool Set, Dotting Tools, Dust Brush,Striping Brushes for Long Lines, Drawing Pen For Gel Polish Design supply
Package contains:Include 15pcs black nail art brushes set, 5pcs nail dotting tool,3pcs Nail Art Liner pen, 3pcs double…
As an affiliate, we earn on qualifying purchases.
As an affiliate, we earn on qualifying purchases.
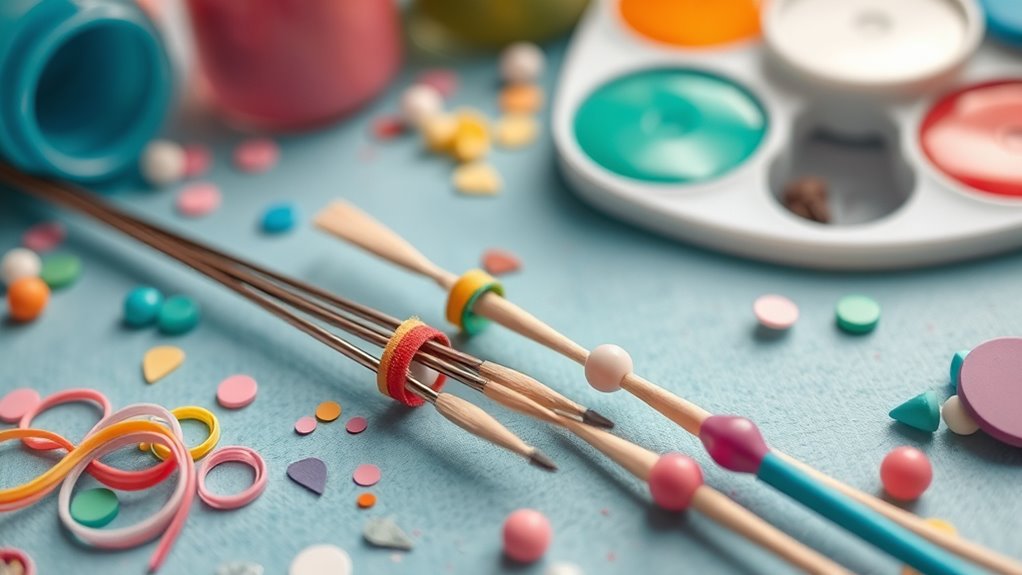
Customizing Tool Sizes for Different Nail Art Effects
Adjusting the size of your nail art tools is essential for achieving a variety of design effects. Proper tool size customization lets you create precise dots, fine lines, or bold accents. To modify your tools for effect variation, consider these options:
- Use different-sized beads or balls glued to your handle for various dot sizes.
- Wrap multiple layers of tape around a brush or pin to alter its thickness.
- Cut or trim sponge tips to create different shapes and sizes.
- Attach small metal or plastic tips to customize the tool’s diameter.
- Experiment with household items like toothpicks or bobby pins to achieve different effects, leveraging their versatility in nail art for more creative possibilities.
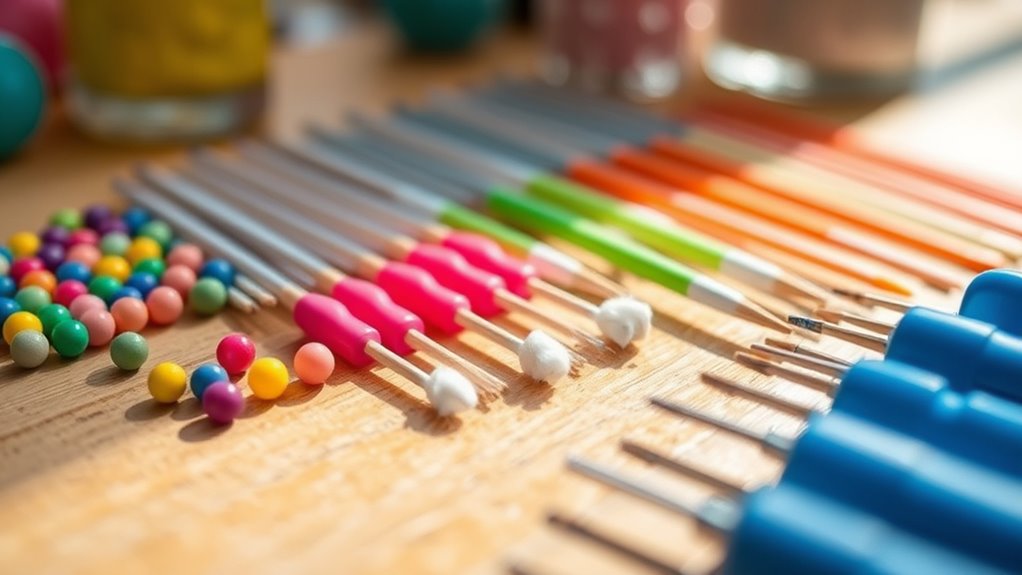
Tips for Ensuring Durability and Reusability
To keep your nail art tools in good shape and ready for multiple uses, you should clean and store them properly after each session. Choosing the right material for your tools is essential for long-term use; opt for sturdy, non-porous items like plastic, metal, or silicone. These materials resist staining and are easy to clean, preventing buildup that can damage your tools. When cleaning, use mild soap and warm water, avoiding harsh chemicals that could degrade the material. Store your tools in a dry, organized space to prevent damage and contamination. Proper care and thoughtful material selection extend the durability of your DIY tools, ensuring they stay functional and effective through many creative sessions. Additionally, understanding merchant services can help you select the best payment options if you decide to sell your nail art creations professionally.
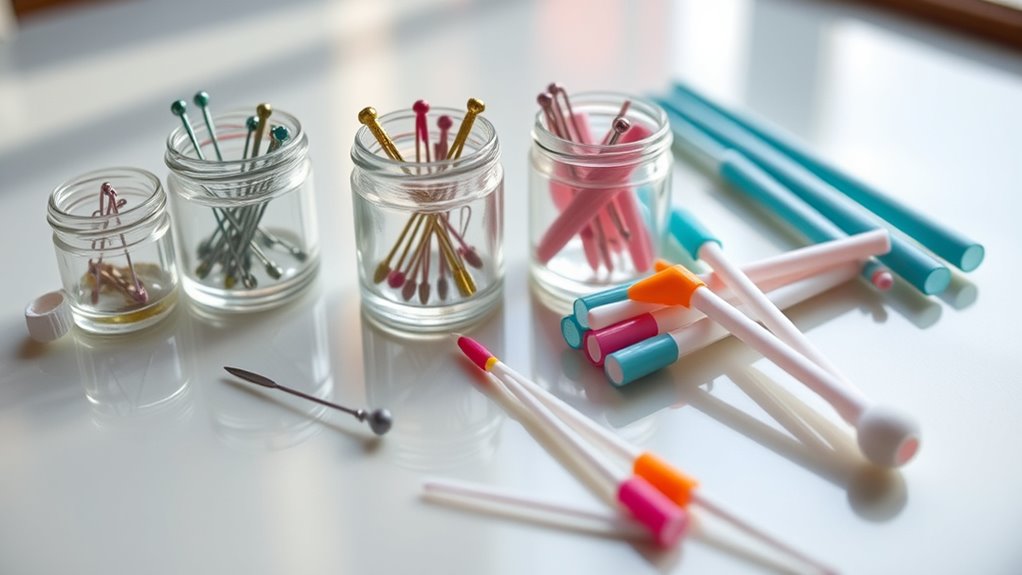
Creative Ways to Decorate and Personalize Your Tools

Adding personal touches to your nail art tools can make your creative process more enjoyable and uniquely yours. To inspire your creative inspiration, consider customizing your tools with simple decor. Here are four ideas:
Personalize your nail tools with simple decor for a more fun and inspiring creative experience.
- Paint Handles: Use acrylic paint to add bold colors or patterns, making tools easy to identify.
- Decorative Tape: Wrap washi tape around handles for fun designs and color coordination.
- Stickers and Decals: Apply tiny stickers to add personality without much effort.
- Glitter Accents: Lightly brush on clear glue and sprinkle glitter for a sparkling touch.
- Use customized tools to enhance your nail art experience and make your designs truly stand out.
These personalizations not only boost your mood but also help you quickly find the right tool, enhancing your overall nail art experience. Keep it fun and let your creativity shine!
Maintenance and Proper Storage of DIY Nail Art Tools

To keep your nail art tools in top shape, regular cleaning and disinfection are essential. Proper storage prevents damage and contamination, making your tools safer and longer-lasting. Organizing your tools efficiently also helps you find what you need quickly and maintain a tidy workspace. Incorporating proper storage techniques can further protect your tools from damage and ensure their longevity.
Cleaning and Disinfection
Proper cleaning and disinfection are essential to keep your DIY nail art tools safe and in good condition. To guarantee they’re properly sanitized, follow these steps:
- Wash tools with warm, soapy water to remove residue.
- Use a brush or cotton swab soaked in alcohol or acetone for thorough cleaning.
- Apply disinfection methods like soaking tools in a disinfectant solution or using UV sterilizers.
- Rinse and dry tools completely before storage to prevent bacteria buildup.
- Regularly monitor for AI vulnerabilities that could compromise the safety of your tools and ensure consistent sanitation practices.
Safe Storage Practices
Ensuring your DIY nail art tools are stored correctly is vital for maintaining their cleanliness and longevity. Proper storage safety prevents dust, dirt, and bacteria from contaminating your tools, which is essential for hygiene practices. Store your dotting tools and brushes in a clean, dry container, preferably with individual compartments to avoid contact and damage. Keep tools away from moisture, extreme temperatures, and direct sunlight, which can cause deterioration. Labeling storage containers helps you quickly identify tools and maintain an organized space. Regularly inspect your storage area for cleanliness, and wash your tools if needed before storing. Following these storage safety guidelines ensures your DIY tools stay in top condition, ready for your next creative session while minimizing the risk of contamination. Additionally, necessary cookies can help track the effectiveness of your storage practices and ensure optimal organization.
Tool Organization Tips
Are you making the most of your nail art tools by keeping them organized? Proper storage prevents damage and makes your tools easier to find. Here are some tips:
- Use small containers or magnetic strips to keep tools with ergonomic grips separate for easy access.
- Label each container or section with clear tool labeling to quickly identify your dotting tools and brushes.
- Store brushes upright to maintain their shape and prevent bristles from bending.
- Regularly clean and sanitize your tools before storing to prolong their lifespan and keep your workspace hygienic.
- Ensuring proper tool safety practices can help prevent damage and extend the longevity of your nail art supplies.
Frequently Asked Questions
Can I Sterilize DIY Nail Art Tools Safely for Reuse?
Yes, you can sterilize your DIY nail art tools safely for reuse by using proper sterilization methods like rubbing alcohol, boiling water, or UV sterilizers. These methods effectively eliminate bacteria and fungi, ensuring your tools stay hygienic. Regular sterilization also helps maintain tool longevity, preventing damage from residue buildup. Just make sure to follow each method’s instructions carefully to keep your tools safe and in good condition for future use.
What Are the Best Household Items for Creating Detailed Nail Art Brushes?
You can use household item alternatives like bobby pins, toothpicks, or thin paintbrushes to create detailed nail art brushes. These DIY tool safety tips guarantee you don’t injure yourself or damage your nails. For precision, cut or reshape these items as needed. Always clean and sterilize your tools thoroughly before reuse to prevent infections, maintaining safe and effective DIY nail art practices.
How Do I Prevent My Homemade Tools From Corroding or Degrading?
Imagine you’re a knight guarding your nail art tools. To prevent corrosion and guarantee tool preservation, clean your homemade brushes and dotting tools thoroughly after each use with mild soap and water. Dry them completely and store in a dry, airtight container. Avoid exposing them to moisture or harsh chemicals. Regularly inspect for signs of degradation, and consider applying a light coating of clear nail polish to protect metal parts from rust.
Are There Eco-Friendly Materials Suitable for Making Sustainable Nail Art Tools?
Yes, you can make sustainable nail art tools using eco-friendly materials like biodegradable plastics and natural fiber composites. These materials are safe for the environment and durable enough for regular use. By choosing biodegradable plastics, you guarantee your tools break down safely over time. Natural fiber composites, made from plant-based fibers, add strength without harming the planet, making your DIY tools both functional and eco-conscious.
Can I Customize My Tools for Different Nail Shapes and Sizes Effectively?
Of course, you can customize your tools for different nail shapes and sizes—because who doesn’t love a challenge? With some clever tool customization and nail shape adaptation techniques, you can tailor your tools perfectly. Just adjust the size, tip, or grip, and you’ll get precise results every time. So go ahead, experiment, and turn your nail art into a personalized masterpiece with tools that truly fit your style.
Conclusion
With a little creativity, your household items can transform into endless nail art possibilities. Think of your DIY tools as your personal palette—each one a brushstroke waiting to be made. By customizing and caring for them, you turn everyday objects into your artistic allies. So, go ahead—dare to experiment, personalize, and craft your unique nail designs. After all, the perfect manicure begins with the tools you create, turning simple ideas into stunning masterpieces.