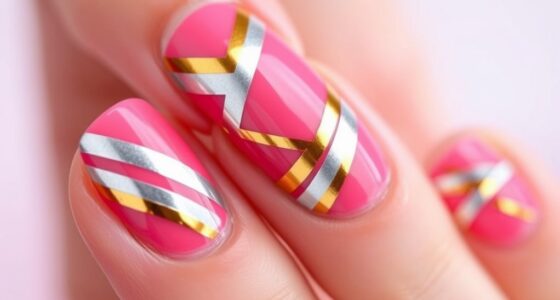
To achieve a flawless manicure cleanup, keep essential tools like small brushes, nail polish remover pens, cotton swabs, and cuticle oil nearby for precise corrections. Use a fine brush or corrector pen dipped in remover to fix edges and smudges quickly. Act fast on mistakes and gently wipe away excess polish around cuticles. For best results, consider shielding nails with tape or latex before applying polish. Keep practicing these techniques for perfect, professional-looking nails every time.
Key Takeaways
- Gather precise tools like small brushes, cotton swabs, and remover pens to ensure neat correction and shape edges accurately.
- Use targeted application of remover with fine brushes or corrector pens for detailed correction of lines and mistakes.
- Choose high-quality, appropriate removal products—acetone-based for stubborn polish, or gentle, acetone-free options to protect nails.
- Act quickly to wipe or dab spills with remover-dipped tools, preventing stains and maintaining a clean, professional look.
- Seal your manicure with protective measures like tape or latex shields, and moisturize afterward for a flawless, long-lasting finish.
Gather Your Essential Tools for Nail Cleanup

Before you begin cleaning up your nails, make sure you have all the essential tools within reach. Properly tidying up your manicure involves more than just removing mistakes; it’s about maintaining your nail art techniques and skin care routines. Gather a small brush, a nail polish remover pen, cotton swabs, and a cuticle pusher. These tools help you clean edges precisely and prevent smudges. Keep a nourishing cuticle oil nearby to support healthy skin. Using the right tools guarantees your cleanup is efficient and neat, avoiding damage to your nail art or skin. Well-prepared tools make the process smoother, helping you achieve a flawless finish while caring for your nails and skin at the same time. Incorporating tools like pimple patches can also protect your skin from irritation during cleanup.
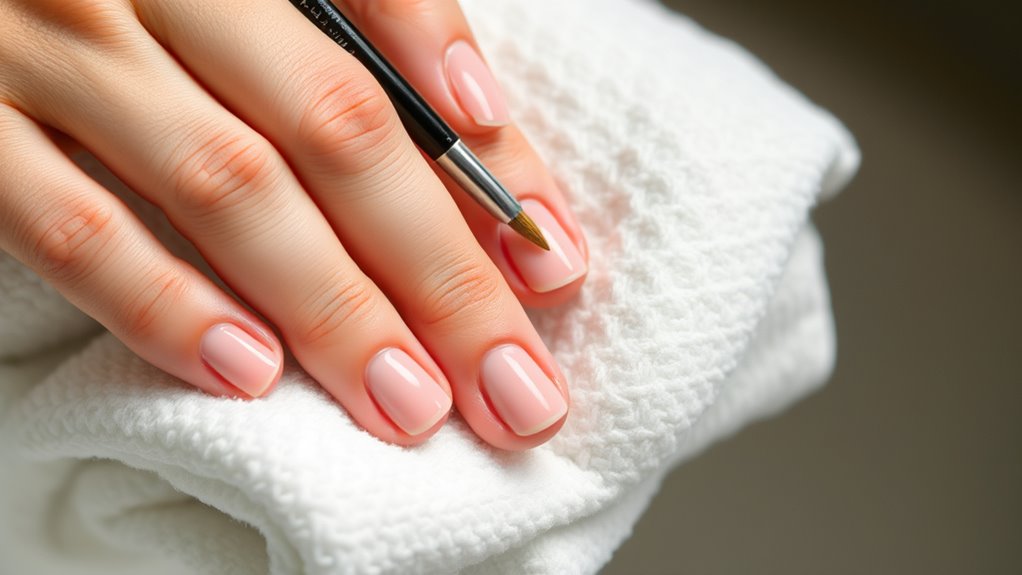
Use a Small Brush or Corrector Pen for Precise Edges
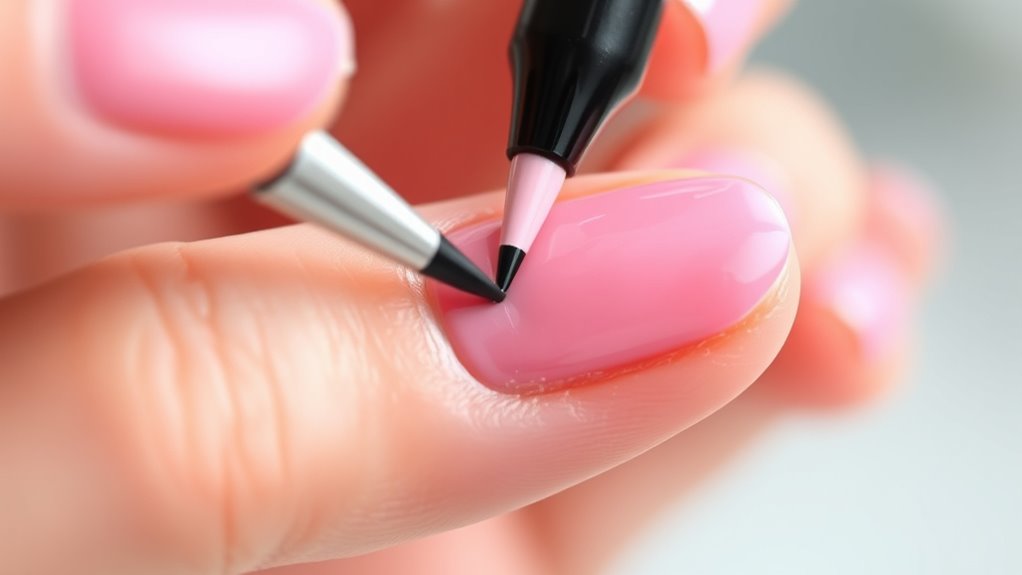
A small brush or corrector pen can make a big difference when you want clean, sharp edges. Use the brush to fine-tune your lines, and the pen to correct any mistakes precisely. Together, they help you achieve a flawless manicure with minimal effort. Paying attention to personal preferences ensures the tools meet your specific needs for the best results.
Fine-Tune With Small Brush
To achieve crisp, clean edges, use a small brush or corrector pen for precise touch-ups. This tool is perfect for fine-tuning your manicure, especially around cuticle detailing and nail art correction. Carefully dip the brush into remover or polish to target small mistakes without disturbing the rest of your polish. Focus on shaping the edges and refining any uneven lines for a polished look. The small brush allows you to precisely clean up smudges or overflows, giving your nails a flawless finish. Take your time, and work slowly for the best results. This step ensures your manicure looks professional and neat, highlighting your attention to detail and skill. With patience, you’ll perfect every edge for a stunning, flawless manicure.
Correct With Pen Precision
Using a small correction pen or a fine-tipped brush allows you to precisely refine your manicure edges. This tool is essential for perfecting nail art techniques and ensuring clean, sharp lines. When removing gel polish, mistakes can be tricky to fix, but a corrector pen makes it easier to tidy up tiny smudges or uneven edges without disturbing the rest of your polish. Dip the pen in acetone or gel remover, then carefully trace along the edges where polish has gone astray. This method provides unparalleled control, helping you achieve a professional-looking finish. Whether perfecting intricate nail art or simply cleaning up accidental smudges, a correction pen is your go-to for detailed, precise corrections. It’s a quick, effective way to elevate your manicure. Color accuracy plays a role in ensuring the true shades of your nail polish are maintained during correction.
Apply Rubbing Alcohol or Nail Polish Remover for Quick Corrections

Choosing the right solution is key to quick corrections, so pick a high-quality rubbing alcohol or nail polish remover. Use a small brush or a cotton swab to apply it precisely where needed, avoiding your skin. Wipe away any excess smoothly to keep your manicure looking flawless.
Choose the Right Solution
When you need to fix small mistakes or tidy up your manicure quickly, applying either rubbing alcohol or nail polish remover is your best bet. Choose the solution based on your needs:
- Use nail polish remover for precise color matching, ensuring your polish stays true to your shade.
- Rubbing alcohol is gentler on nail health, ideal for quick corrections without damaging your nails.
- Opt for acetone-based remover if you need to remove stubborn polish, but limit exposure to protect your nails.
- Select a gentle, acetone-free remover if you want to preserve nail health and avoid dryness.
- For a more authentic look, consider creating a farmhouse bedroom ambience that complements your style while doing your nails.
Apply With Precision
To achieve clean, precise corrections, apply rubbing alcohol or nail polish remover carefully with a small brush or a cotton swab. This targeted approach helps you fix mistakes quickly without disturbing your flawless base coat. Use gentle dabbing to lift excess polish or clean up edges, especially when working on intricate nail art techniques. Keep in mind, patience is key—allow each layer to dry slightly to prevent smudges. Additionally, practicing mindful organization of your tools can streamline your correction process and prevent accidental mistakes.
Wipe Excess Seamlessly
Wiping excess polish seamlessly is essential for a flawless manicure. Using nail polish removal or rubbing alcohol helps you quickly correct mistakes without smudging your design. Here are four cleanup techniques to master this step:
- Dip a small brush or cotton swab into nail polish remover for precise cleanup along the edges.
- Gently wipe away excess polish from your cuticles or skin without disturbing the polish on your nails.
- Use a clean, lint-free cloth dampened with remover to clear larger smudges smoothly.
- Keep a steady hand and work slowly to avoid spreading polish onto unwanted areas.
- Choosing the right clean-up tools can make the process even more efficient and less messy.
These steps ensure your manicure looks professional and neat. Proper nail polish removal techniques make correction fast and effortless, giving you a perfect finish every time.
Correct Smudges Immediately to Prevent Set-In Stains

Smudges on your freshly painted nails can quickly become permanent stains if you don’t address them right away. To prevent set-in stains, use gentle drying techniques like blowing cool air or holding your nails steady for a few seconds. Act fast by softly dabbing the smudge with a clean brush dipped in remover or acetone, but avoid smearing further. This immediate correction keeps the polish smooth and prevents uneven edges. Incorporate simple nail art tips, such as applying a quick top coat after fixing the smudge, to lock in your perfect finish. Remember, quick action is key—delaying only increases the risk of smudges drying into stubborn stains. Stay attentive, and your manicure stays flawless from first coat to final touch. For a truly professional look, consider proper nail care practices to maintain the longevity of your polish.
Tackle Cuticle Spills With a Cotton Swab and Remover

To clean up cuticle spills, use a cotton swab for precision. Apply remover gently to avoid damaging your polish. This careful approach helps achieve a neat, professional-looking manicure.
Precise Cotton Swab Use
When you notice excess cuticle remover spilling onto your nails or surrounding skin, a cotton swab becomes your best tool for quick cleanup. To guarantee a flawless finish, follow these tips:
- Dip your cotton swab in remover, then gently wipe along the spill, maintaining control for precision.
- Keep the swab steady and use small, circular motions to avoid disturbing the polish.
- For color matching, clear away spills carefully to prevent smudging or staining your nail art.
- Prioritize nail health by avoiding excessive rubbing, which can weaken or irritate the skin.
- Ensuring the remover is used on clean, dry nails can improve the effectiveness of the cleanup and protect your skin from irritation application timing.
Using a cotton swab with precision helps keep your manicure neat and professional-looking, while also protecting your nails and skin from unnecessary damage.
Gentle Remover Application
If you notice excess cuticle remover spilling onto your nails or surrounding skin, tackling it promptly with a cotton swab and gentle remover application is essential. This helps prevent damage during nail polish removal and maintains proper cuticle care. Dip a cotton swab in a small amount of gentle remover, then carefully dab the spill area. Use a steady hand to avoid disturbing your polish or irritating your cuticles. For better control, follow this guide:
| Step | Action | Tips |
|---|---|---|
| 1 | Dip cotton swab in remover | Use minimal product |
| 2 | Gently dab spill area | Be precise, avoid excess |
| 3 | Clean surrounding skin | Prevent polish mishaps |
| 4 | Moisturize after removal | Maintain healthy cuticle care |
This method ensures a clean, polished look while protecting your skin. Remember, practicing proper removal techniques can make a significant difference in maintaining healthy nails and cuticles.
Remove Excess Polish Carefully With a Toothpick or Orange Stick
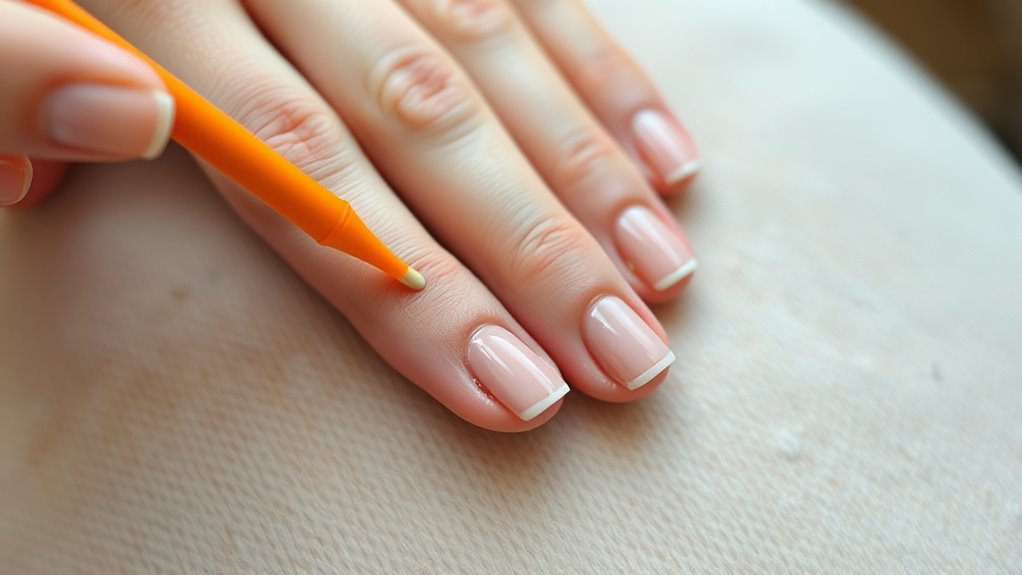
Gently remove any excess polish around your nails using a toothpick or orange stick. This step helps maintain clean lines and prevents smudges, especially when working with detailed nail art. To do this effectively:
- Choose a tool that suits your polish consistency—thin toothpicks for thick polish, or orange sticks for smoother application.
- Dip the tip lightly in acetone or remover if needed, but avoid excess liquid.
- Carefully slide the tool along the edges, nudging away any stray polish.
- Work slowly to avoid damaging your design or smearing the polish on your nail art.
This method allows precise cleanup without disturbing the fresh polish, making your manicure look flawless and professional. Always proceed gently, and keep your tools clean for best results.
Fix Uneven Lines With a Fine Detailing Brush

Uneven lines can detract from a polished look, but you can easily correct them with a fine detailing brush. Use the brush dipped in a small amount of acetone or nail polish remover to carefully trace over the uneven edges. This technique enhances nail art precision and helps create crisp, clean lines. Focus on small, deliberate strokes to refine the detailed line work without smudging surrounding polish. Take your time and work slowly for the best results. If needed, wipe the brush frequently to prevent excess product from spreading. This simple step not only corrects imperfections but also elevates your manicure to a professional level. Understanding machine learning can help you better grasp the importance of patience and precision in achieving flawless results. With patience and a steady hand, your nails will showcase flawless, sharp lines that complete a perfect manicure.
Clean up Around the Nails With a Damp Brush for a Sharp Finish

After refining your lines with a detailing brush, the final step is to clean up around your nails for a crisp, polished look. Using a damp brush helps you precisely remove excess polish or stray smudges, especially around intricate nail art. Here are some tips:
- Dip a small, flat brush into nail polish remover or water if you’re cleaning up after nail art.
- Gently wipe around the edges of your nails to clear away polish mistakes.
- Focus on sharp lines and clean edges to enhance the overall finish.
- Keep the brush damp but not dripping to avoid smudging your polish or damaging your design.
This simple step ensures your manicure looks flawless and professional, perfect for showcasing your nail art without messy edges.
Prevent Future Mistakes by Using Tape or Liquid Latex as Shields
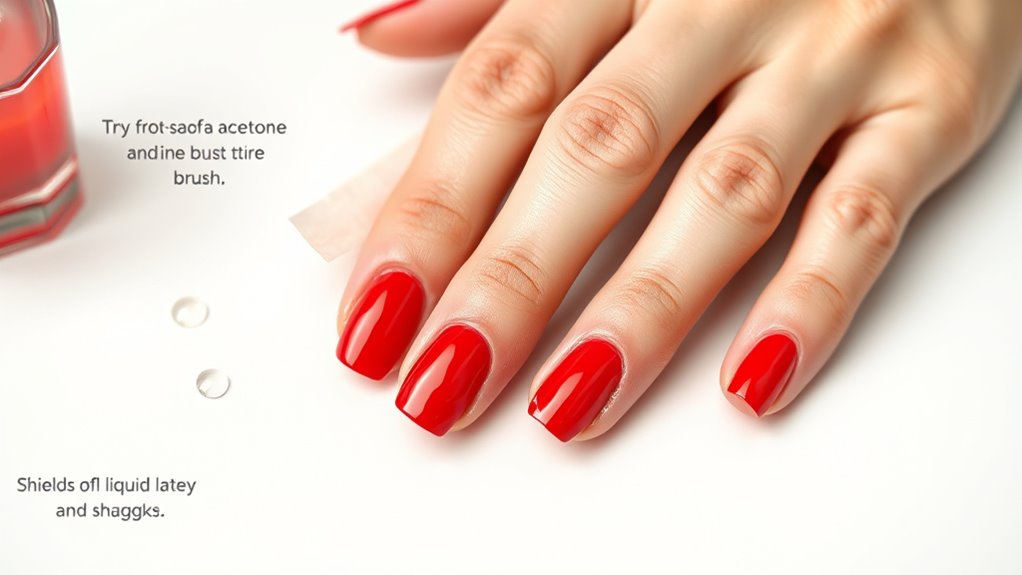
To prevent accidental smudges and keep your clean lines intact, using tape or liquid latex as shields is a smart technique. Nail tape offers a precise barrier along your cuticle line, making it easy to apply polish without worries of messes. Simply place the tape around your nails before painting, then remove it carefully afterward to reveal crisp edges. Liquid latex works similarly but is more flexible; you paint a thin layer around your nails and let it dry. Once your polish is complete, peel away the latex to effortlessly lift off any stray polish. Both methods protect your skin and surrounding areas, ensuring a neat, professional-looking manicure. This simple step helps prevent future mistakes and saves you time during cleanup.
Practice Patience and Take Your Time for Flawless Results
Achieving a flawless manicure requires patience and careful attention to detail. Rushing through the process can lead to mistakes and uneven results. To guarantee perfection, practice patience and take your time with each step. Here are four tips to help you master timing patience:
- Allow coats to dry completely before applying the next to prevent smudges.
- Use a gentle touch when cleaning up excess polish, avoiding hurried movements.
- Wait before adding topcoat—this helps prevent smearing and ensures longevity.
- Set aside ample time for your manicure, so you’re not rushed or tempted to skip steps.
Frequently Asked Questions
How Can I Prevent Polish From Bleeding Onto My Skin?
To prevent polish from bleeding onto your skin, use nail art tips like applying a thin layer of petroleum jelly or tape around your nails before polishing. This creates a barrier that keeps excess polish off your skin. During polish removal, be gentle with cotton swabs or brushes to avoid smudging. These tips help you achieve a clean, professional look and make polish removal easier later.
What’s the Best Method to Fix Uneven Nail Polish Lines?
To fix uneven nail polish lines, start by trimming excess polish with a small brush dipped in nail polish remover. Use gentle nail buffer techniques around the edges to smooth out any unevenness. Carefully clean up the cuticle area for a neat finish. Applying a top coat can also help even out minor imperfections, giving your manicure a polished, flawless look.
How Do I Remove Dried Polish Without Damaging My Nails?
You can remove dried polish without damaging your nails by soaking a cotton ball in a gentle remover, then pressing it onto your nail for a few seconds. Gently rub to lift the polish, avoiding excessive force. Use a nail soak to soften stubborn spots if needed. This method minimizes damage and keeps your nails healthy, leaving them clean and ready for a fresh coat.
Can I Use Household Items for Quick Nail Polish Corrections?
Yes, you can use household remedies for quick nail polish corrections. DIY hacks like using a small brush dipped in acetone or nail polish remover can help fix mistakes neatly. Toothpicks or cotton swabs also work well for precise cleanup. Just be careful not to overuse these household items, and always moisturize afterward to protect your nails. These simple remedies make quick corrections easy and affordable.
What’s the Safest Way to Clean up Around Delicate Cuticles?
To clean up around delicate cuticles safely, you should focus on gentle removal and cuticle care. Use a small brush or a cotton swab dipped in acetone or nail polish remover, but apply it carefully to avoid overexposure. Gently clean the edges without touching the cuticles directly. This preserves your cuticle health while achieving a neat, flawless look. Always prioritize gentle techniques to prevent damage and maintain healthy cuticle care.
Conclusion
With the right tools, quick corrections, and steady patience, you can achieve a flawless manicure every time. Embrace precision with small brushes, protect your skin with tape or latex, and correct mistakes immediately to prevent stubborn stains. Practice makes perfect—so take your time, stay calm, and enjoy the process. With these tips, flawless nails become not just a goal, but a routine you can confidently master every single time.