
For winter wonderland nails, you can try cozy sweater-inspired textures using warm colors like burgundy, green, and beige, complemented by snowflake patterns in icy blues and silvers. Incorporate glitter, metallic accents, and delicate snowflake stamps for a festive, sparkling finish. Add holiday symbols such as ornaments or pinecones for extra charm. To achieve the look, focus on textures, subtle gradients, and neat designs—if you continue exploring, you’ll find tips to perfect your winter nails effortlessly.
Key Takeaways
- Incorporate knit textures and warm winter colors like burgundy and forest green for cozy sweater-inspired nails.
- Use delicate snowflake patterns with rhinestones or glitter accents for a frosty, festive look.
- Apply stamping techniques with light pressure and subtle shades for detailed snowflake and sweater effects.
- Add holiday motifs such as ornaments or holly alongside snowflakes for layered seasonal designs.
- Maintain nails with regular moisturizing and top coats to keep winter-themed nail art lasting and vibrant.

Born Pretty Christmas Nail Stamping Plates 8PCS Nail Art Design Kit Fall Winter Halloween Christmas Tree Patterns Templates with Snowflake Cute Deer Nail Art Image Plates DIY Printing Tools
PACKAGE CONTENTS:8Pcs Nail Art Stamp Template Image Plate Set, Great variety of images. Chrirstmas Tree With Snowflake Cute…
As an affiliate, we earn on qualifying purchases.
As an affiliate, we earn on qualifying purchases.
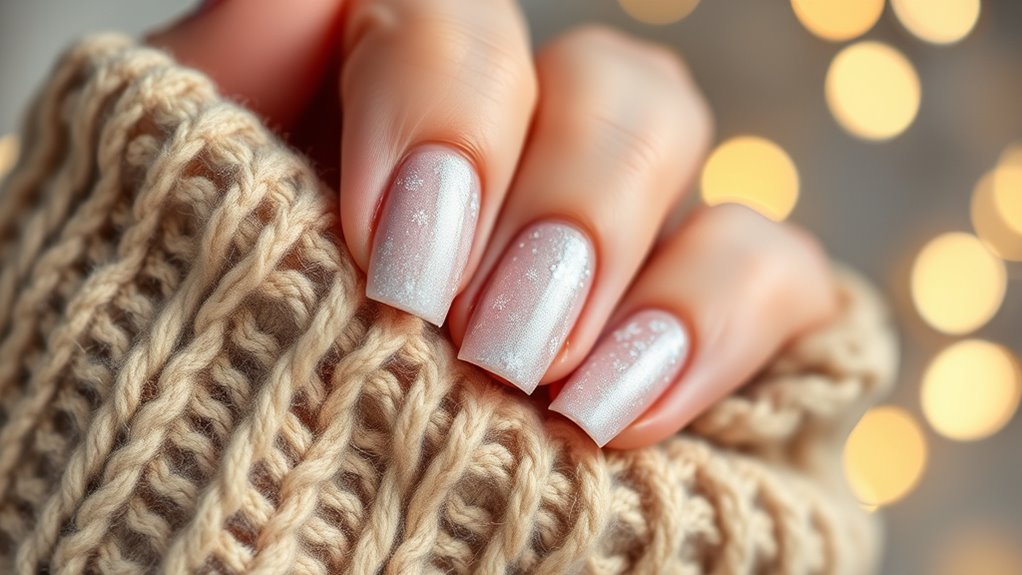
Warm Sweater Texture Nails in Cozy Winter Colors
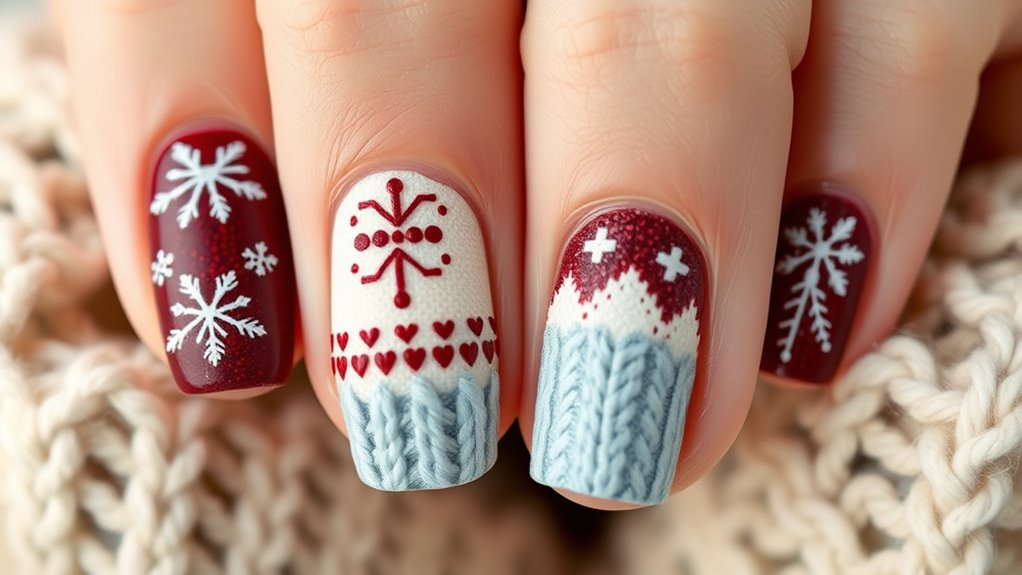
During the chilly winter months, adding warmth to your nails can make a big difference in your overall look. You can achieve this by incorporating knit pattern designs that mimic cozy textures found in your favorite sweaters. Think of soft, tactile details that resemble cable knits or ribbing, adding depth and dimension to your manicure. Use warm winter colors like deep burgundy, forest green, or creamy beige to enhance that snug, inviting vibe. These textures create a tactile illusion that makes your nails feel like a wearable piece of winterwear. Applying matte finishes or subtle accents can emphasize the cozy textures further. Incorporating natural materials such as linen or soft fabrics into nail art can further enhance that cozy, rustic feel. This approach not only keeps your nails stylish but also embodies the warmth and comfort of your winter wardrobe.

30 Sheets Christmas Nail Art Stickers Decals 3D Self-Adhesive Snowflake Nail Stickers White Snowmen Santa Claus Elk Nail Supplies New Year DIY Nail Decals
Snowflake Nail Art Stickers: You will get 30 styles white nail decals in one set of different snowmen…
As an affiliate, we earn on qualifying purchases.
As an affiliate, we earn on qualifying purchases.
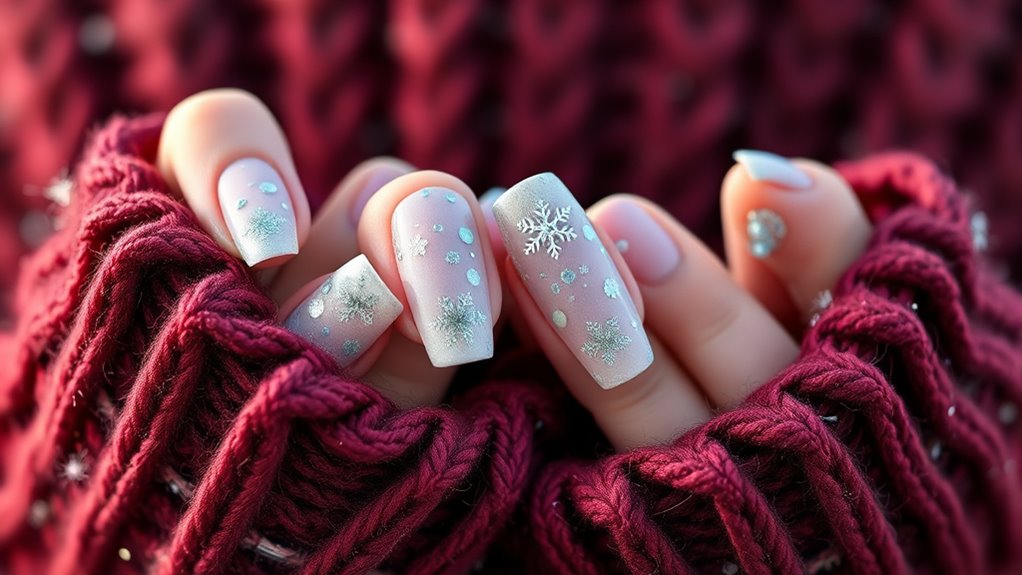
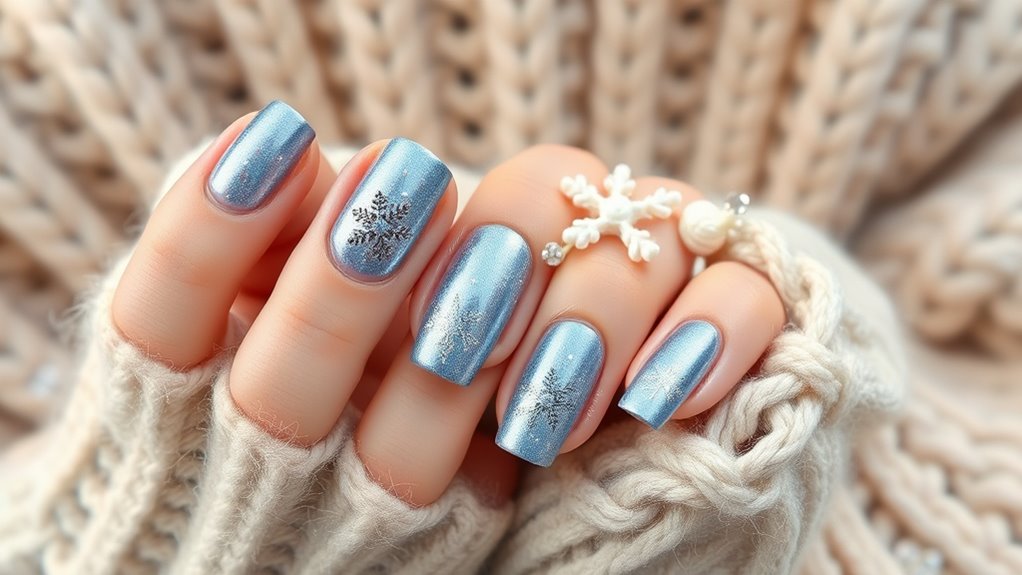
Sparkling Snowflake Designs for a Festive Touch
Adding a touch of sparkle to your winter nails instantly elevates any festive look. Sparkling snowflake designs bring a magical, icy charm that’s perfect for holiday nail trends. Imagine delicate white snowflakes layered over deep navy or icy silver backgrounds, shimmering under holiday lights. To keep your nails looking their best, prioritize winter skincare to prevent dryness and chipping. Visualize your nails adorned with tiny, glittering snowflakes, each one unique, with some accented by tiny rhinestones for extra sparkle. Here’s a mental image:
| Snowflake Pattern | Base Color | Accent Details |
|---|---|---|
| Intricate lace | Frosty blue | Silver glitter |
| Bold silhouette | Deep navy | Tiny rhinestones |
| Delicate tracings | Snow white | Holographic shimmer |
| Frosted tips | Pale gray | Sparkling glitter |

Beetles Neutral Gel Nail Polish – 6 Colors Soak Off UV LED Nail Gel Kit, Brown Gray Silver White Pink Long Lasting Glossy for Salon & Home Manicure Gift for Women
Elegant Neutral Shades : This 6-color gel nail polish set includes white, soft pink, taupe brown, light gray,…
As an affiliate, we earn on qualifying purchases.
As an affiliate, we earn on qualifying purchases.
Combining Chunky Knits and Icy Accents for a Unique Look

To create a truly unique winter look, you can mix textured knit patterns with icy accents that catch the light. Choosing a cool color palette, like icy blues and silvers, enhances the frosty vibe. Try using accent nail techniques such as glitter tips or embossed designs to add extra dimension and flair. Incorporating AI-driven design tools can help you visualize and customize your nail art ideas more precisely.
Textured Knits and Glitter
For a truly eye-catching winter look, combine chunky knit textures with sparkling icy accents. You can mimic knit patterns on your nails using textured polish or 3D embellishments that resemble fabric textures, adding depth and dimension. Incorporate glitter or shimmer to evoke icy frost and snow, creating a shimmering contrast against the matte, cozy feel of the knit-inspired designs. Use layered textures to enhance the effect, such as ribbed or cable-knit patterns paired with sparkling accents that catch the light with every movement. This combination emphasizes the tactile qualities of winterwear while adding a touch of glamour. The key is balancing the plush, tactile appeal of knit textures with the reflective sparkle of glitter, resulting in a striking, winter-perfect manicure. Additionally, selecting the right color temperature can enhance the overall wintery vibe and make the design pop even more.
Color Palette Choices
Choosing the right color palette can elevate your winter manicure by seamlessly blending chunky knit textures with icy accents. To achieve this, consider pairing cozy autumn shades like deep browns and burnt oranges with soft pastel tones such as blush pinks and icy blues. This combination creates a warm yet frosty aesthetic that’s both inviting and elegant. Here’s a simple guide:
| Autumn Shades | Pastel Tones | Icy Accents |
|---|---|---|
| Warm Browns | Soft Pink | Silver Glitter |
| Burnt Orange | Mint Green | Frosted White |
| Olive Green | Lavender | Light Blue |
Mixing these palettes gives your nails a layered look — perfect for winter’s cozy yet crisp vibe. Incorporating color palette choices can help you customize your look for any occasion.
Accent Nail Techniques
By combining chunky knit textures with icy accents on your accent nails, you can create a striking winter look that balances warmth and frost. Use gel polish to achieve a glossy, durable base for your design. For the knit effect, opt for textured nail decals or 3D gel techniques that mimic chunky sweater patterns. To enhance the icy vibe, incorporate silver or icy blue gel polish accents, creating a frosted appearance. Nail decals featuring snowflakes or frost patterns add detail without fuss. Apply these on a single accent nail or alternate nails for variety. This technique emphasizes contrast, making your winter manicure truly unique. The combination of warm knit textures and cool icy details will give your nails a cozy yet crisp winter charm. Additionally, Halloween celebrations in Australia have become increasingly popular, inspiring creative costume ideas that can be echoed in your nail art designs for a festive touch.

Morovan Christmas Nail Polish Set: 2025 Glitter Gifts Ideas Red Green Gold Silver Fingernail Polish Kit Winter Quick Dry Regular Nail Polish Pack Manicure for Women Girls Holiday Party
🎄Christmas Nail Polish Set: Our collection offers 15 colors, Christmas red, glitter red, Christmas green, glitter green, glitter…
As an affiliate, we earn on qualifying purchases.
As an affiliate, we earn on qualifying purchases.
Using Glitter and Metallics to Enhance Your Winter Nails

Glitter and metallics instantly elevate your winter nail look, adding a touch of sparkle and sophistication that perfectly complements the season’s festive spirit. You can easily incorporate glitter gradients for a seamless shimmer from cuticle to tip, creating depth and dimension. Metallic accents, like gold or silver strips, add a chic, modern edge to your design. To make it pop, try combining glitter gradients with bold metallic stripes or dots. These elements reflect light beautifully, making your nails stand out during holiday parties. Experiment with different textures and colors to match your winter wardrobe. Whether subtle or statement-making, glitter and metallics bring a luminous charm that captures the essence of winter elegance. Incorporating color combinations can further enhance the overall look, making your nails truly festive and stylish.
Creating Subtle Snowflake Patterns With Nail Stamps
Choosing the right stamps is key to creating delicate snowflake patterns that look elegant and subtle. You’ll want to focus on stamps with fine details and clear designs to achieve a refined look. With some tips on snowflake details and subtle application, you can make your nails beautifully wintery without overdoing it. Remember, understanding credit card terms and security measures can help you stay informed about online transactions if you’re purchasing nail art supplies.
Choosing the Right Stamps
Selecting the right nail stamps is essential for creating subtle snowflake patterns that enhance your winter manicure. Focus on stamping plate selection by choosing plates with delicate, intricate snowflake designs that aren’t too bold or overwhelming. Look for plates that feature fine lines and small details, which help achieve a subtle, refined look. Pay attention to stamp design intricacies; some designs may have more complex patterns that could muddy the effect, so opt for simpler, cleaner motifs for a softer appearance. Test different plates to see how the patterns transfer onto your nails and guarantee they complement your overall style. The goal is to find stamps that balance detail with subtlety, giving your manicure a cozy, elegant winter vibe.
Perfecting Snowflake Details
To achieve the perfect subtle snowflake patterns, focus on how you apply your nail stamps. Use light pressure to avoid over-inking and guarantee clean transfers, especially when creating delicate stencil patterns. For added finesse, incorporate snowflake brush techniques, gently refining edges and adding tiny details for depth. Choose soft, neutral base shades to keep the snowflakes understated yet elegant. Experiment with different stamp designs to find the most delicate patterns suited for your style. Carefully align the stamp for symmetry, and clean your tools promptly to prevent smudging. Proper technique is essential for achieving a flawless look, so practice patience and precision with each step. Here’s a helpful guide:
| Technique | Description |
|---|---|
| Light Stamping Pressure | Prevents excess ink, maintains subtlety |
| Gentle Brush Work | Adds fine details and enhances delicate patterns |
| Neutral Base Colors | Keeps snowflakes subtle and sophisticated |
| Precise Alignment | Ensures symmetry for a refined look |
| Quick Clean-up | Preserves clarity and prevents smudging |
Tips for Subtlety
Ever wonder how to achieve truly subtle snowflake patterns with nail stamps? The key is to focus on minimalist nail designs that emphasize delicate detail without overwhelming your look. Start by choosing soft, neutral polish shades like pale gray or beige for your base. Use a light hand when applying the snowflake stamp to keep the pattern understated. Opt for a sheer or matte top coat to maintain a subtle finish. Remember, seasonal nail care is essential—keep your nails moisturized and free of debris for a clean stamp application. Less is more here; small, fine snowflake designs create a refined winter vibe that’s perfect for everyday elegance. Incorporating proper nail care techniques can also enhance the longevity and appearance of your snowflake designs. With these tips, you’ll craft understated, beautiful winter nails that complement any outfit.
Incorporating Holiday Symbols With Winter-Themed Nail Art

Holiday symbols instantly elevate winter-themed nail art by adding festive charm and visual interest. Incorporating holiday motifs like Christmas trees, ornaments, or candy canes enhances the seasonal feel. These symbols evoke feelings of warmth, joy, and celebration, making your nails more memorable. To maximize impact, consider these ideas:
- Use tiny holiday motifs alongside snowflakes for a playful, festive look.
- Combine winter symbolism like pinecones or holly with cozy sweater patterns for a layered effect.
- Opt for metallic accents or glitter to highlight holiday symbols and create a sparkling, joyful vibe.
Adding self watering plant pots to your holiday decor can also bring a touch of greenery and practicality to your seasonal celebrations, making self watering plant pots an excellent choice for holiday gift-giving or home decoration.
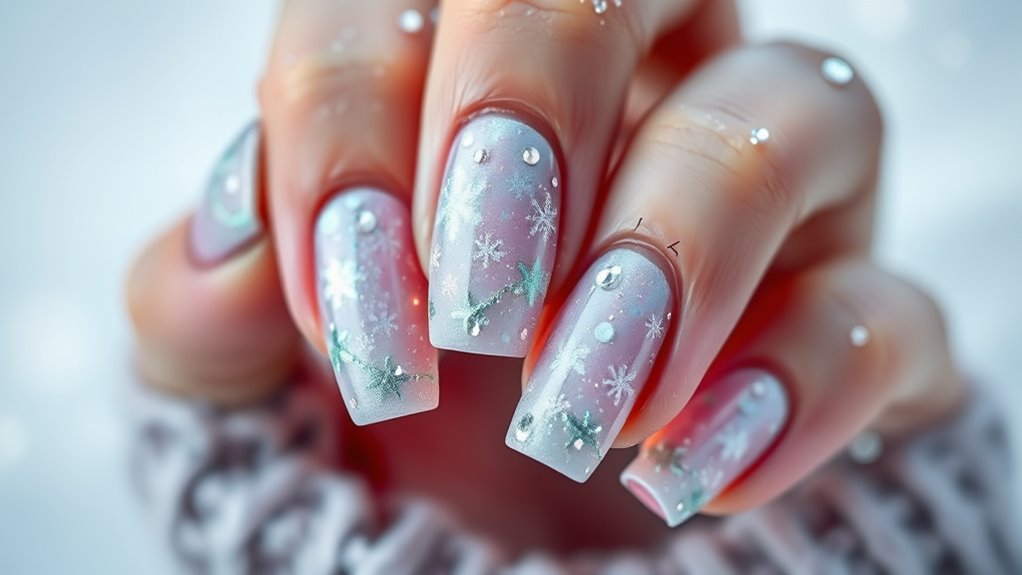
Perfecting the Ombre Effect With Cool Winter Hues

Building on festive symbols, mastering the ombre effect with cool winter hues can elevate your nail art to a sophisticated level. To achieve a seamless gradient, use high-quality gel polish on your nail extensions for durability and smooth blending. Start with a light icy blue or lavender at the cuticle and gradually shift to a darker shade at the tip. Use a sponge to blend the colors softly, creating a natural fade. Keep in mind, the key to a perfect ombre is patience and layering. Here’s a quick tip:
| Tip | Benefit |
|---|---|
| Use a dense sponge | Better color blending |
| Apply thin layers | Faster drying and smoother |
| Seal with top coat | Long-lasting, glossy finish |
Tips for Maintaining Your Winter Wonderland Nails Throughout the Season
Maintaining your Winter Wonderland nails throughout the season requires consistent care and attention. To keep your cozy sweater and snowflake designs looking fresh, follow these tips.
- Moisturize regularly—dry winter air can cause chipping, so apply cuticle oil daily and keep your nails hydrated, preventing cracks and peeling.
- Avoid harsh chemicals—stay away from spring florals or summer brights nail polishes that contain strong solvents, which can weaken your nails and fade your winter-themed art.
- Use a top coat—reapply every few days to preserve shine and prevent chips, ensuring your snowflakes stay crisp and your cozy designs last longer.
With these simple steps, your winter nails will remain stunning, evoking the warmth of a cozy sweater while resisting the season’s harsh elements.
Frequently Asked Questions
How Long Do Winter-Themed Nail Designs Typically Last?
Winter-themed nail designs usually last about a week to ten days with proper nail polish longevity. To keep your cozy sweater and snowflake nail art looking fresh, practice good winter nail maintenance, like moisturizing cuticles and avoiding harsh chemicals. Using high-quality top coats and gentle removal methods can extend their lifespan. With proper care, your festive nails stay beautiful longer, so you can enjoy your winter look for more days.
What Are the Best Nail Care Tips for Winter Dryness?
Don’t let winter dryness catch you off guard—stay ahead by sticking to your hydration routines and prioritizing cuticle maintenance. Keep your nails moisturized with nourishing oils and hand creams, especially after washing. Use gloves when doing chores to protect your hands from harsh elements. Regularly push back cuticles and avoid biting or picking at them. These simple steps help your nails stay healthy, strong, and beautiful all season long.
Can I Do Winter Nail Art at Home Easily?
Yes, you can do winter nail art at home easily with some DIY nail art techniques. Start by choosing a winter color palette like icy blues, silvers, and deep reds. Use tape or nail stencils for clean designs like snowflakes or cozy sweaters. With simple tools and patience, you can create festive, professional-looking nails that match the winter theme without needing a salon.
What Tools Are Essential for Creating Snowflake Patterns?
To create snowflake patterns, you’ll need essential tools like nail stamping plates and a stamper, which make intricate designs easier. Detail brushes are also key for adding delicate touches and customizing your snowflakes. You should have a fine-tipped brush for precision, a stamping kit for quick, consistent patterns, and a steady hand. These tools help you achieve professional-looking snowflakes right at home with ease and accuracy.
Are There Hypoallergenic Options for Winter Nail Polishes?
Yes, you can find hypoallergenic formulas for winter nail polishes. Allergy-friendly brands offer options that minimize common irritants like formaldehyde, toluene, and DBP. These brands focus on creating safe, gentle formulas perfect for sensitive skin, ensuring you can enjoy festive nail art without worry. Look for labels that specify hypoallergenic or allergy-friendly to pick the best options for your winter nail designs.
Conclusion
With winter nail art, you can truly embrace the season’s charm. Did you know that 65% of people say festive nails boost their holiday spirit? By mixing cozy textures, sparkling details, and subtle patterns, you’ll keep your nails looking stunning all season long. So, go ahead—try those snowflakes and sweater designs, and enjoy showcasing your winter wonderland nails. After all, a little festive flair can make your season even more special!