To start with 3D acrylic nail art, focus on creating textured, eye-catching designs like sculpted flowers and unique embellishments. Begin by preparing healthy nails and practicing your acrylic layer techniques, building up shapes gradually for depth and dimension. Experiment with different colors, forms, and textures to master the art of sculpting realistic or stylized elements. Keep practicing and exploring new techniques — if you keep going, you’ll uncover more tips to perfect your 3D nail creations.
Key Takeaways
- Learn to create 3D acrylic elements like flowers by layering and sculpting with acrylic powders and liquids.
- Start with healthy nails and proper preparation to ensure long-lasting 3D nail art.
- Use inspiration from nature, fashion, or art to design intricate 3D motifs and textures.
- Practice building up layers slowly to achieve realistic and textured 3D effects.
- Watch tutorials and practice on tips to develop skills and explore new 3D sculpting techniques.
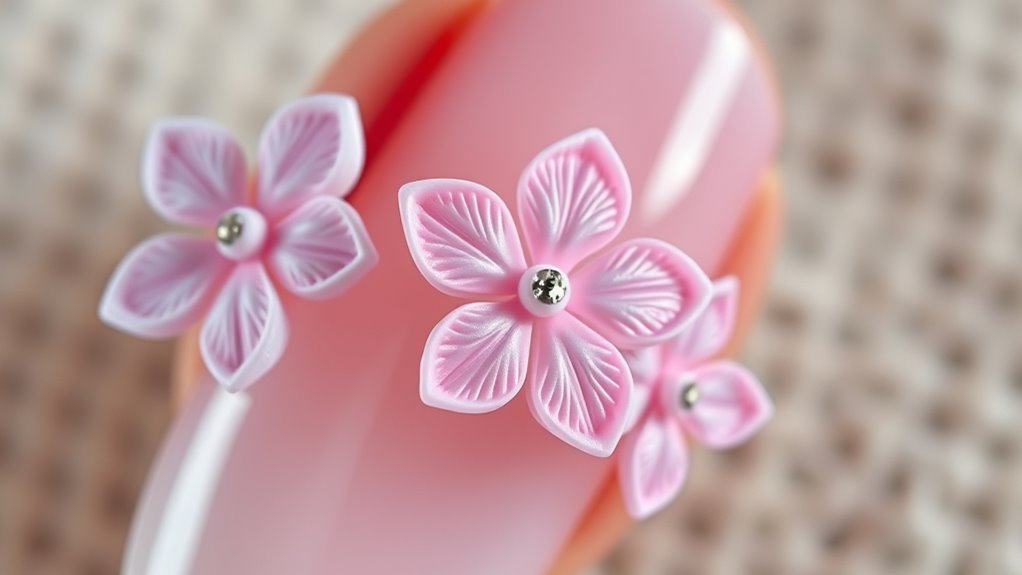
3D acrylic nail art is a stunning way to add depth and texture to your manicure. It’s a technique that transforms plain nails into miniature works of art, giving you the chance to showcase intricate designs that stand out. Whether you want to create delicate flowers, bold shapes, or textured accents, 3D acrylics enable you to push the boundaries of traditional nail art. To achieve the best results, you’ll need to focus on proper nail care, ensuring your nails are healthy and well-prepared before starting any design. Healthy nails provide a strong base for applying acrylics and help your 3D creations last longer without lifting or cracking. Keep your nails moisturized and free from damage by regularly using cuticle oil and avoiding harsh chemicals that can weaken the nail plate.
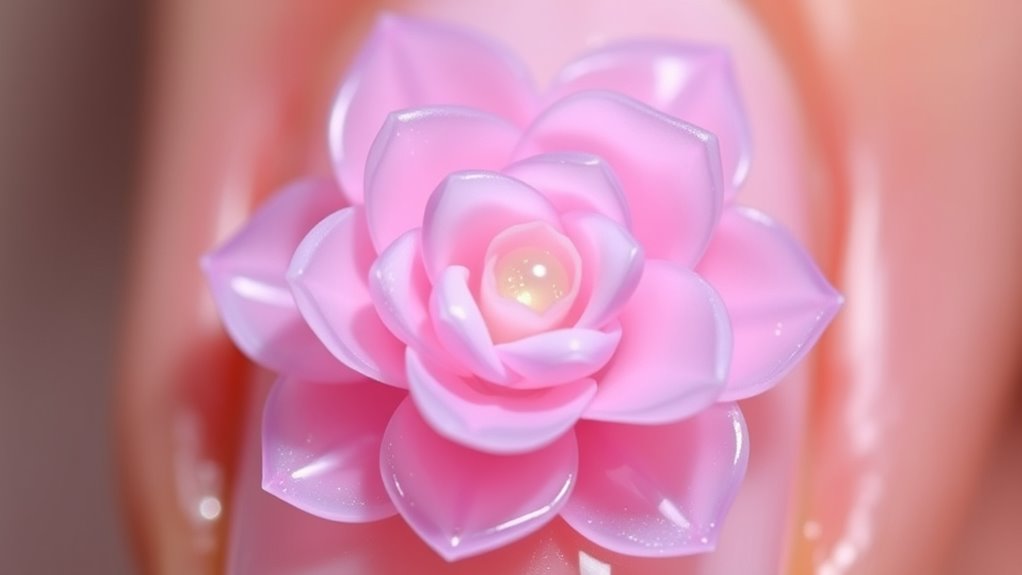
When exploring 3D acrylic nail art, design inspiration is key. You can draw ideas from nature, fashion, or even art pieces that resonate with your personal style. Flowers are among the most popular motifs because they’re versatile and visually appealing. Using acrylic powders and liquids, you can sculpt tiny roses, daisies, or peonies directly onto your nails, creating realistic or stylized blooms that seem to pop right out. To make your floral designs stand out, consider adding subtle shading or tiny embellishments like rhinestones or glitter for extra dimension. The process involves layering acrylic carefully—first outlining the shape, then filling in the petals or details with thicker acrylic to create a raised, three-dimensional effect.
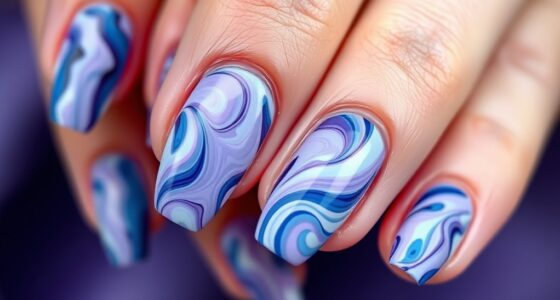
Beyond flowers, you can craft other textured elements such as bows, hearts, or abstract shapes. The key is to work slowly and patiently, building up layers of acrylic to achieve the desired depth. Using different colors and textures can help you create contrast and highlight your design details. If you’re new to 3D acrylic nail art, practicing on a nail canvas or practice tips can boost your confidence before working on your own nails. Watching tutorials and gathering design inspiration from social media platforms can also spark new ideas and techniques, helping you refine your skills.
Top picks for "intro acrylic nail"
Open Amazon search results for this keyword.
As an affiliate, we earn on qualifying purchases.
Frequently Asked Questions
What Tools Are Essential for 3D Acrylic Nail Art?
To create stunning 3D acrylic nail art, you need essential tools like a fine-detail brush for precise brush techniques and color blending. A sturdy acrylic brush helps you sculpt and shape the flowers or designs, while a palette knife can be useful for mixing colors smoothly. Don’t forget a good nail file and buffer to prep your nails, ensuring your artwork adheres well and looks flawless.
How Long Does a 3D Acrylic Nail Design Last?
Your 3D acrylic nail design can last about 2 to 3 weeks, depending on durability factors like your daily activities and nail care. To extend its life, follow maintenance tips such as avoiding harsh chemicals, moisturizing your cuticles, and scheduling regular fills. Proper care prevents chipping and lifting, ensuring your beautiful 3D art stays intact longer. With good upkeep, you can enjoy stunning nails for an impressive duration.
Can Beginners Learn 3D Acrylic Nail Sculpting Easily?
As a beginner, you can definitely learn 3D acrylic nail sculpting, but it requires patience and practice. Starting with basic techniques helps you develop the necessary skills gradually. Focus on mastering beginner techniques like proper acrylic mixing and shaping. As you practice regularly, your skill development will improve, making complex designs easier over time. Remember, consistent practice and patience are key to becoming proficient in 3D acrylic nail art.
What Are Common Mistakes to Avoid in 3D Nail Art?
Avoid common pitfalls in 3D nail art to keep your designs on point, like a ship without a rudder. Focus on design consistency, ensuring each element matches your vision, and always use proper curing to prevent smudges or lifting. Rushing through the process can lead to mistakes, so take your time. Remember, patience and attention to detail are your best tools for creating flawless 3D acrylic nail art.
How Do You Fix Mistakes in Intricate 3D Designs?
When correcting errors in intricate 3D designs, you should carefully identify where the mistake is. Use a fine brush or tool to gently remove excess acrylic or reshape areas. To smooth surfaces, lightly file or buff the affected spots, blending corrections seamlessly into the design. Patience is key; take your time to fix mistakes without damaging the details, ensuring your 3D nail art looks flawless and polished.
Conclusion
Now that you know the basics of 3D acrylic nail art, you’re ready to get creative and make stunning designs. Did you know that the global nail art market is expected to reach over $11 billion by 2027? That’s a huge opportunity to explore your skills and turn your passion into a profession. So, keep practicing, experiment with different techniques, and soon you’ll be creating beautiful, eye-catching nails that everyone will admire!