You can create stunning nail art on a budget by using affordable gel polishes and easy-to-apply nail stickers. Apply gel polish for a long-lasting shine and durability, then add eye-catching designs with inexpensive stickers that peel and seal with a top coat. Experiment with fun patterns and bold colors to achieve professional results without spending much. Keep exploring for more tips and tricks to maximize your nail art creations without breaking the bank.
Key Takeaways
- Use affordable gel polishes and nail stickers to create detailed designs without high costs.
- Practice simple techniques like layering and stamping to achieve professional-looking nail art at home.
- Reuse and store supplies properly to maximize their lifespan and value.
- Explore online tutorials and inspiration for budget-friendly, trendy nail design ideas.
- Focus on easy, bold patterns to create stunning nails with minimal supplies and effort.
Achieving stylish nail art doesn’t have to break the bank. You can create stunning designs with affordable supplies that won’t drain your wallet. One of the best ways to elevate your nail game without spending a fortune is by using gel polish. Unlike regular polish, gel polish offers a longer-lasting finish with a shiny, professional look. It’s easy to apply at home, and a small bottle can go a long way. You don’t need fancy tools—just a UV or LED lamp, which many people already have or can borrow. With gel polish, you can experiment with bold colors, intricate designs, or subtle shades that stay flawless for days. Plus, since it’s more durable, you save money by not constantly redoing chipped nails.
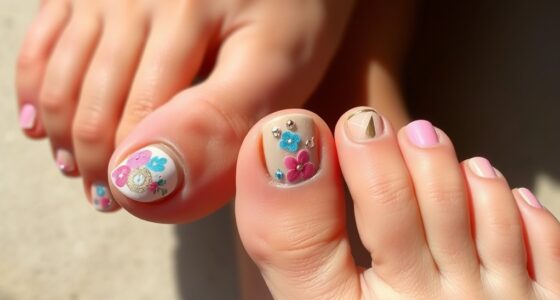
Another budget-friendly option is nail stickers. These are a game-changer because they allow you to add complex patterns and designs without any artistic skill or pricey tools. Nail stickers come in a wide variety of styles—from floral patterns to geometric shapes—and are super easy to use. You simply peel, stick, and seal with a top coat. They’re perfect for quick makeovers when you’re short on time or patience. Nail stickers are also versatile; you can layer them over plain polish or gel for a more elaborate look. Best of all, they’re inexpensive and reusable if you store them properly. You can find many designs online or in stores, making it easy to switch up your style without spending much.
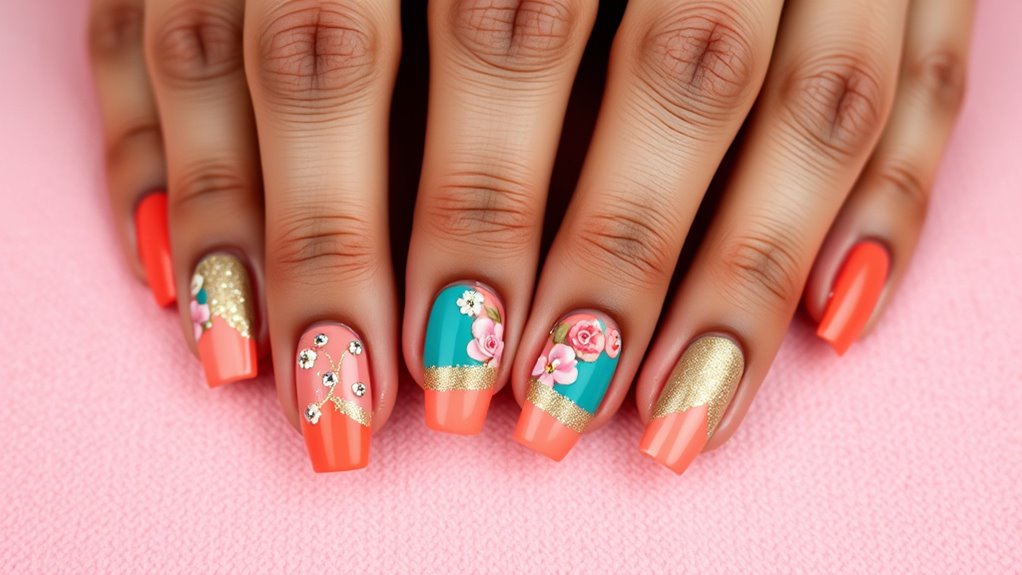
To make the most of your budget, combine gel polish with nail stickers. Start with a base coat of gel polish in your favorite color, cure it under a lamp, then add nail stickers for a unique design. Seal everything with a top coat—preferably gel for extra durability—and you’ve got a professional-looking manicure that costs a fraction of what you’d pay at a salon. You don’t need fancy tools or expensive brands; just a little creativity and some basic supplies. Using cost-effective techniques helps you achieve salon-quality results without overspending. With a bit of practice, you can master DIY nail art that looks just as good as salon results, but for a fraction of the price.
Top picks for "nail budget gorgeou"
Open Amazon search results for this keyword.
As an affiliate, we earn on qualifying purchases.
Frequently Asked Questions
Can I Achieve Professional-Looking Nail Art at Home?
You can definitely achieve professional-looking nail art at home. Start by exploring nail art tutorials online to learn techniques and tricks. Use affordable supplies to create custom nail designs that match your style. Practice regularly, and you’ll improve your skills over time. With patience and creativity, you’ll be able to craft stunning, salon-quality nail art without breaking the bank. Custom nail designs are easier than you think when you follow the right tutorials.
How Long Does DIY Nail Art Last Without Professional Topcoat?
Worried your DIY nail art won’t last? Without a professional topcoat, expect your nail durability to drop, usually lasting about 3-5 days. To maximize DIY maintenance, apply a clear topcoat every couple of days to protect your design and extend its life. Keep your nails moisturized and avoid harsh chemicals, which can help your nail art stay vibrant longer, even without professional sealing.
What Are the Best Tools for Beginner Nail Art?
When starting with beginner nail art, the best tools include a good brush selection and dotting tools. A variety of brushes helps you create different designs, from fine lines to bold strokes. Dotting tools make adding polka dots or small details easy. You don’t need expensive supplies—look for affordable options that fit your budget. Practice with these tools, and you’ll improve your skills while keeping it budget-friendly.
Are There Specific Brands That Offer Affordable Nail Art Supplies?
You might wonder if there are affordable brands that offer quality nail art supplies. Luckily, many budget-friendly options exist, like Sally Hansen, SinfulColors, and Wet N Wild, which provide a wide range of nail polishes and tools at low prices. These brands help you create gorgeous designs without breaking the bank. Exploring these affordable brands allows you to experiment with different styles while staying within your budget.
How Do I Prevent My Nail Art From Chipping Quickly?
To prevent your nail art from chipping quickly, focus on enhancing nail polish longevity through proper prep, a base coat, and a top coat. Use chip prevention techniques like avoiding harsh chemicals, applying thin layers, and letting each coat dry thoroughly. Keep your nails moisturized and wear gloves during chores. These simple steps help your nail art stay vibrant longer, saving you time and money while maintaining a polished look.
Conclusion
Remember, creating stunning nail art on a budget is like painting a masterpiece with simple, affordable brushes—you just need the right technique and imagination. I once turned a plain bottle of polish into a glittering galaxy for a party, proving that you don’t need expensive supplies to make a big impact. With a little creativity, you can transform everyday items into gorgeous designs. So go ahead, get creative, and let your nails tell your unique story without breaking the bank.